> ## Documentation Index
> Fetch the complete documentation index at: https://docs.flashcat.cloud/llms.txt
> Use this file to discover all available pages before exploring further.
# AWS CloudWatch Integration
> Sync AWS CloudWatch alert events to Flashduty via webhook to achieve automated alert noise reduction
Sync AWS CloudWatch alert events to Flashduty via webhook to achieve automated alert noise reduction.
## In Flashduty
***
You can obtain an integration push URL through either of these two methods:
### Using Private Integration
Choose this method when you don't need to route alert events to different channels. It's simpler.
Expand
1. Go to the Flashduty console, select **Channel**, and enter a specific channel's details page
2. Select the **Integration** tab, click **Add Integration** to enter the integration page
3. Choose **AWS CloudWatch** integration, click **Save** to generate a card
4. Click the generated card to view the **push URL**, copy it for later use, and you're done
### Using Shared Integration
Choose this method when you need to route alerts to different channels based on the alert event's payload information.
Expand
1. Go to the Flashduty console, select **Integration Center=>Alert Events** to enter the integration selection page
2. Select **AWS CloudWatch** integration:
* **Integration Name**: Define a name for this integration
3. Configure the default route and select the corresponding channel (after the integration is created, you can go to `Route` to configure more routing rules)
4. Click **Save** and copy the newly generated **push URL** for later use
5. Done
## In AWS CloudWatch
***
1. Log in to your AWS Console, search for `Simple Notification Service` product and enter its console
2. Go to the `Topics` page, click the `Create topic` button to start creating a topic
3. Select `Standard` for `Type`, enter `Flashduty` as the name
4. Click the `Create Topic` button to complete topic creation
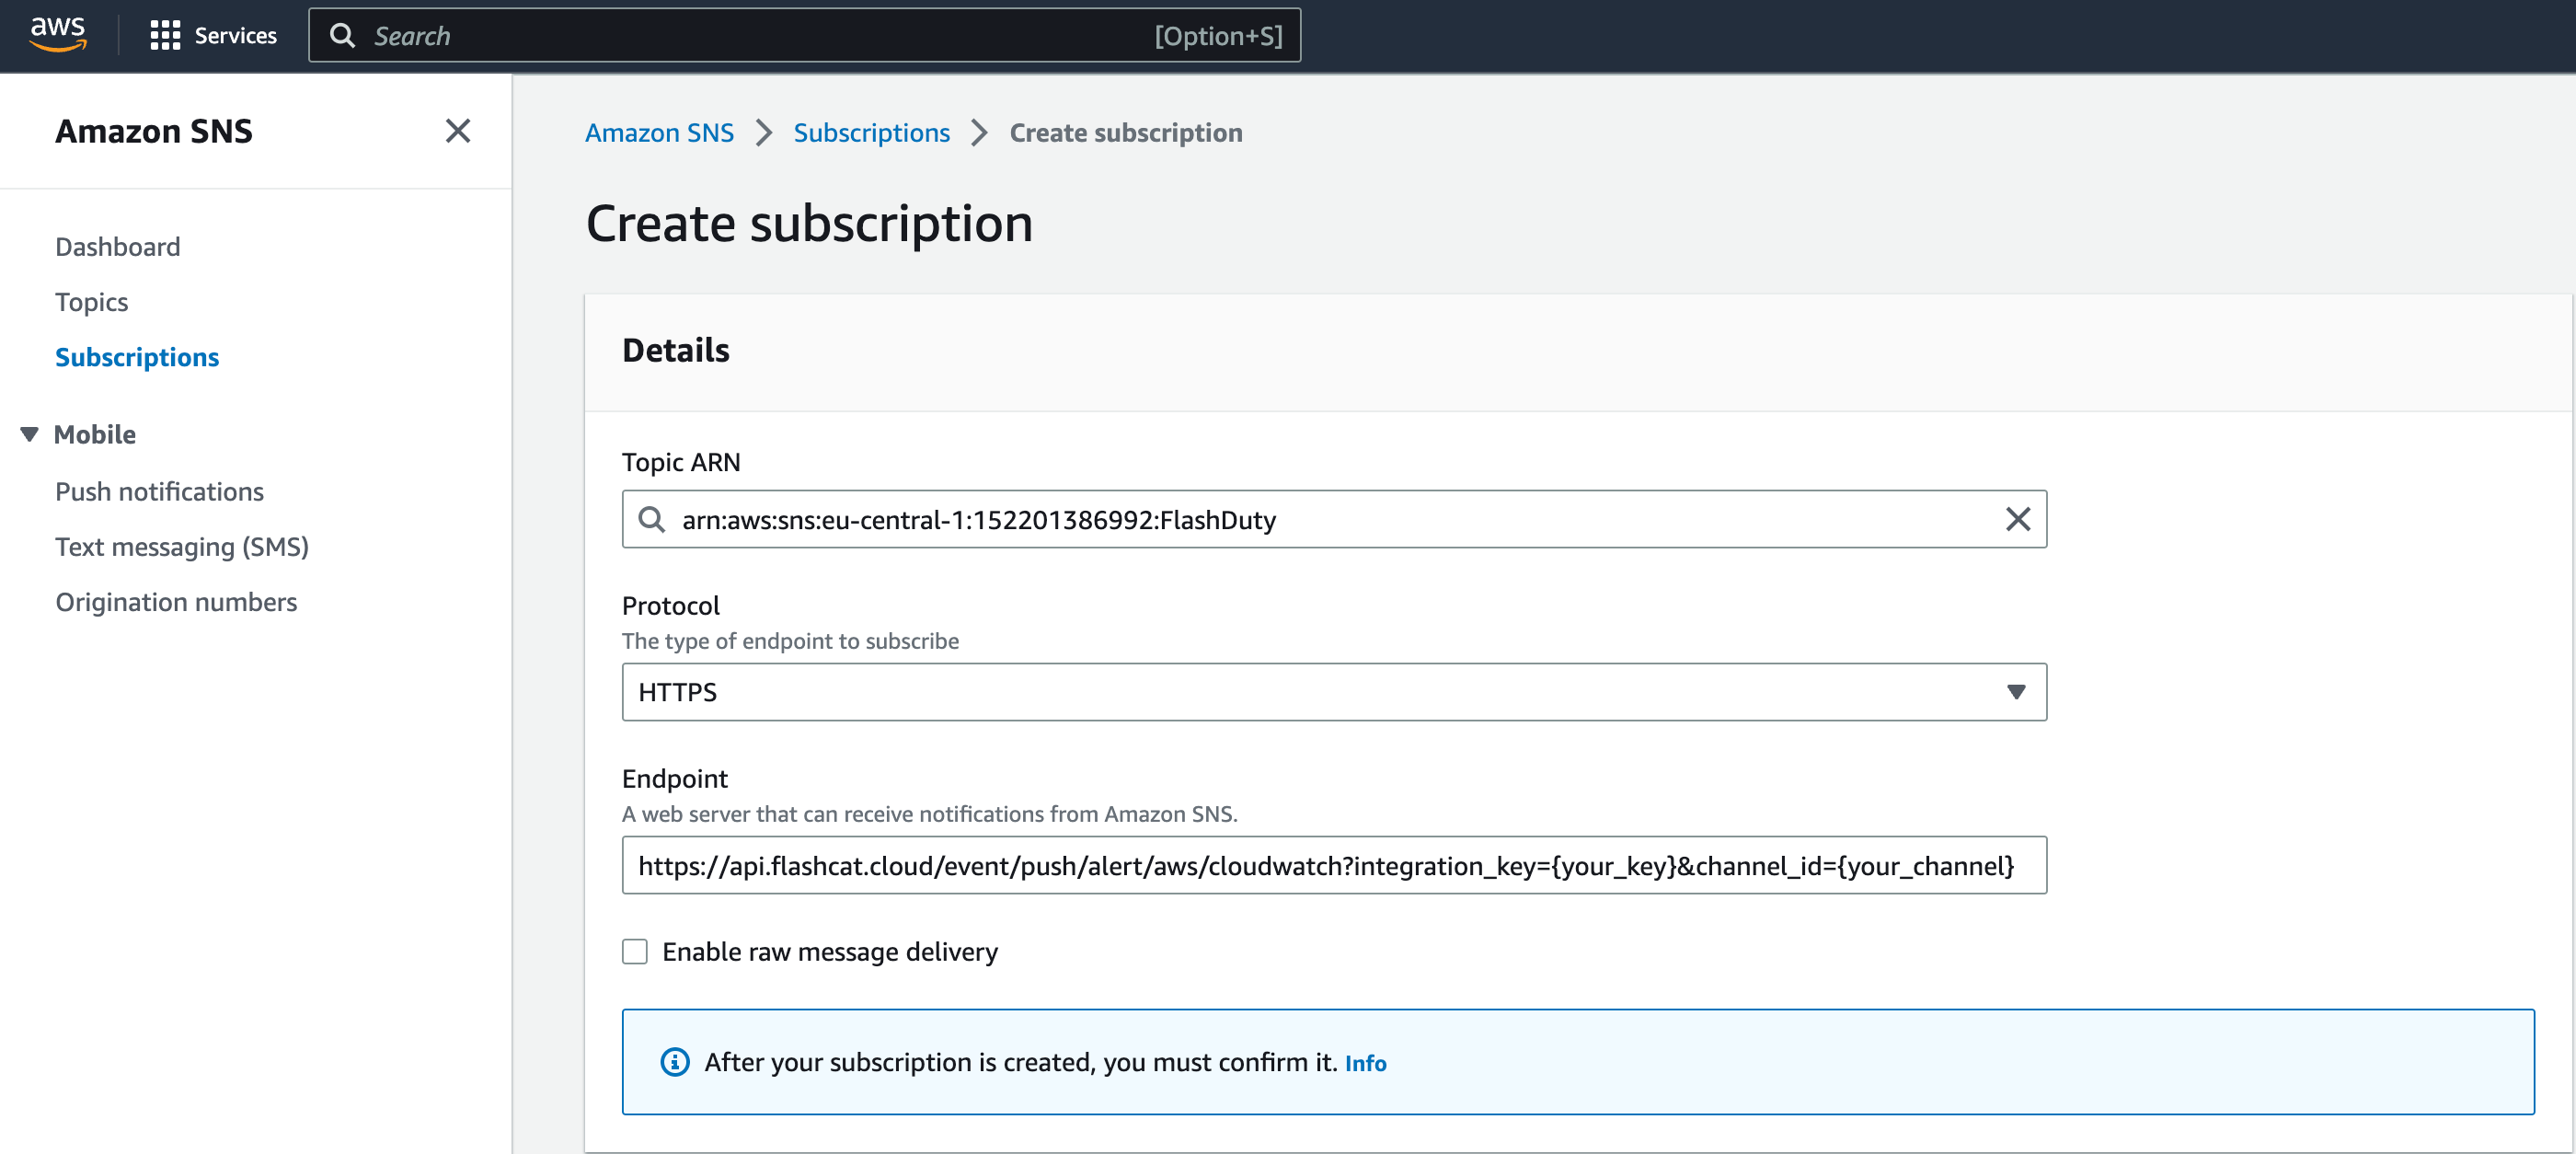
5. Go to the `Subscriptions` page, click the `Create subscription` button to create a subscription for the topic
6. Select `Flashduty` for `Topic ARN`, choose `HTTPS` for `Protocol`, enter the integration push URL for `Endpoint` (enter the integration name on the current page, the URL will be generated after saving)
7. Click the `Create subscription` button to complete subscription creation
8. Return to the `Subscriptions` page. When the subscription status shows `Confirmed`, the subscription URL verification is successful; otherwise, please contact Flashduty
9. Search for the `CloudWatch` product and enter its console
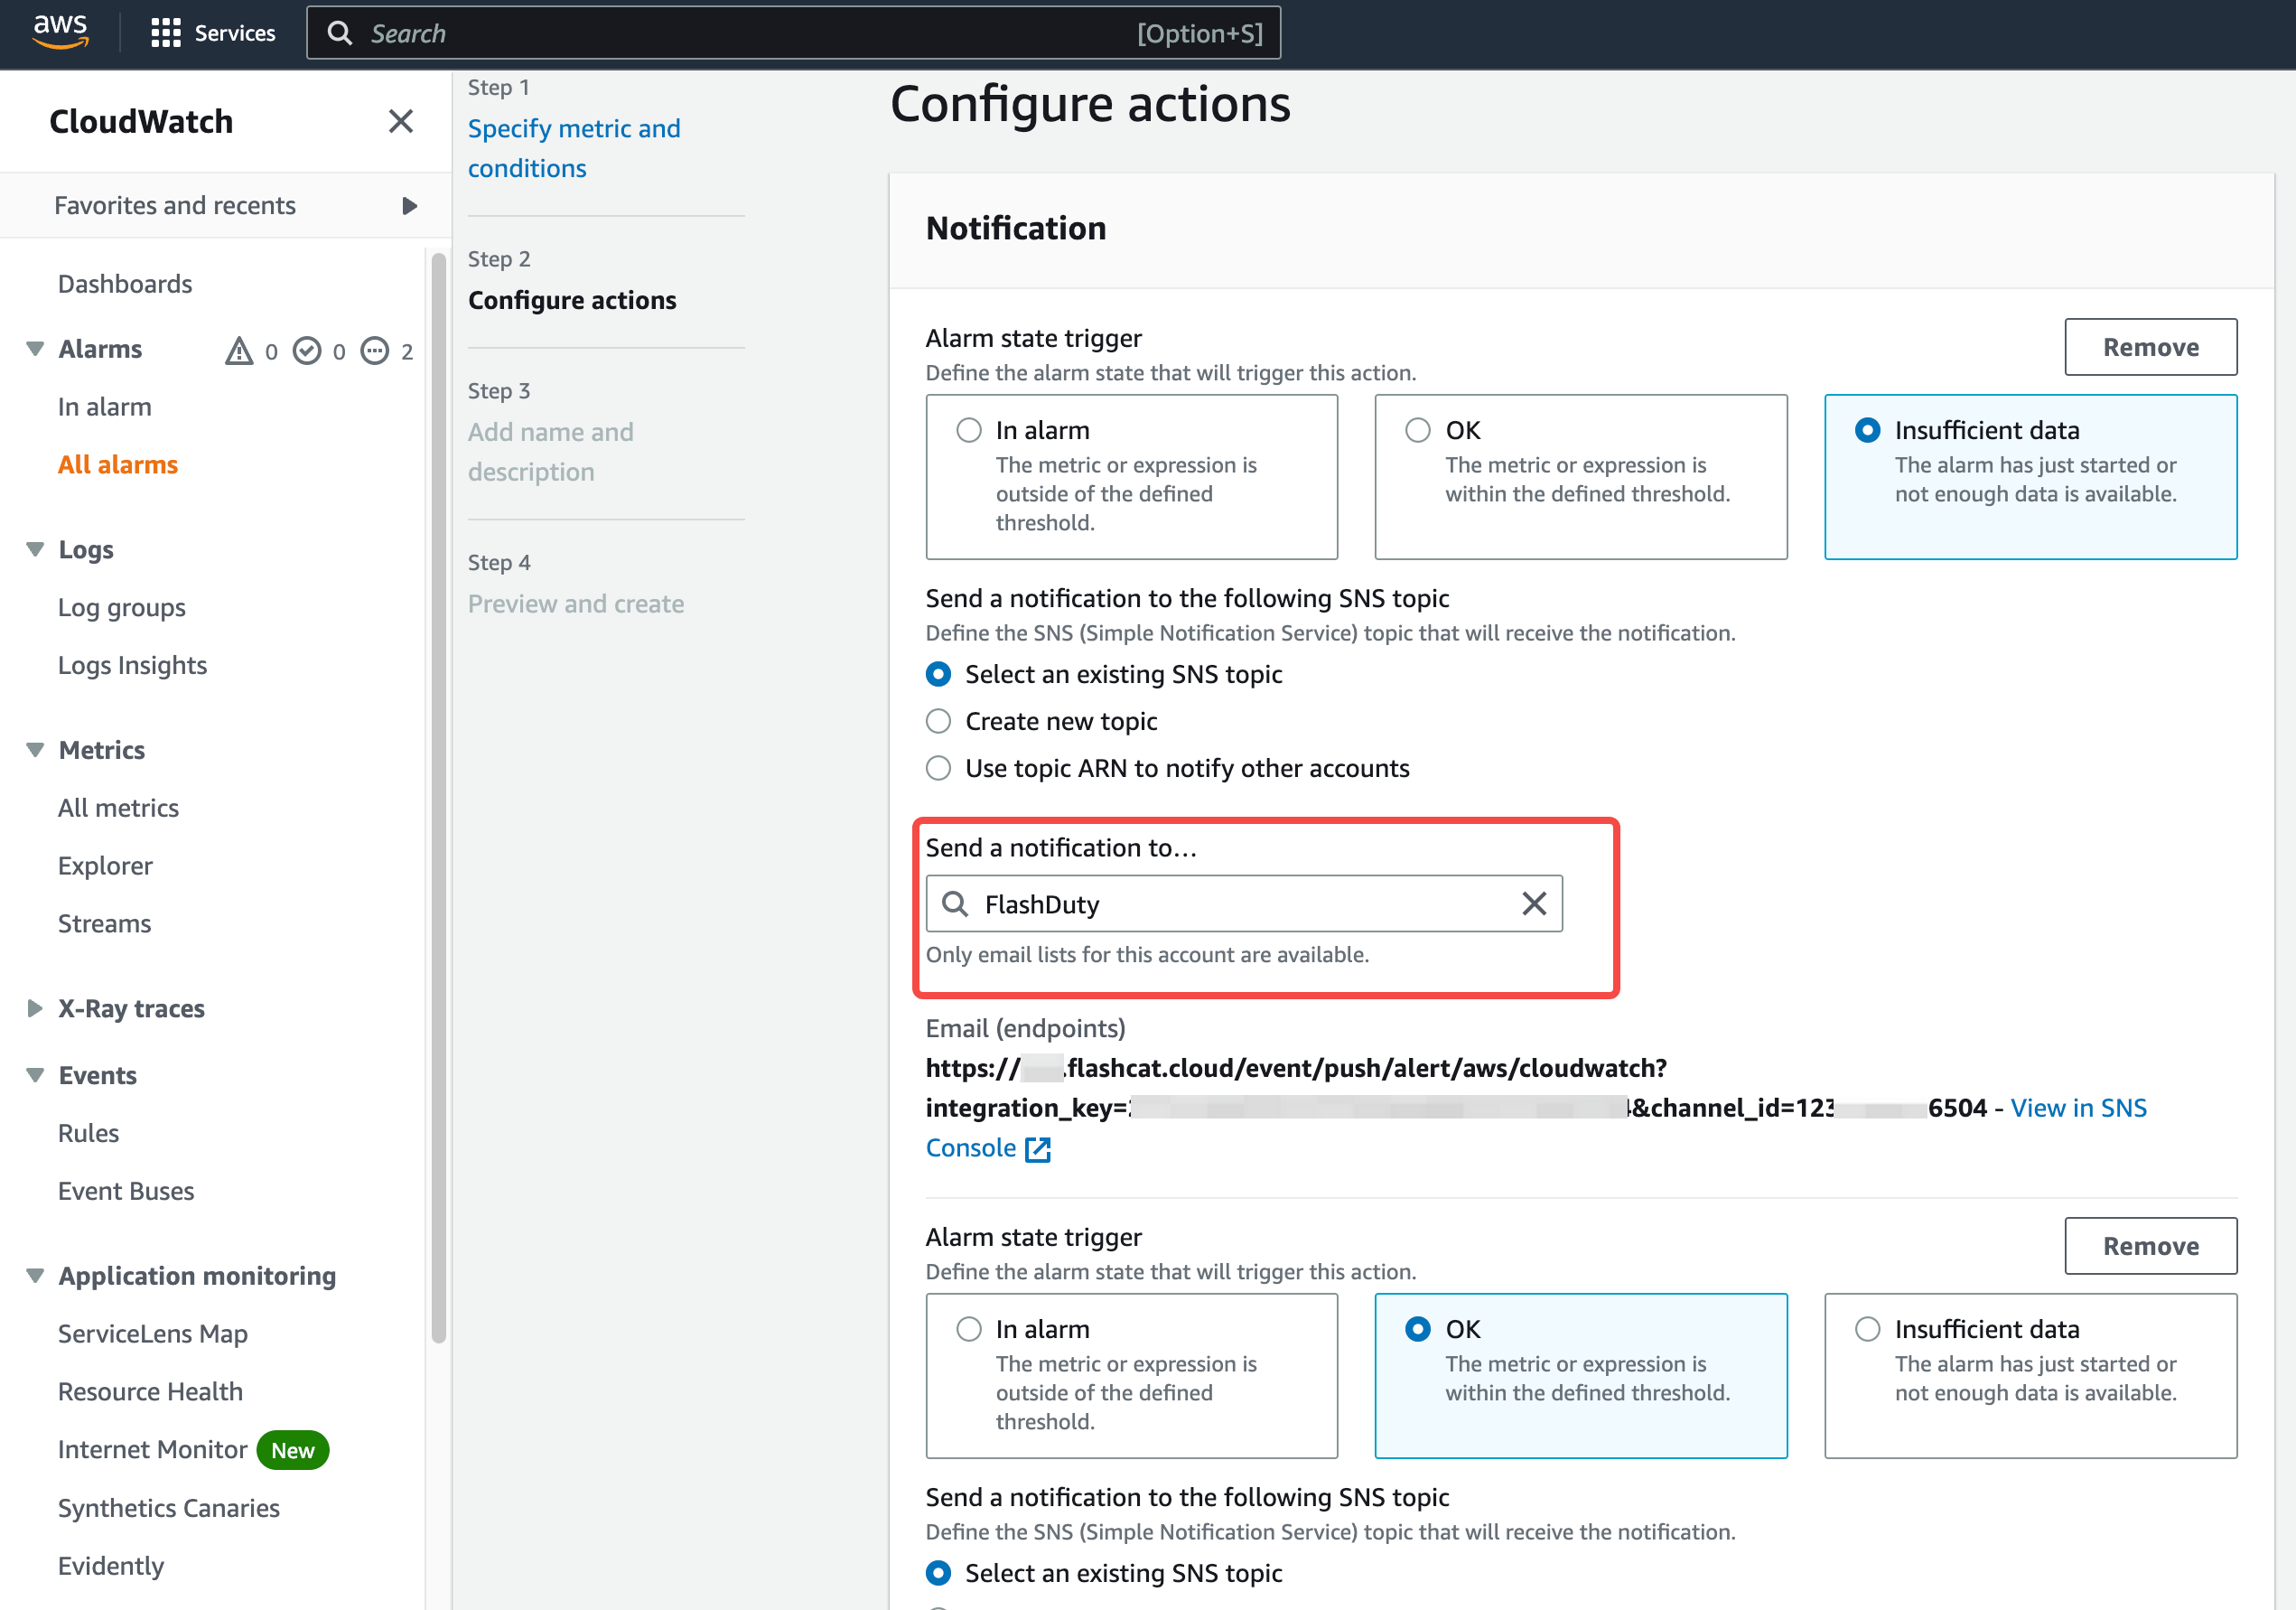
10. Go to the `All alarms` page, choose to create or edit existing alarm policies
11. For the `Notification` step, select `Flashduty` as the `SNS topic` for all three states: `In alarm`, `OK`, and `Insufficient data`, as shown below:
12. Return to the integration list. If the latest event time is displayed, the configuration is successful and events are being received
13. Complete
All CloudWatch metric alarms correspond to Flashduty "warning" severity level alerts.