Preparation
Login or Register Authing
If you’re a new user, you need to create a user pool first—follow the prompts to create one.
Create Application
- Select standard web application
- Fill in application name
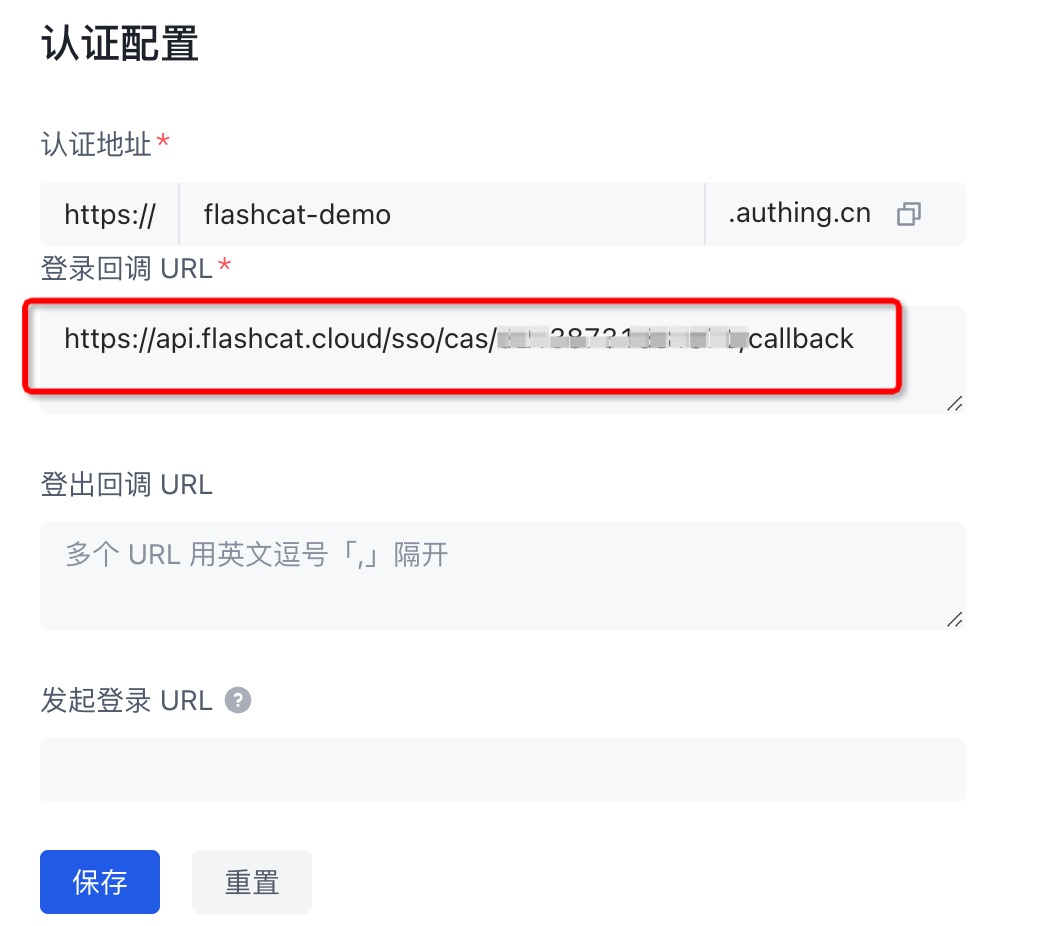
- Fill in authentication URL (the URL to redirect to during SSO login)
Protocol Configuration
- OIDC Protocol
- SAML2.0 Protocol
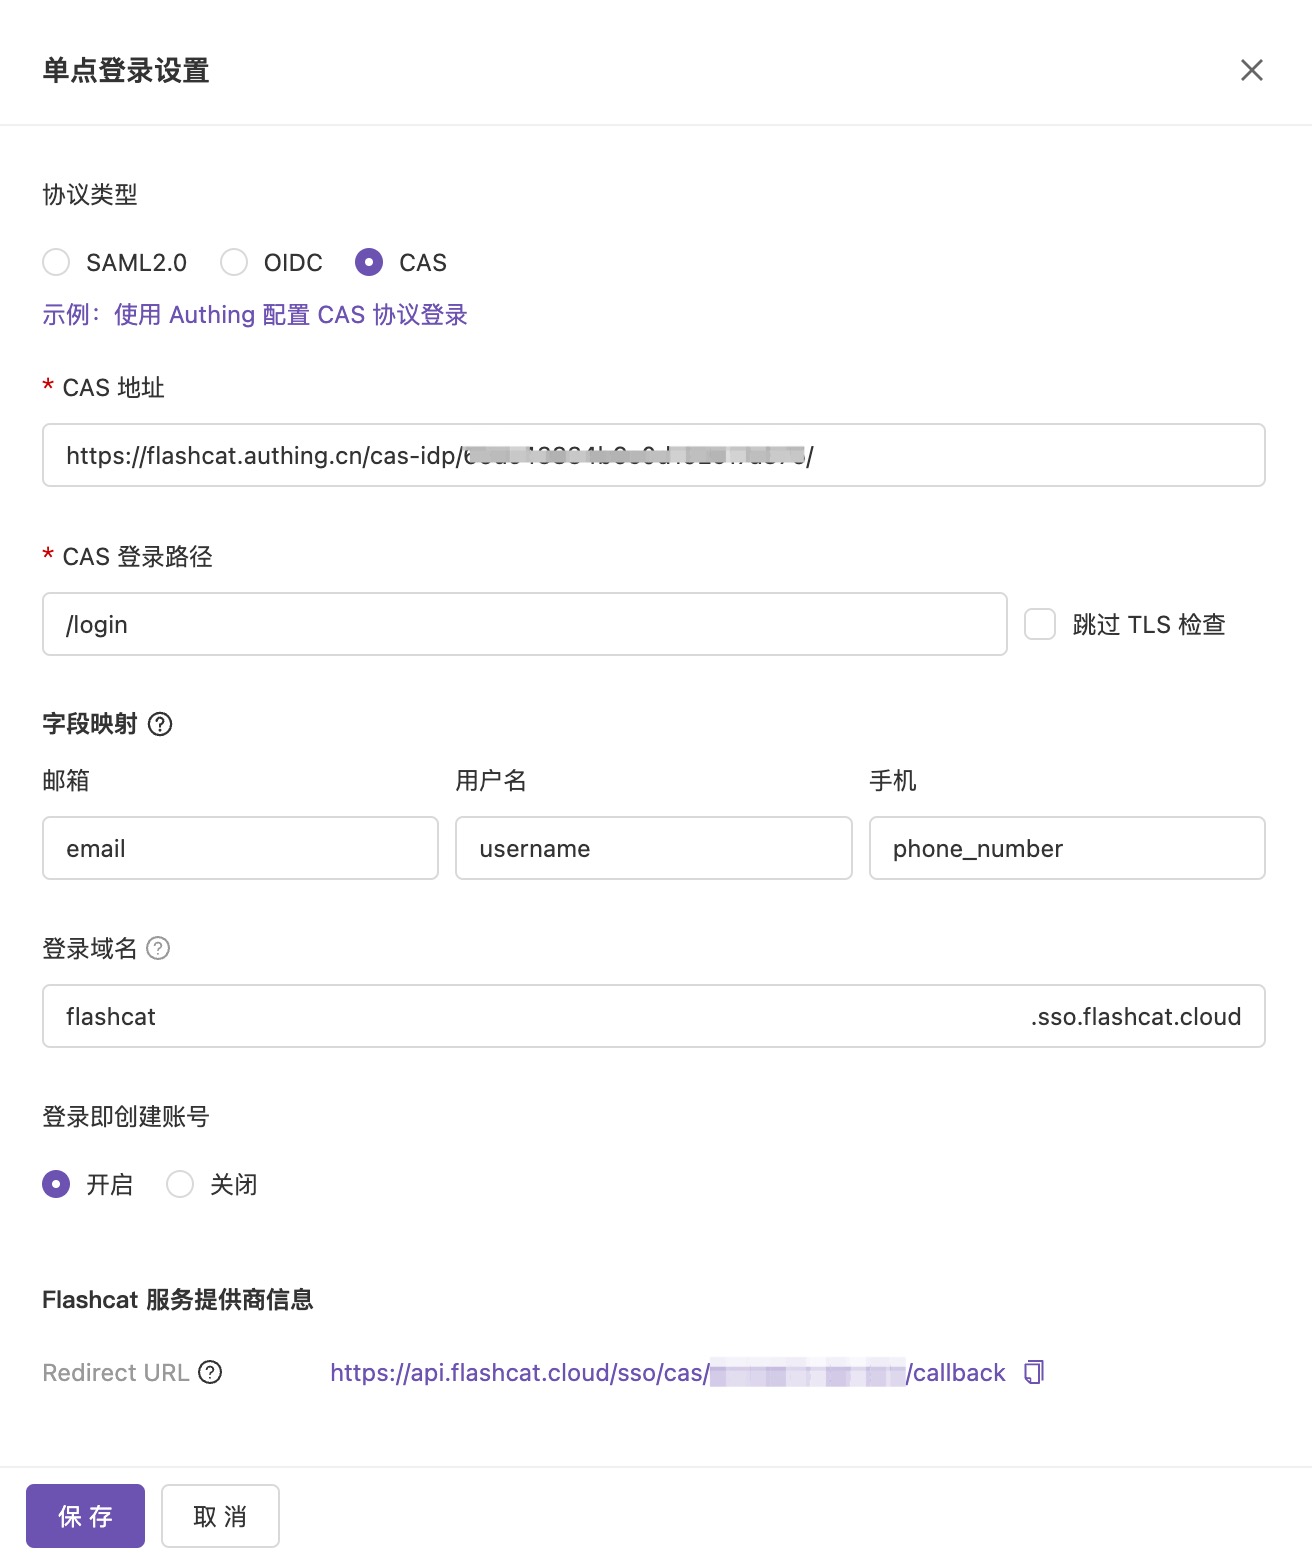
- CAS Protocol
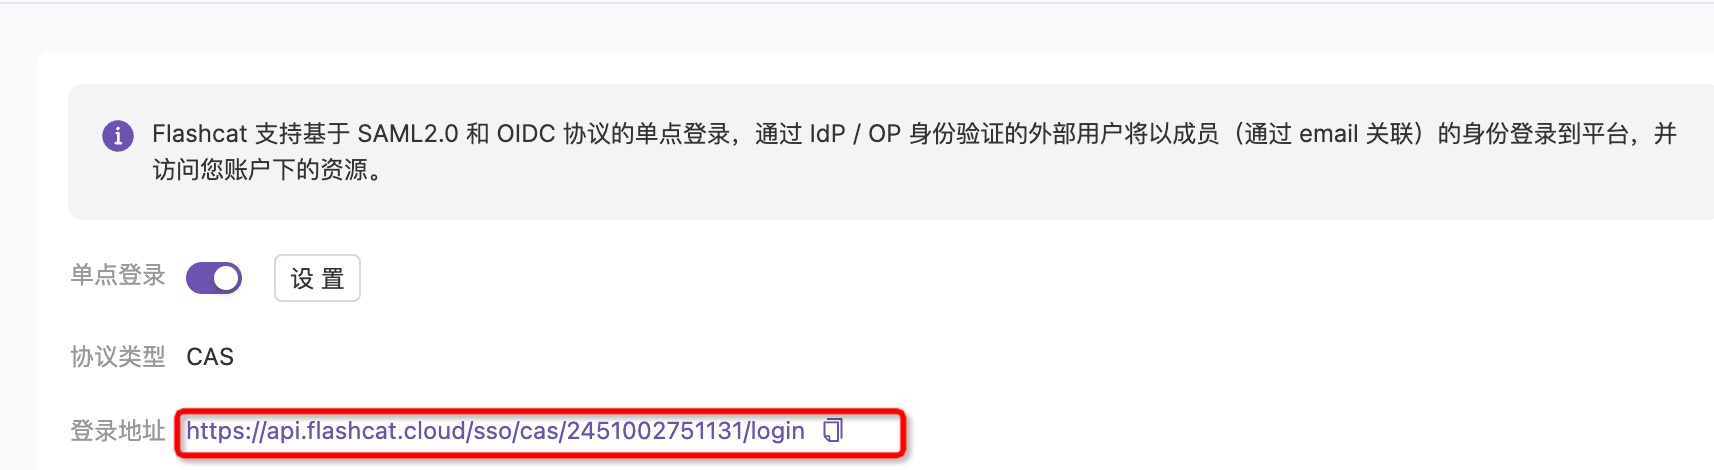
1. Enable Single Sign-On Configuration
Open Flashduty console and enable single sign-on configuration.2. Configure Information
Copy Authing application information to the corresponding fields:3. Modify Authing Configuration
Change id_token signing algorithm to RS256:4. Create User and Test Login
Flashduty only supports user email association, so users need to be created with email.