In Flashduty
You can obtain an integration push URL through either of these two methods:
Using Private Integration
Choose this method when you don’t need to route alerts to different channels. It’s simpler.Using Shared Integration
Choose this method when you need to route alerts to different channels based on the alert payload information.In AppDynamics
I. AppDynamics Alert Push Configuration
Step 1: Configure Flashduty Alert Channel
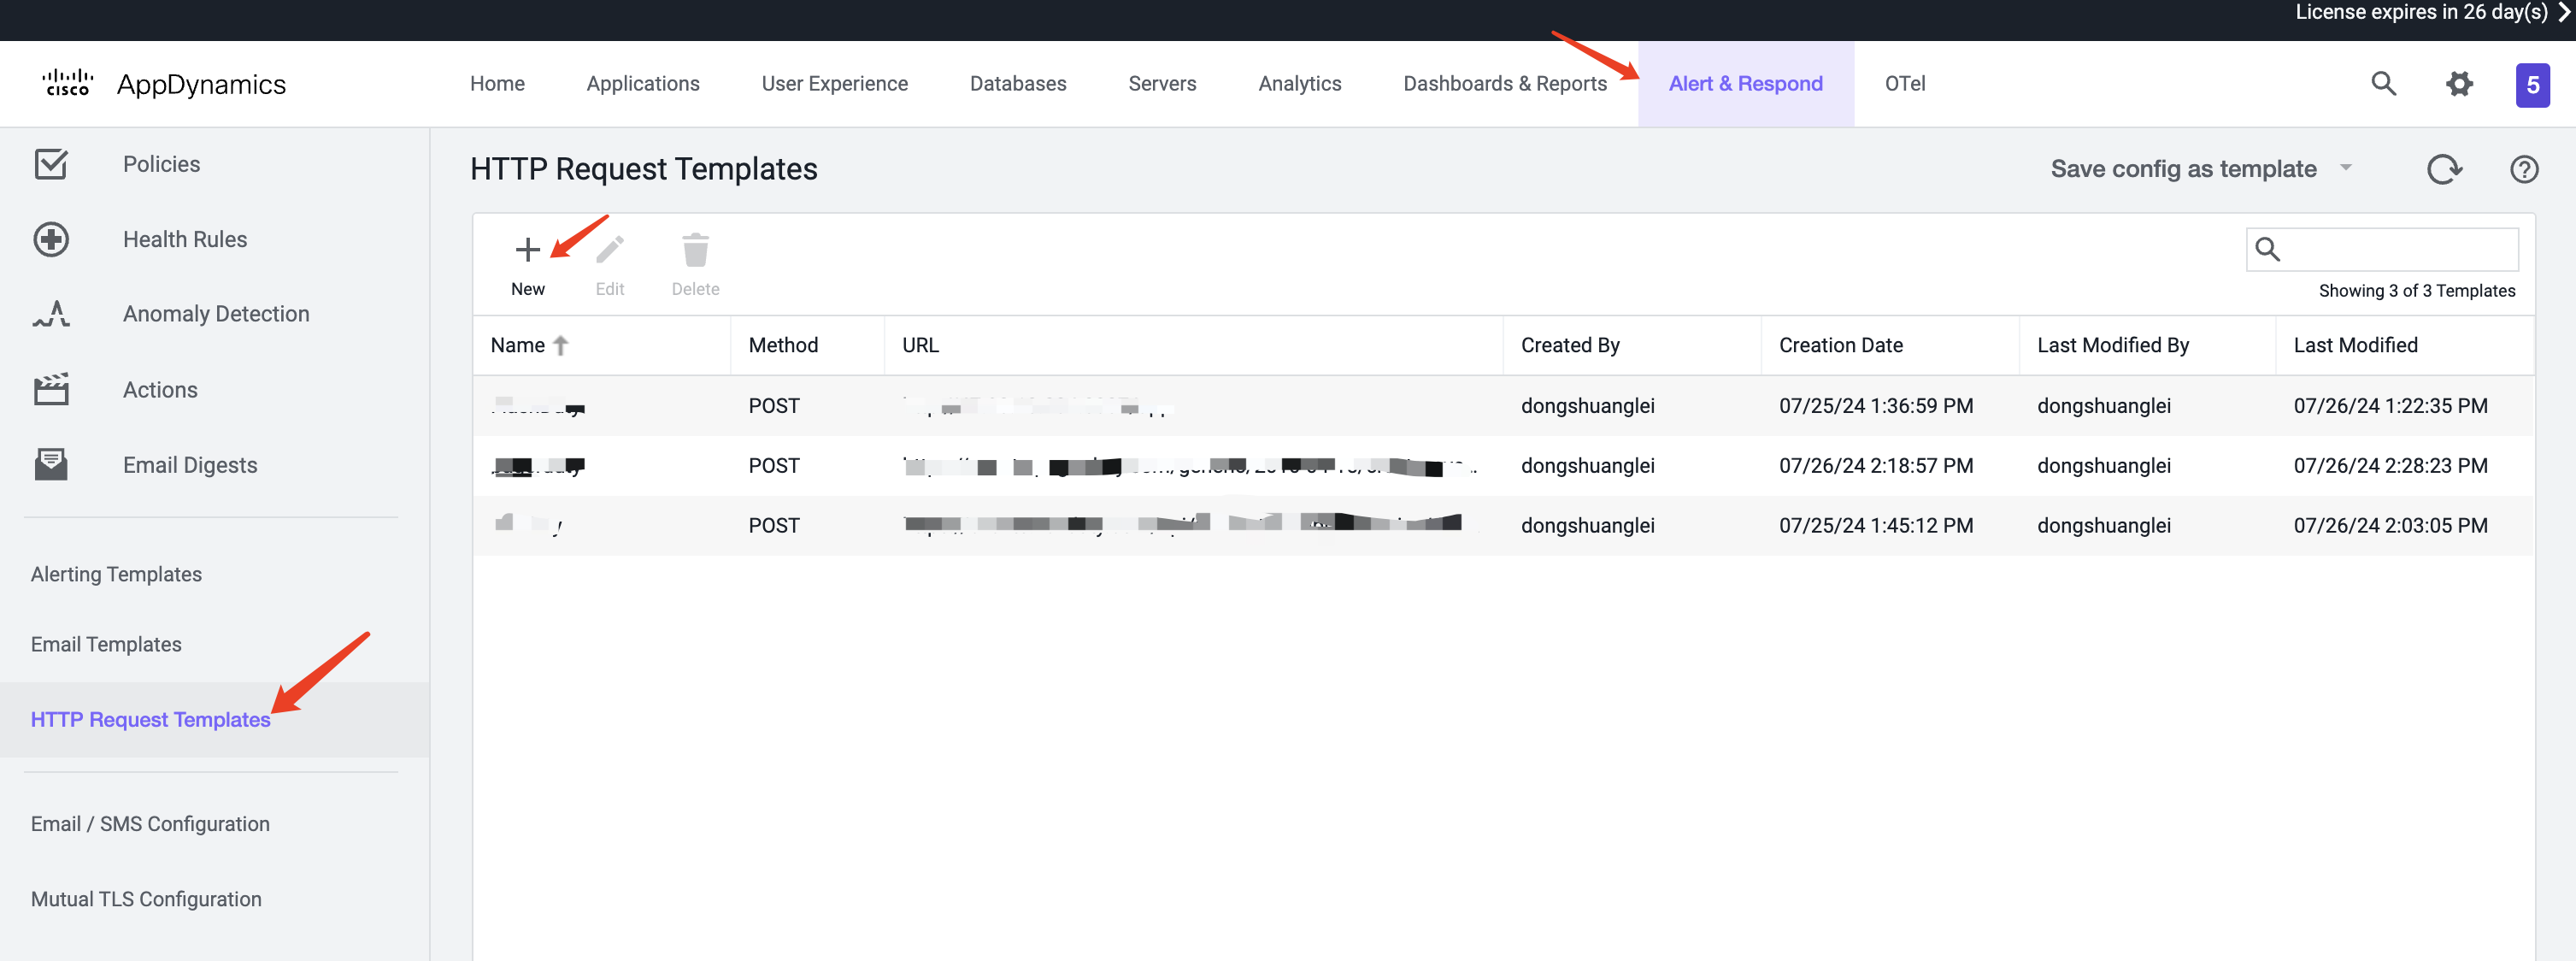
- Log in to your AppDynamics console
- Find
Alert Respond, selectHTTP Request Templates, and clickNewto create an alert channel
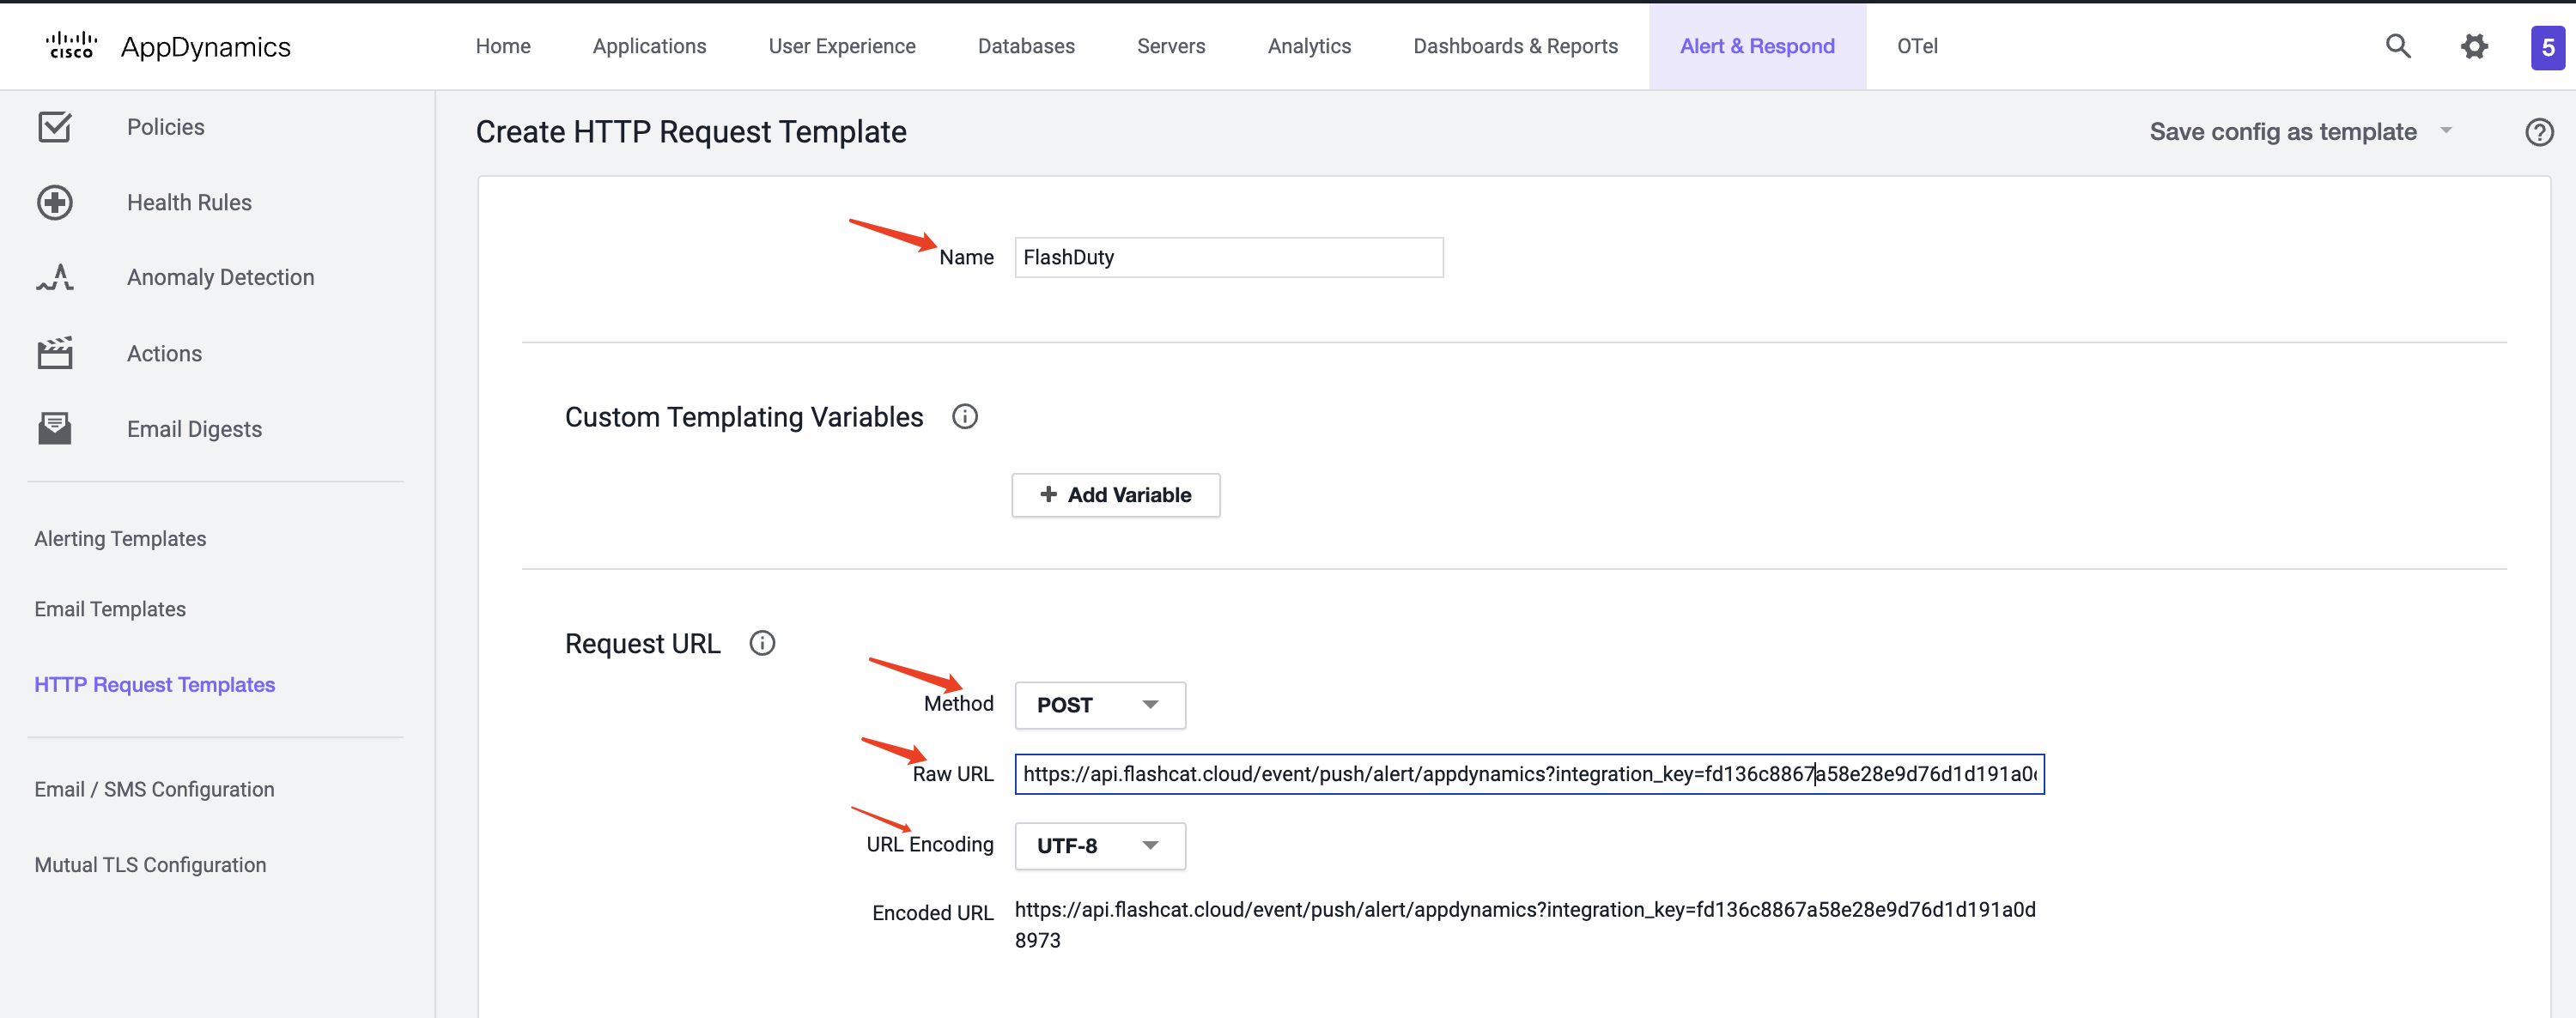
- In the template configuration, enter Flashduty as the
Name - In the
Request URLsection, select POST as theMethod, and enter the integration push URL inRaw URL(enter the integration name on this page, and the URL will be generated after saving)
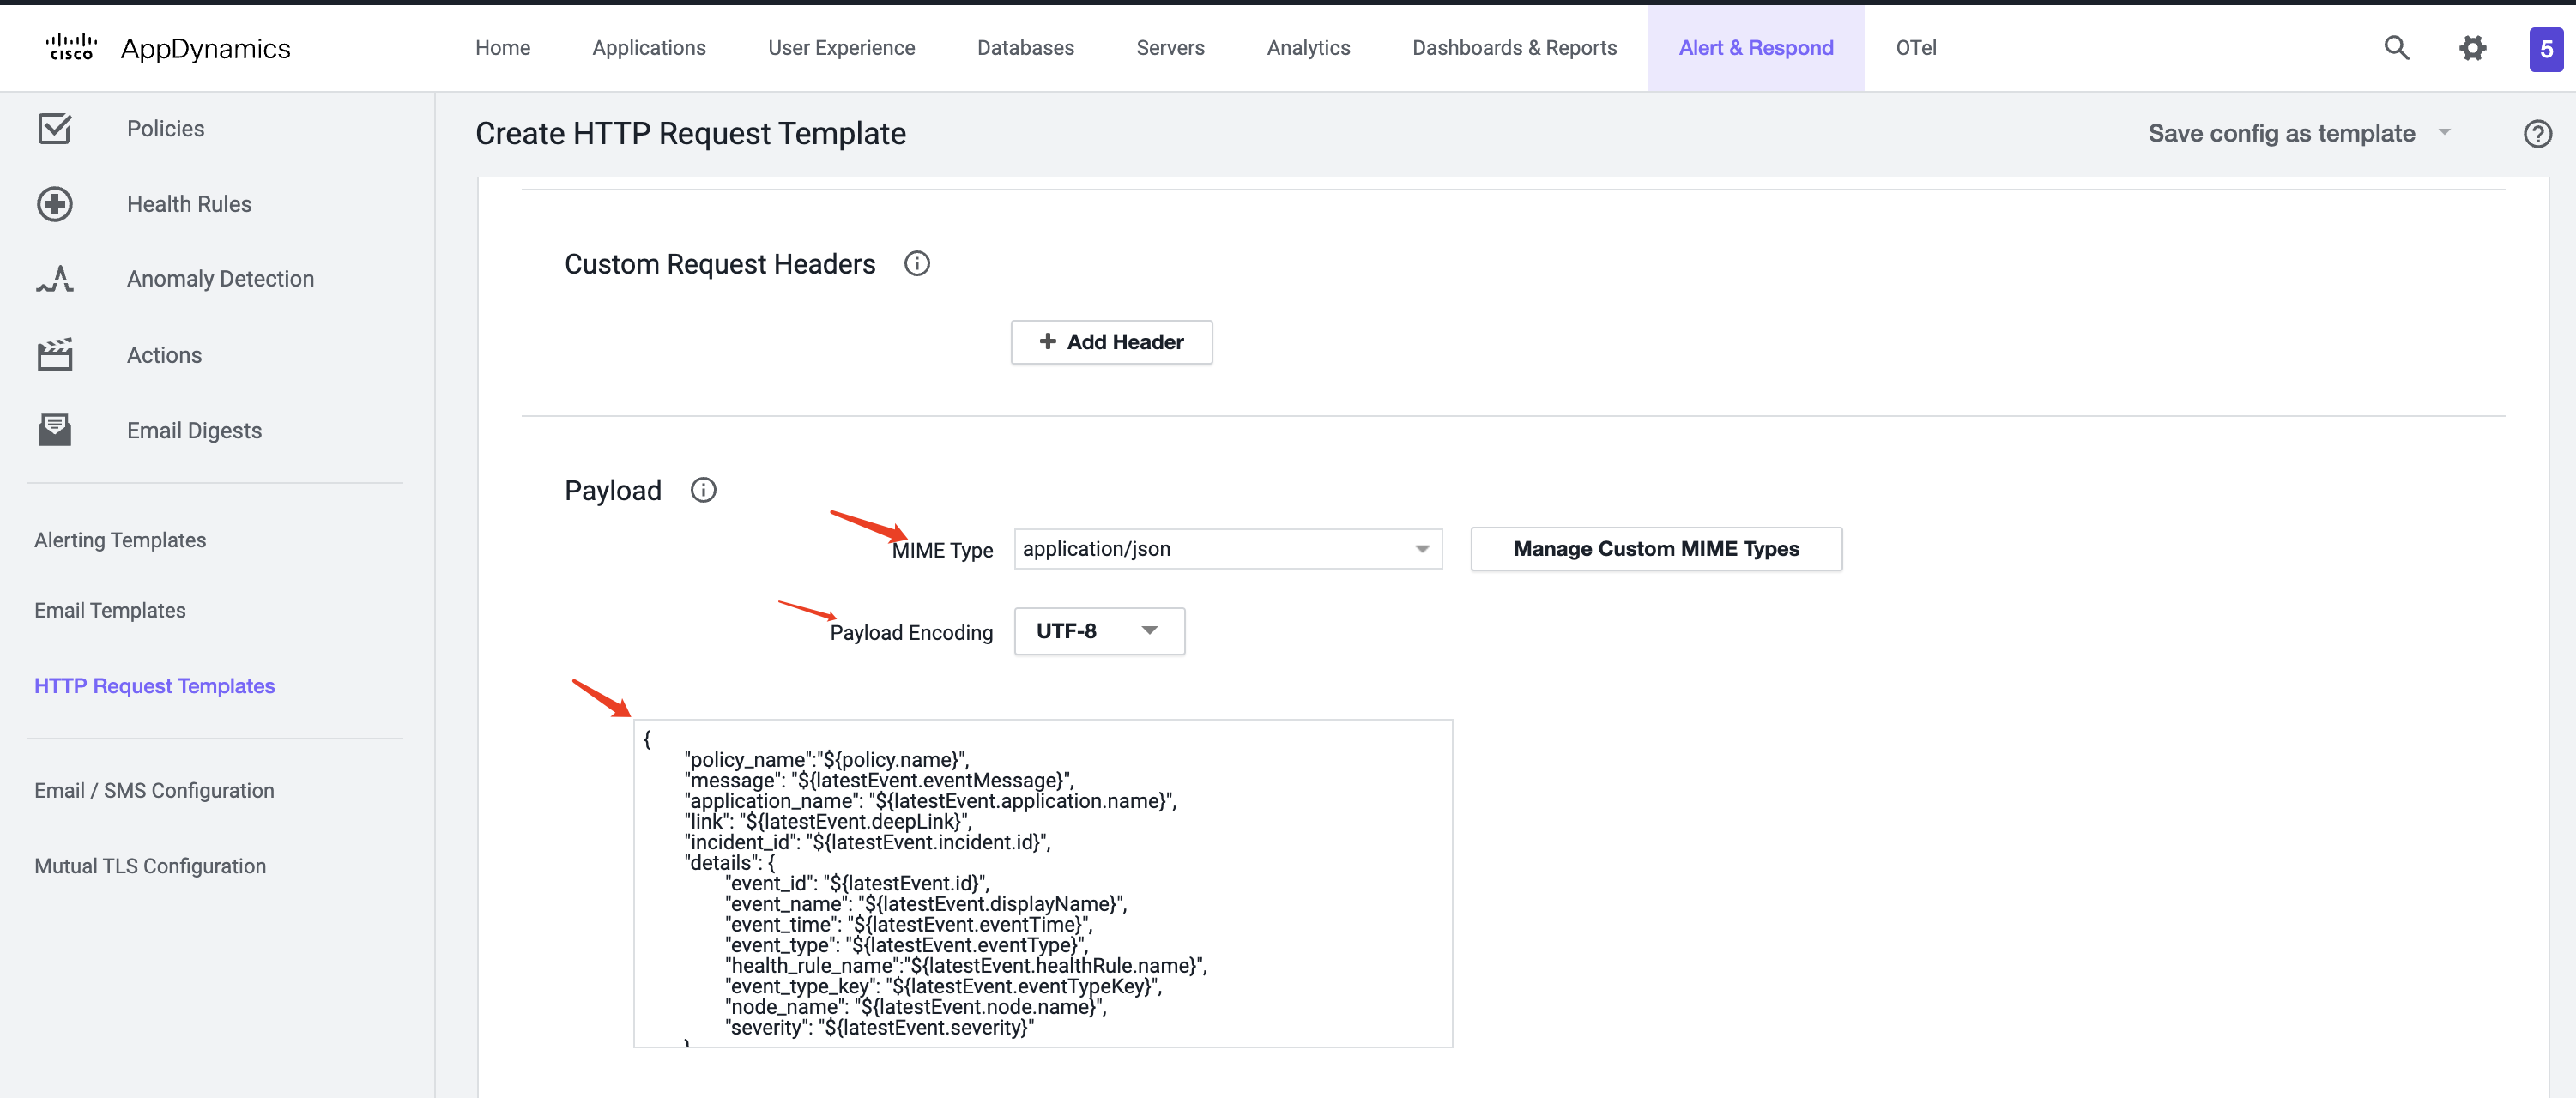
- In the
Payloadsection, selectapplication/jsonasMIME TypeandUTF-8asPayload Encoding - Paste the following content in the
Payloadtext box:
 Special Note (Optional Configuration)Configuration:
 Custom Templating Variables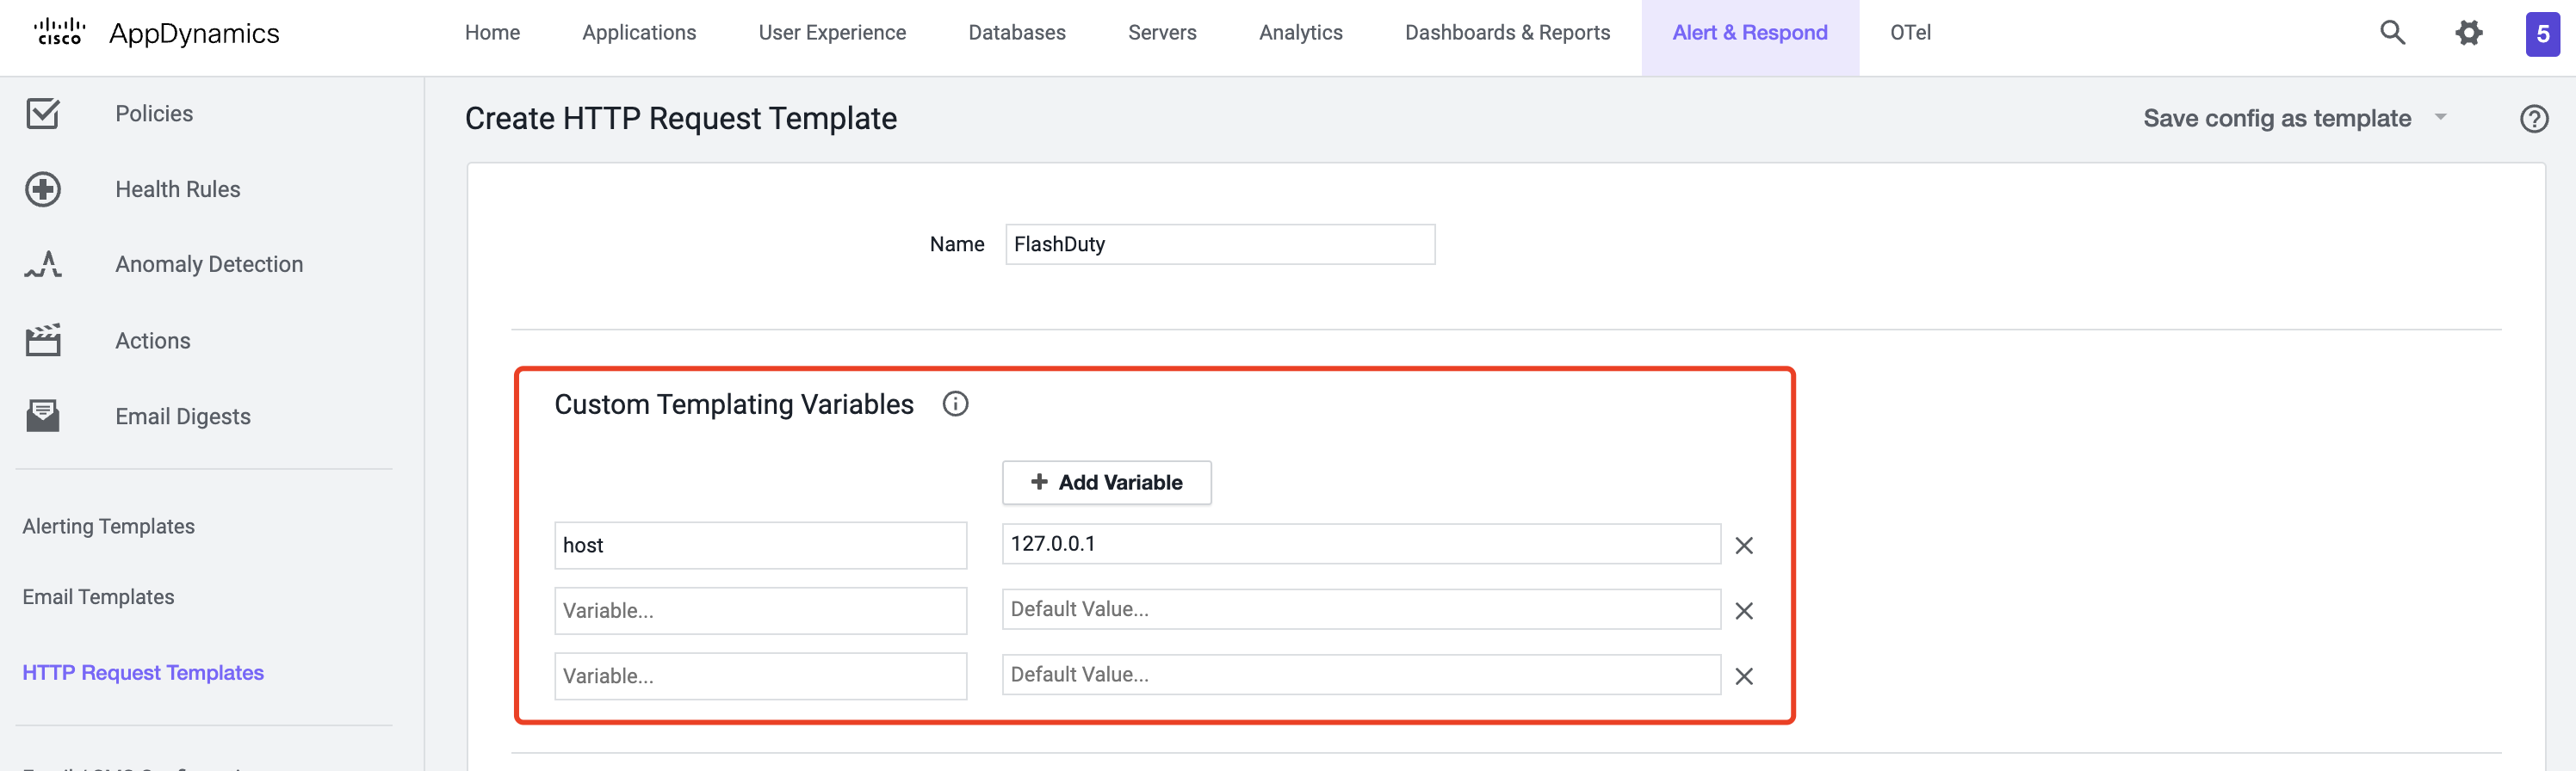 If you need to configure
 Custom Templating Variables, you can refer to the following JSON template. Here, custom_variables is a fixed format, and the variables within custom_variables are custom Variables. The names defined on the page should match the variable names referenced in the JSON template.- In the
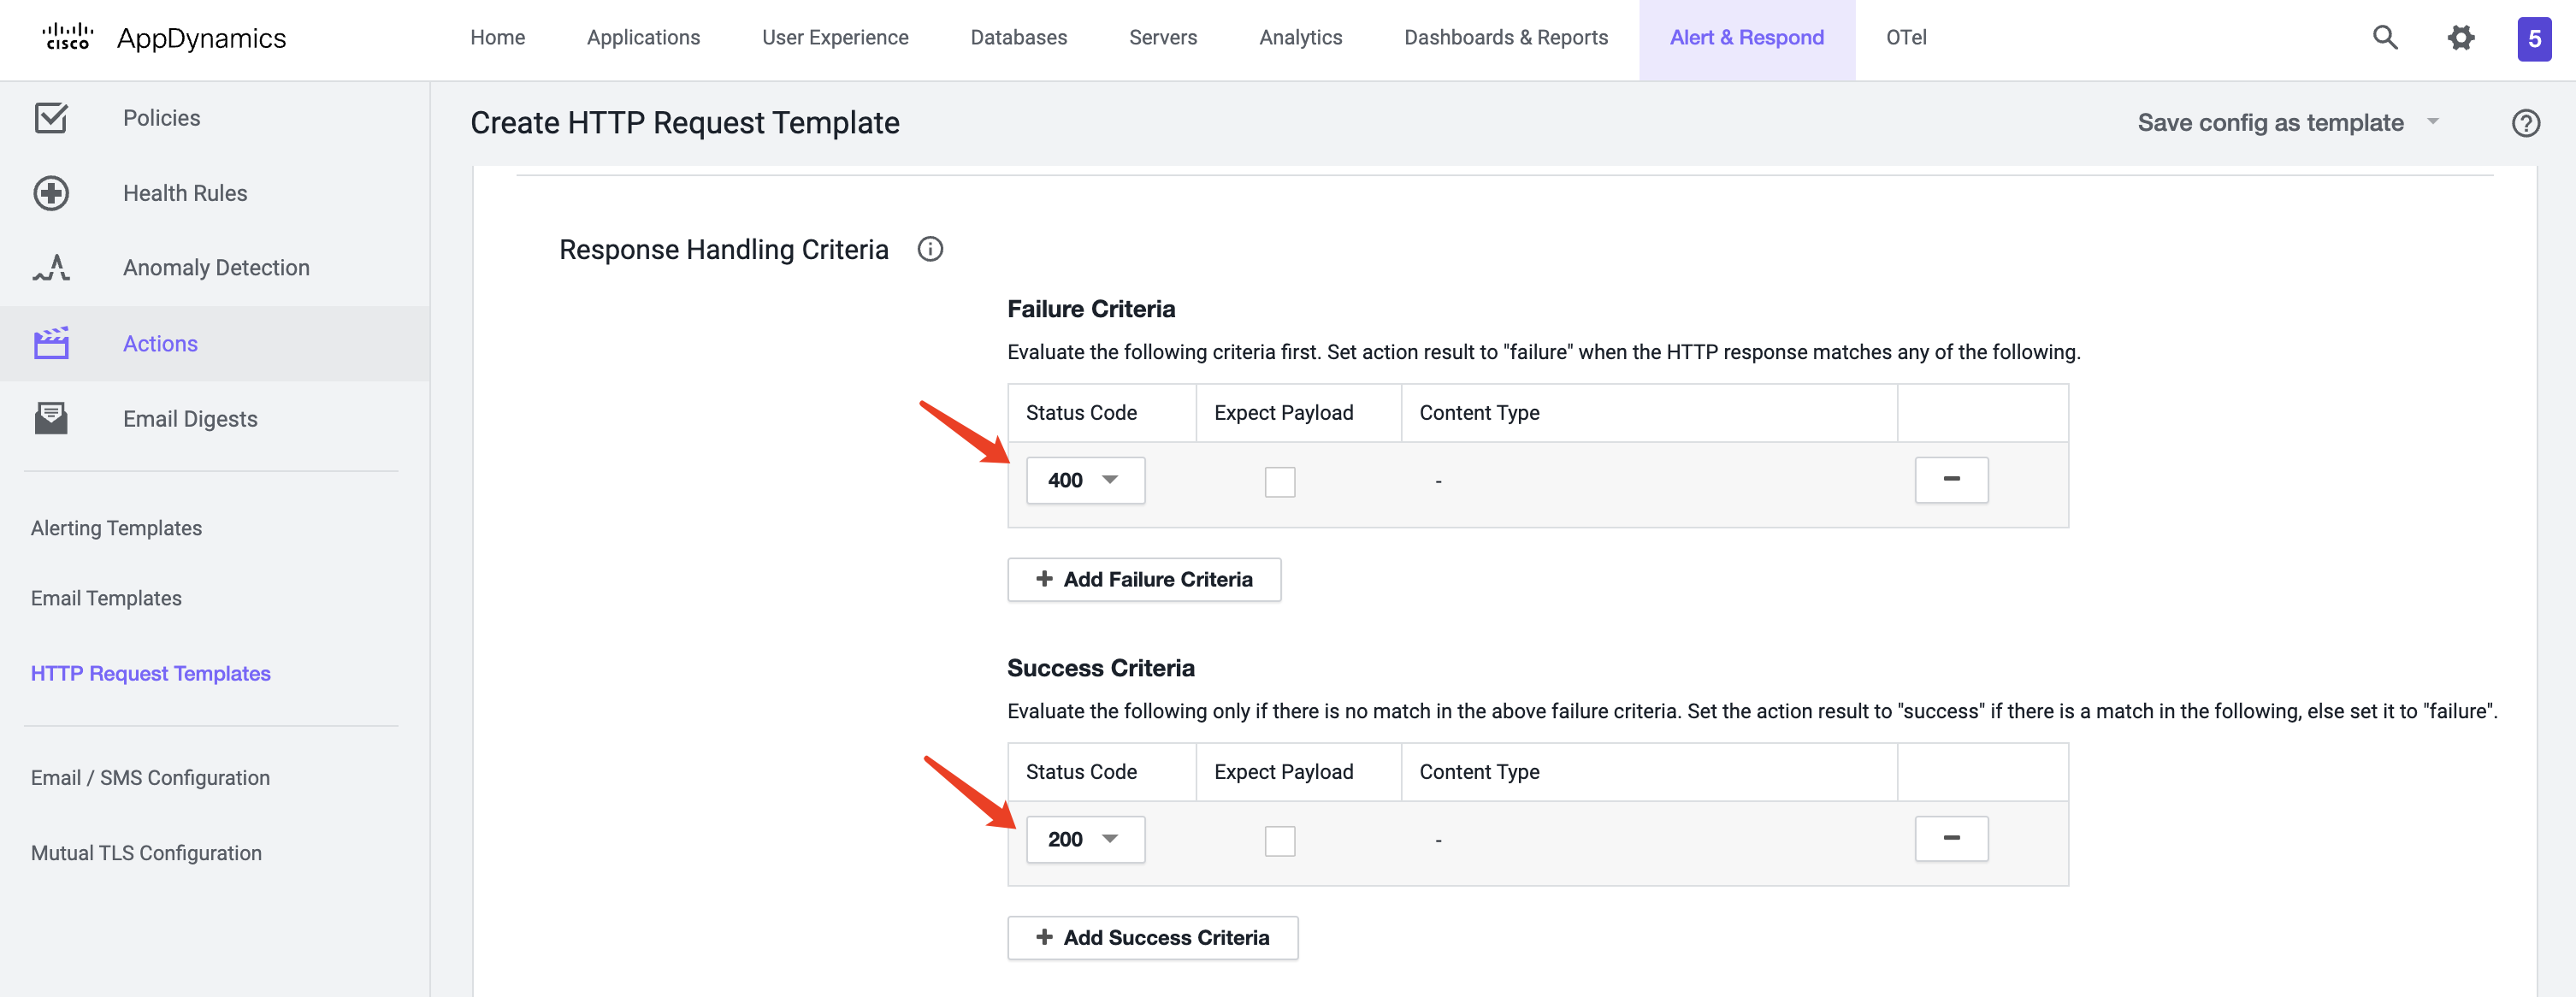
Response Handling Criteriasection, set theFailure Criteriastatus code to 400 and theSuccess Criteriastatus code to 201
- Click
Saveto complete
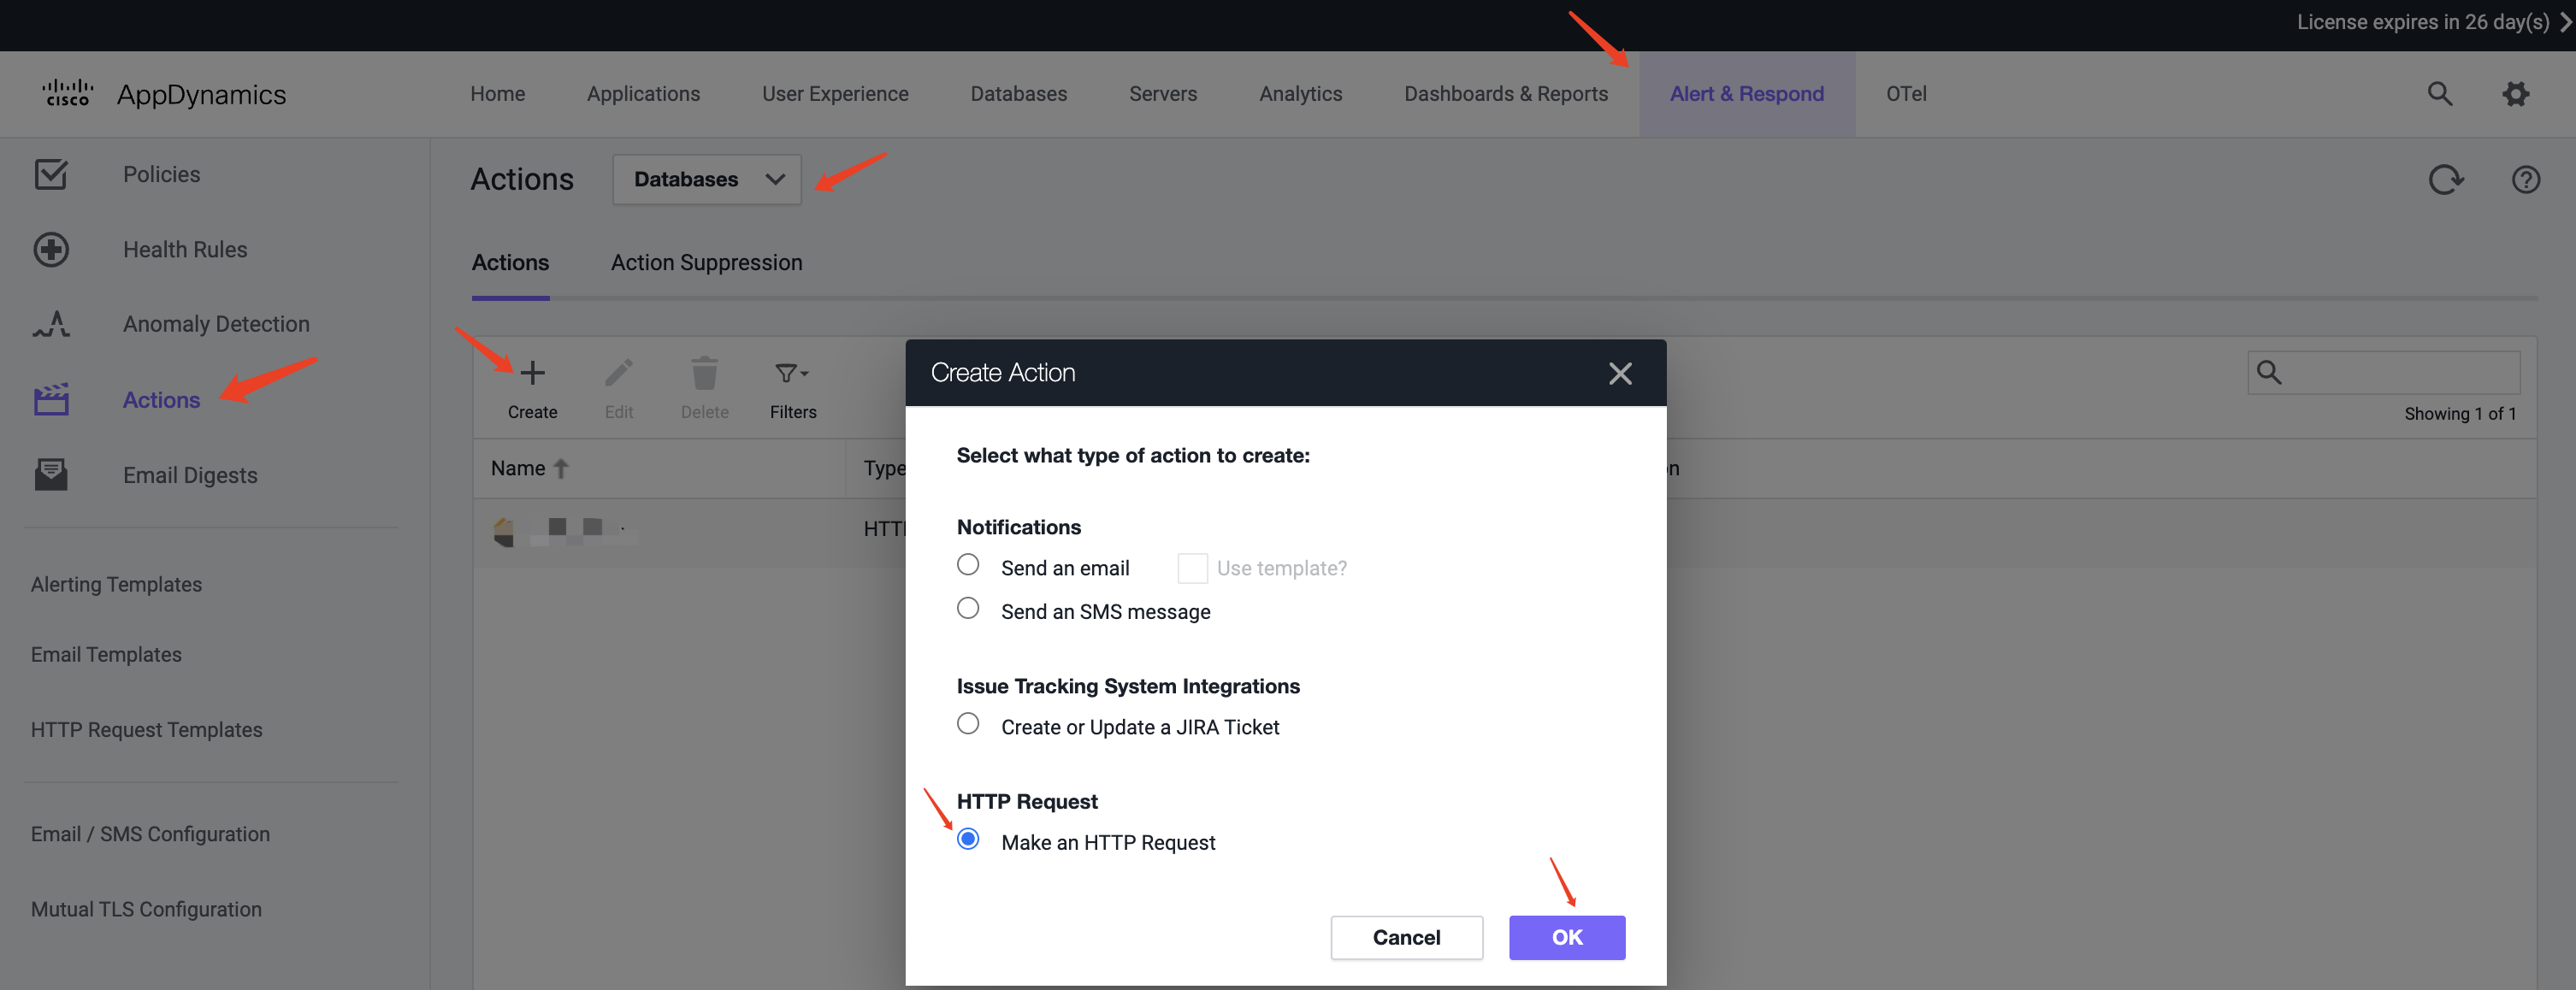
Step 2: Create Action
- Select
Actionsin the left navigation bar, choose the application type you want to create for, and clickCreate - In the
Create Actionpopup, selectMake an HTTP Requestand clickOK
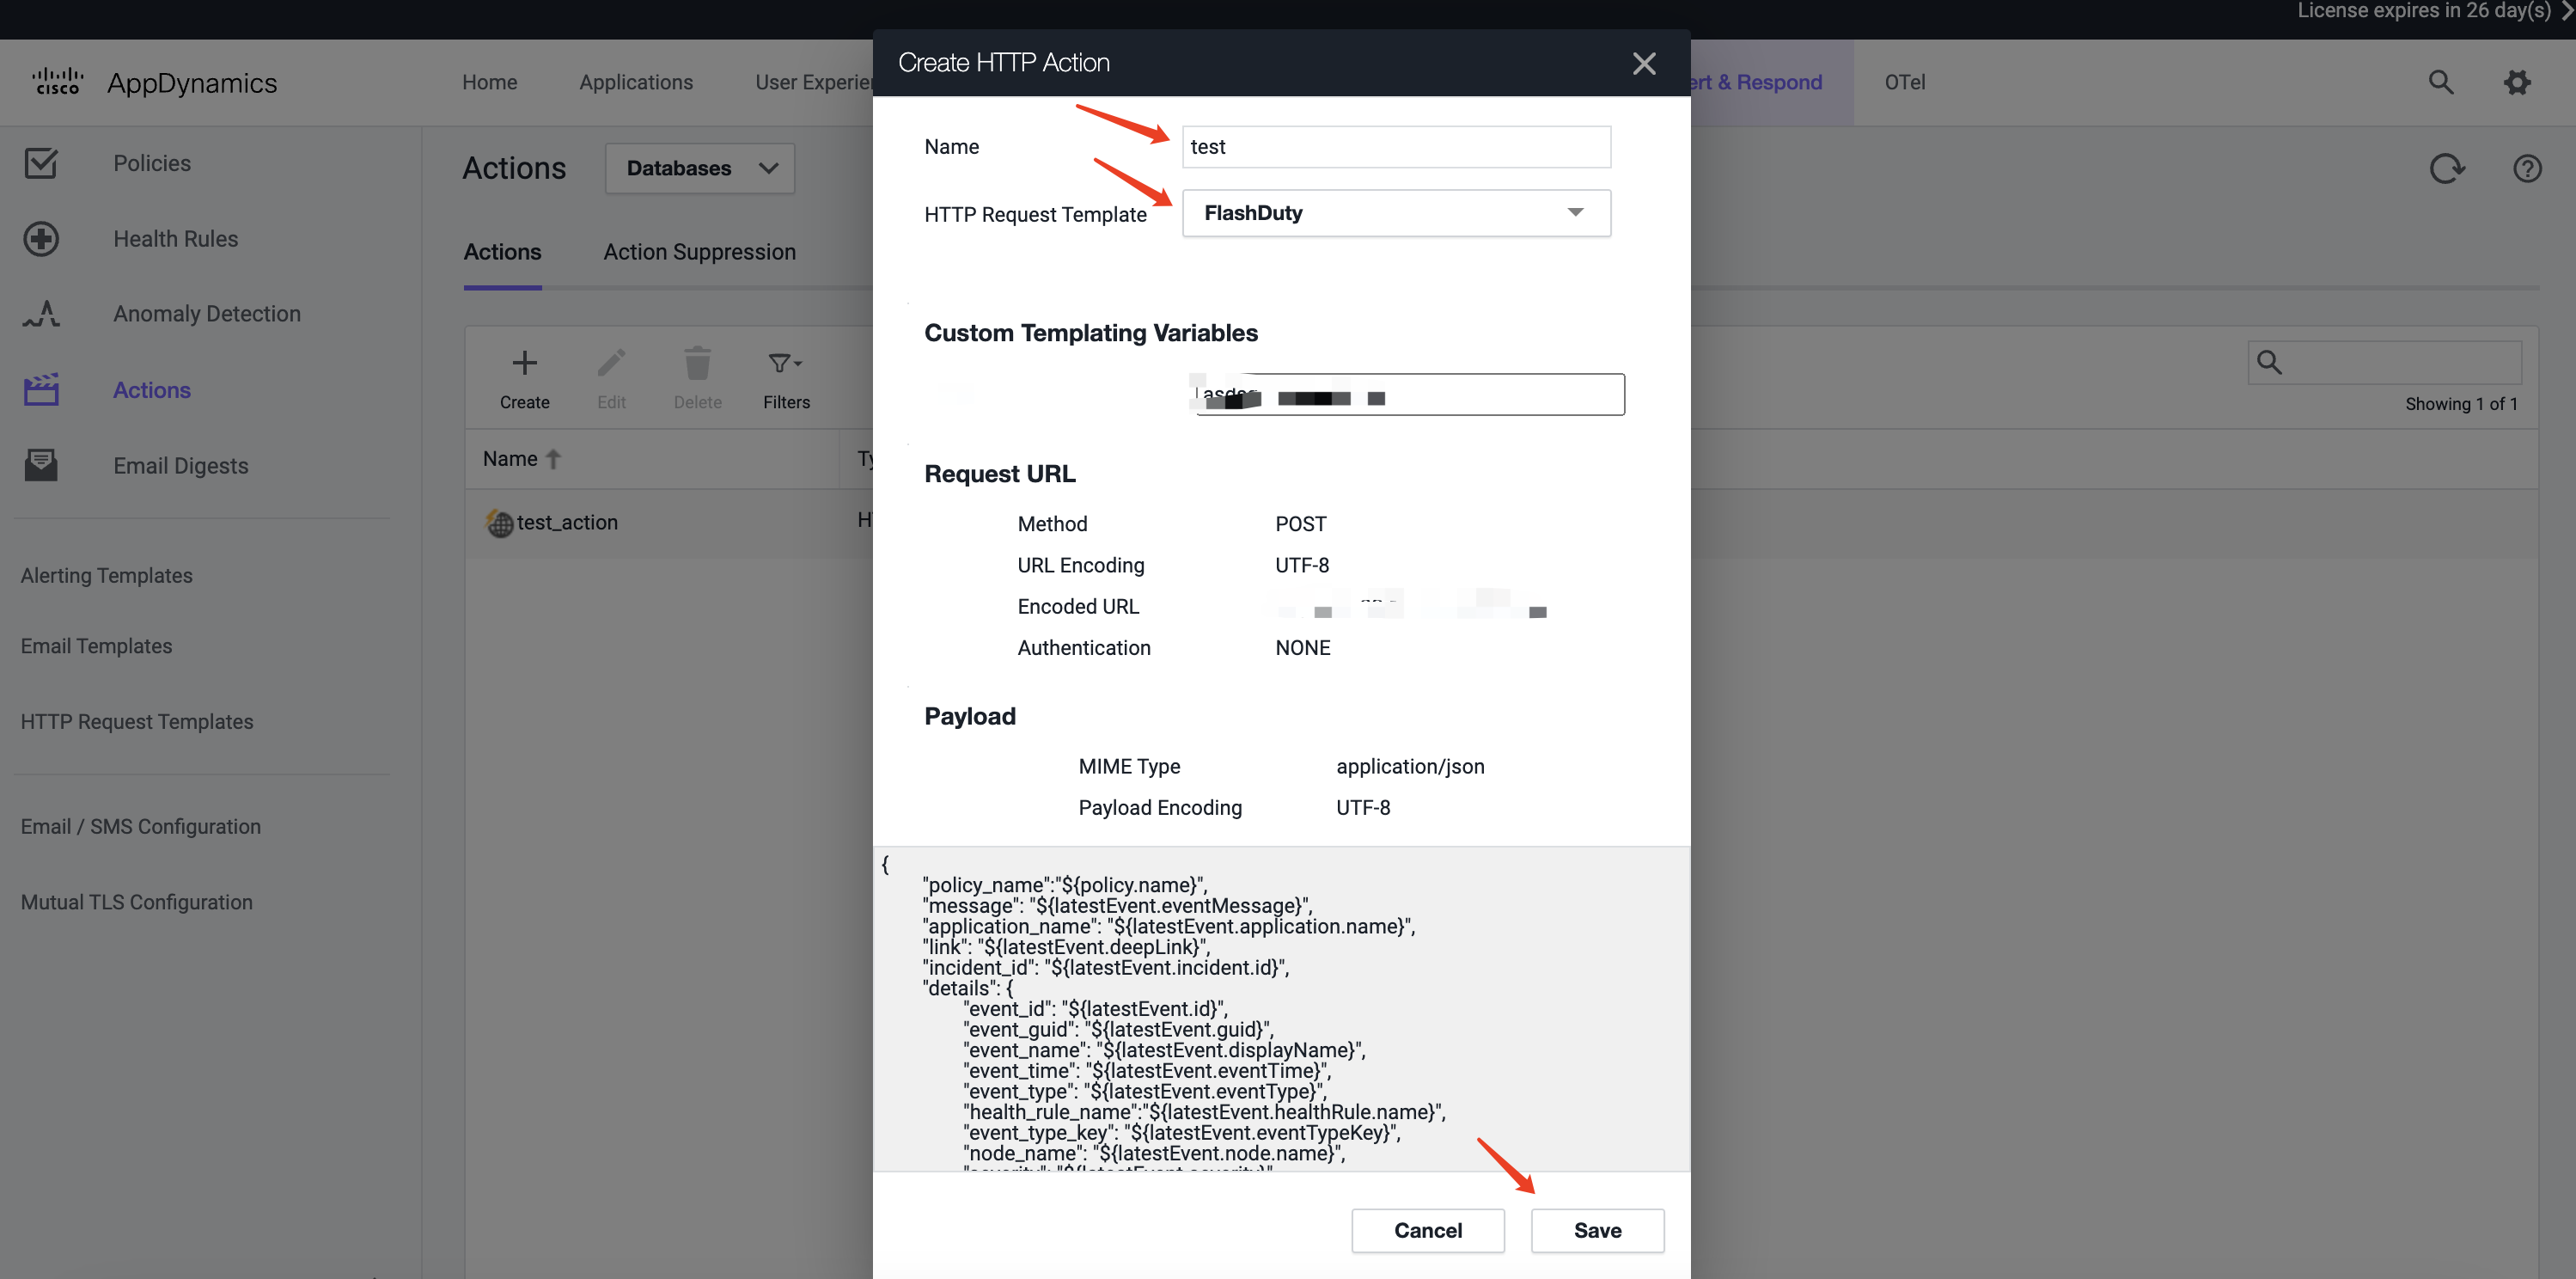
- In the
Create HTTP Actionpopup, enter a Name, select Flashduty created inStep 1as theHTTP Request Template, and clickSAVE
Step 3: Use the Action Created in Step 2 in Alert Policies
- Select
Policiesin the left navigation bar - Create or edit existing policies (configure alert rules as needed, alert rule configuration is omitted here)
- In the
Actionssection of the policy configuration page, click add and select the Action created inStep 2
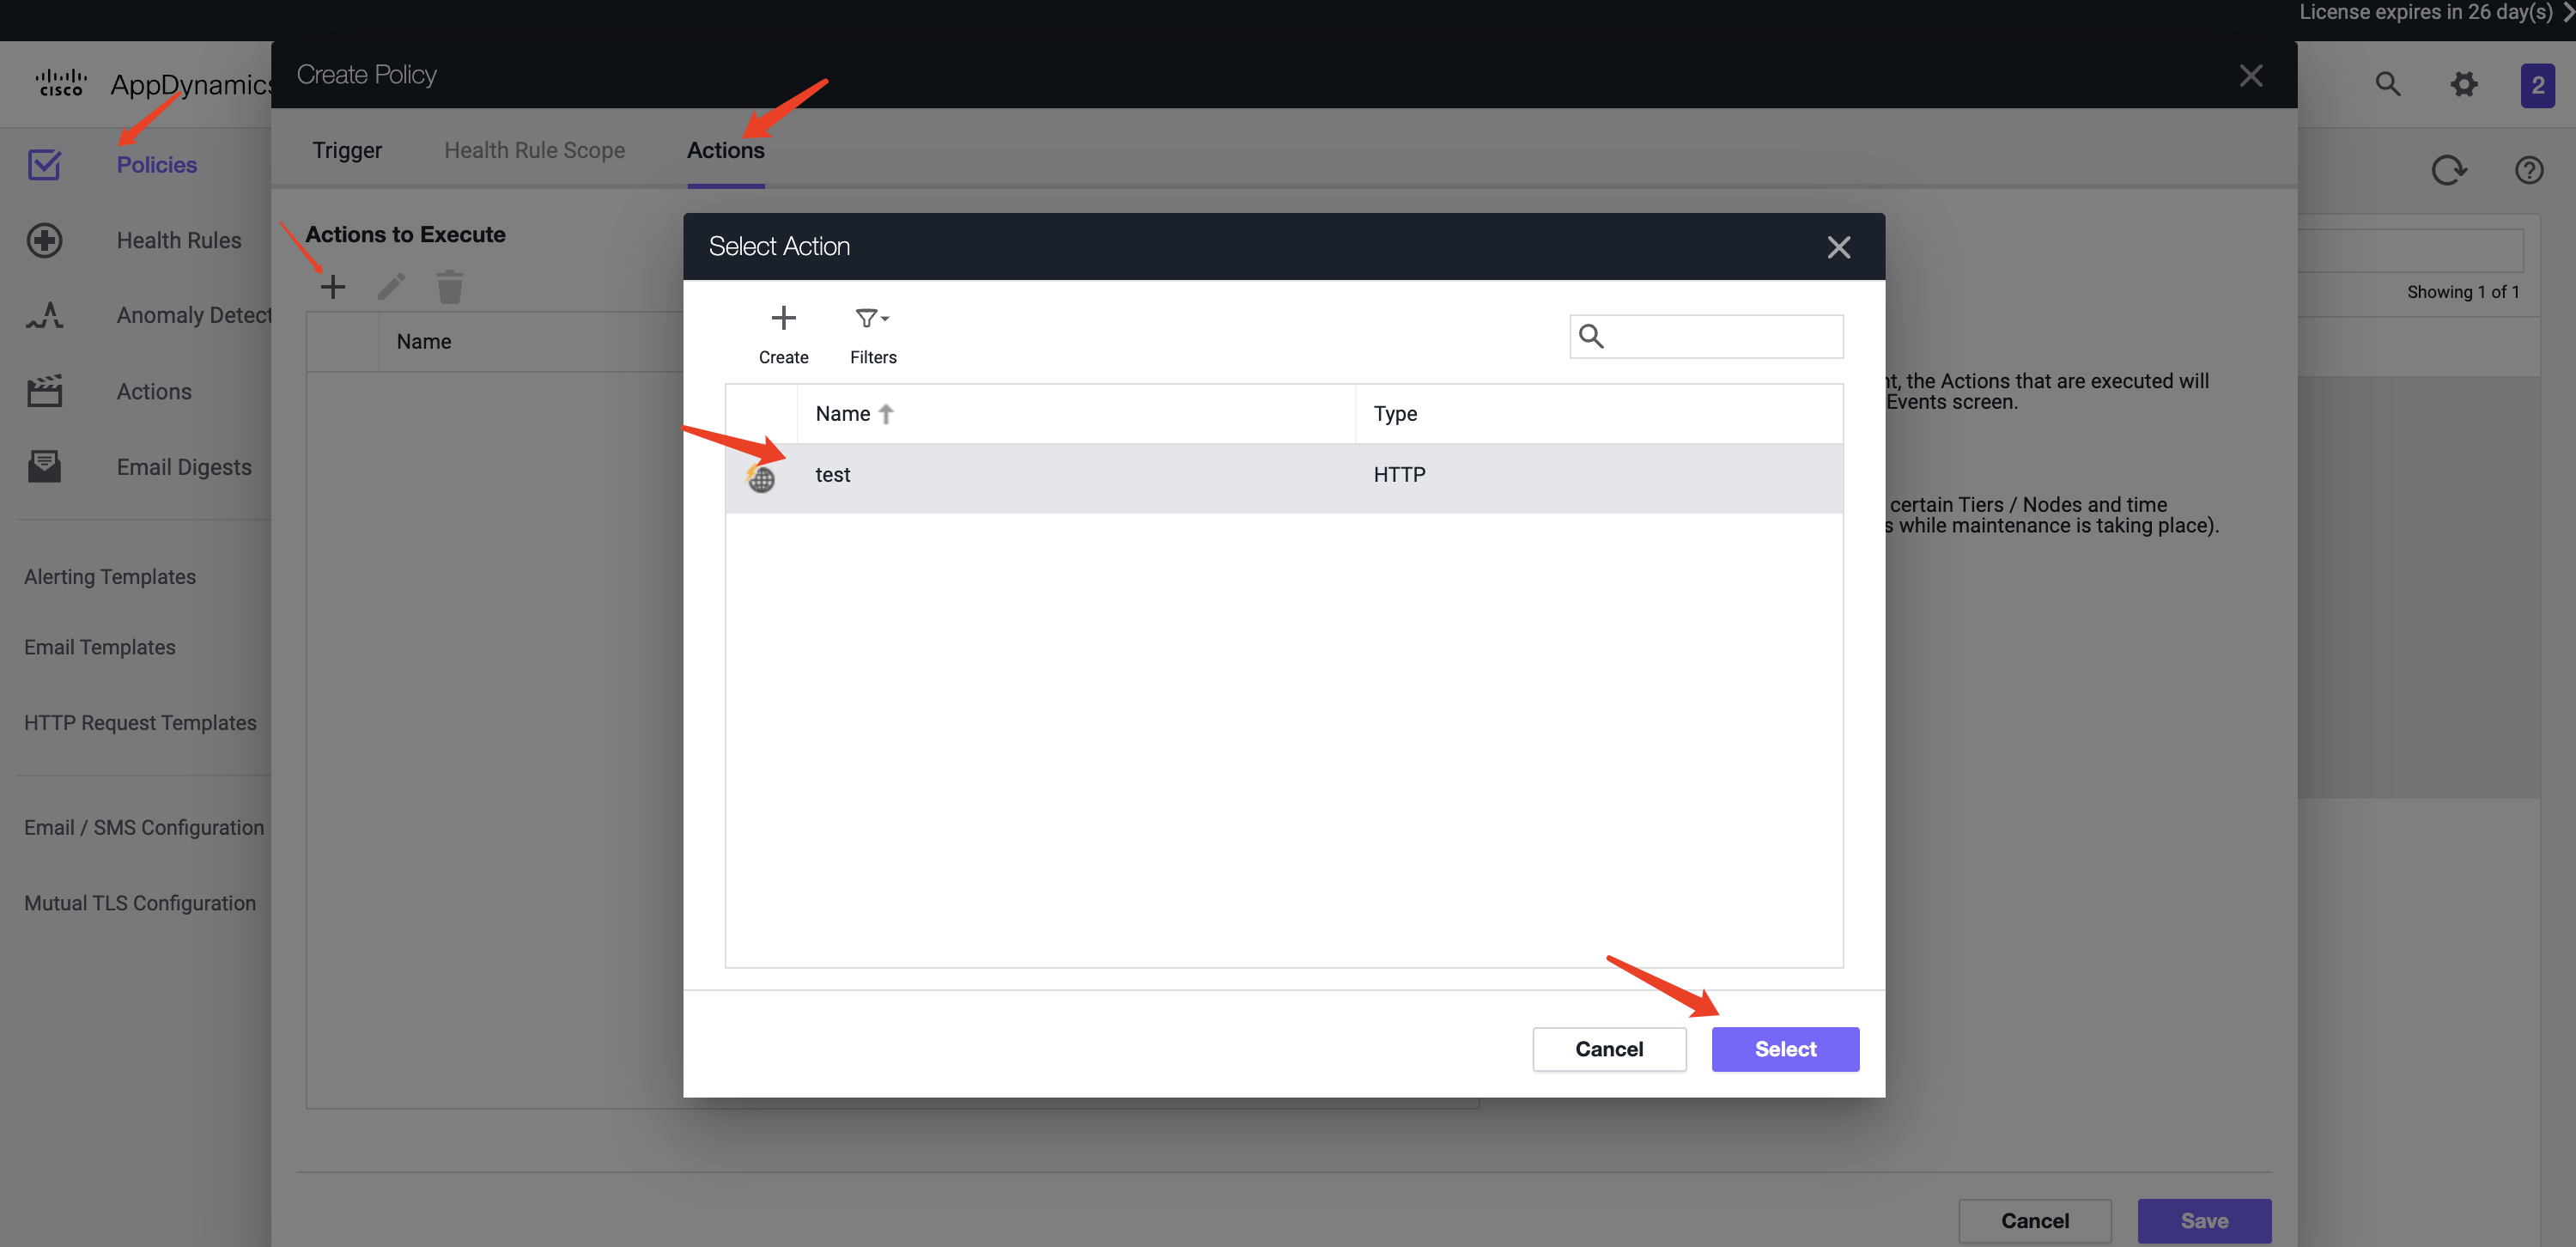
- After completing other configurations, click
Saveto finish
II. Status Mapping
| AppDynamics | Flashduty | Status |
|---|---|---|
| ERROR | Critical | Critical |
| WARN | Warning | Warning |
| INFO | Info | Info |