
AWS EventBridge Integration
Sync AWS EventBridge alert events to Flashduty via webhook for automated alert noise reduction.
In Flashduty
You can obtain an integration push URL through either of these two methods:
Using Private Integration
Choose this simpler option when you don't need to route alert events to different channels.
Expand
- Go to the Flashduty console, select Channel, and enter a channel's details page
- Select the Integrations tab, click Add Integration to enter the integration page
- Choose AWS EventBridge integration and click Save to generate a card
- Click the generated card to view the push URL, copy it for later use, and you're done
Using Shared Integration
Choose this option when you need to route alerts to different channels based on the alert event payload.
Expand
- Go to the Flashduty console, select Integration Center=>Alert Events to enter the integration selection page
- Select AWS EventBridge integration:
- Integration Name: Define a name for this integration
- Configure the default route and select the corresponding channel (after the integration is created, you can go to
Routeto configure more routing rules) - Click Save and copy the newly generated push URL for later use
- Done
In AWS EventBridge
I. AWS EventBridge Alert Push Configuration
Step 1: Create Connection in API destinations
- Log in to your AWS Console, search for
Amazon EventBridgeproduct, and enter the corresponding product console - Select
Integration=>API destinationsfrom the left navigation bar - Click
Connections, then clickCreate connection
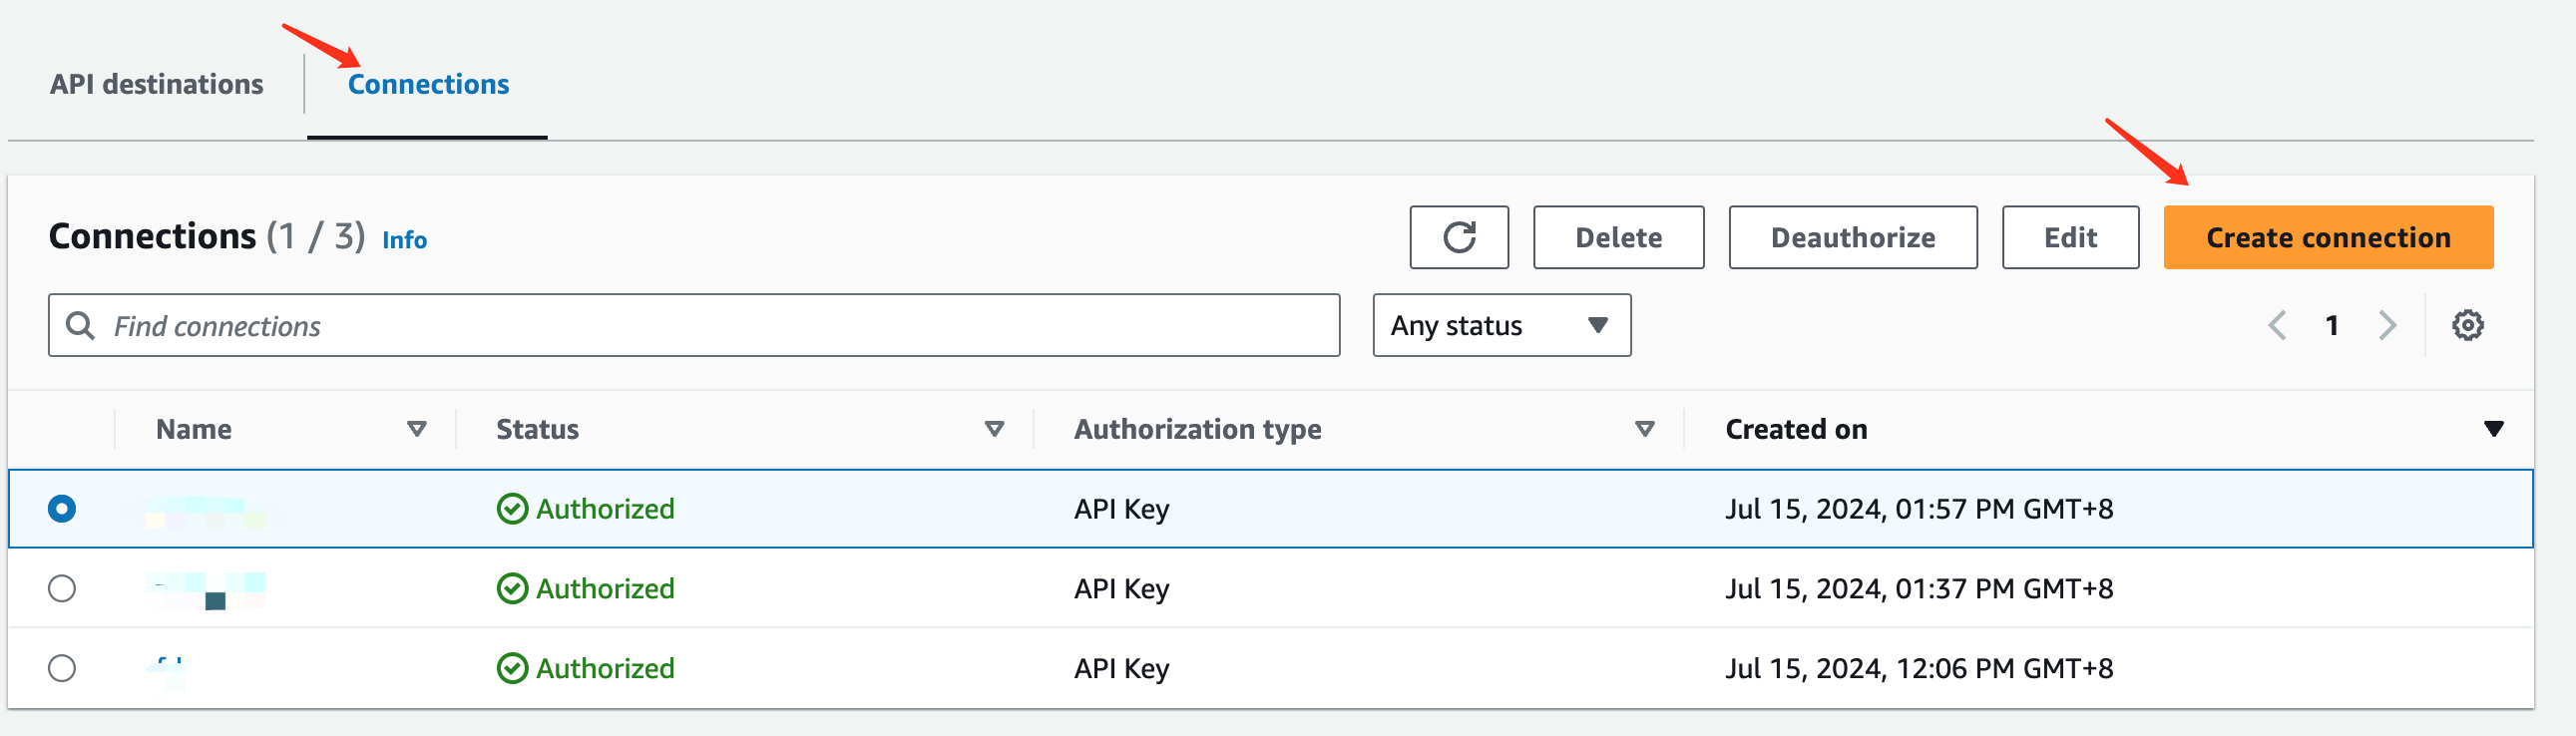
- In the
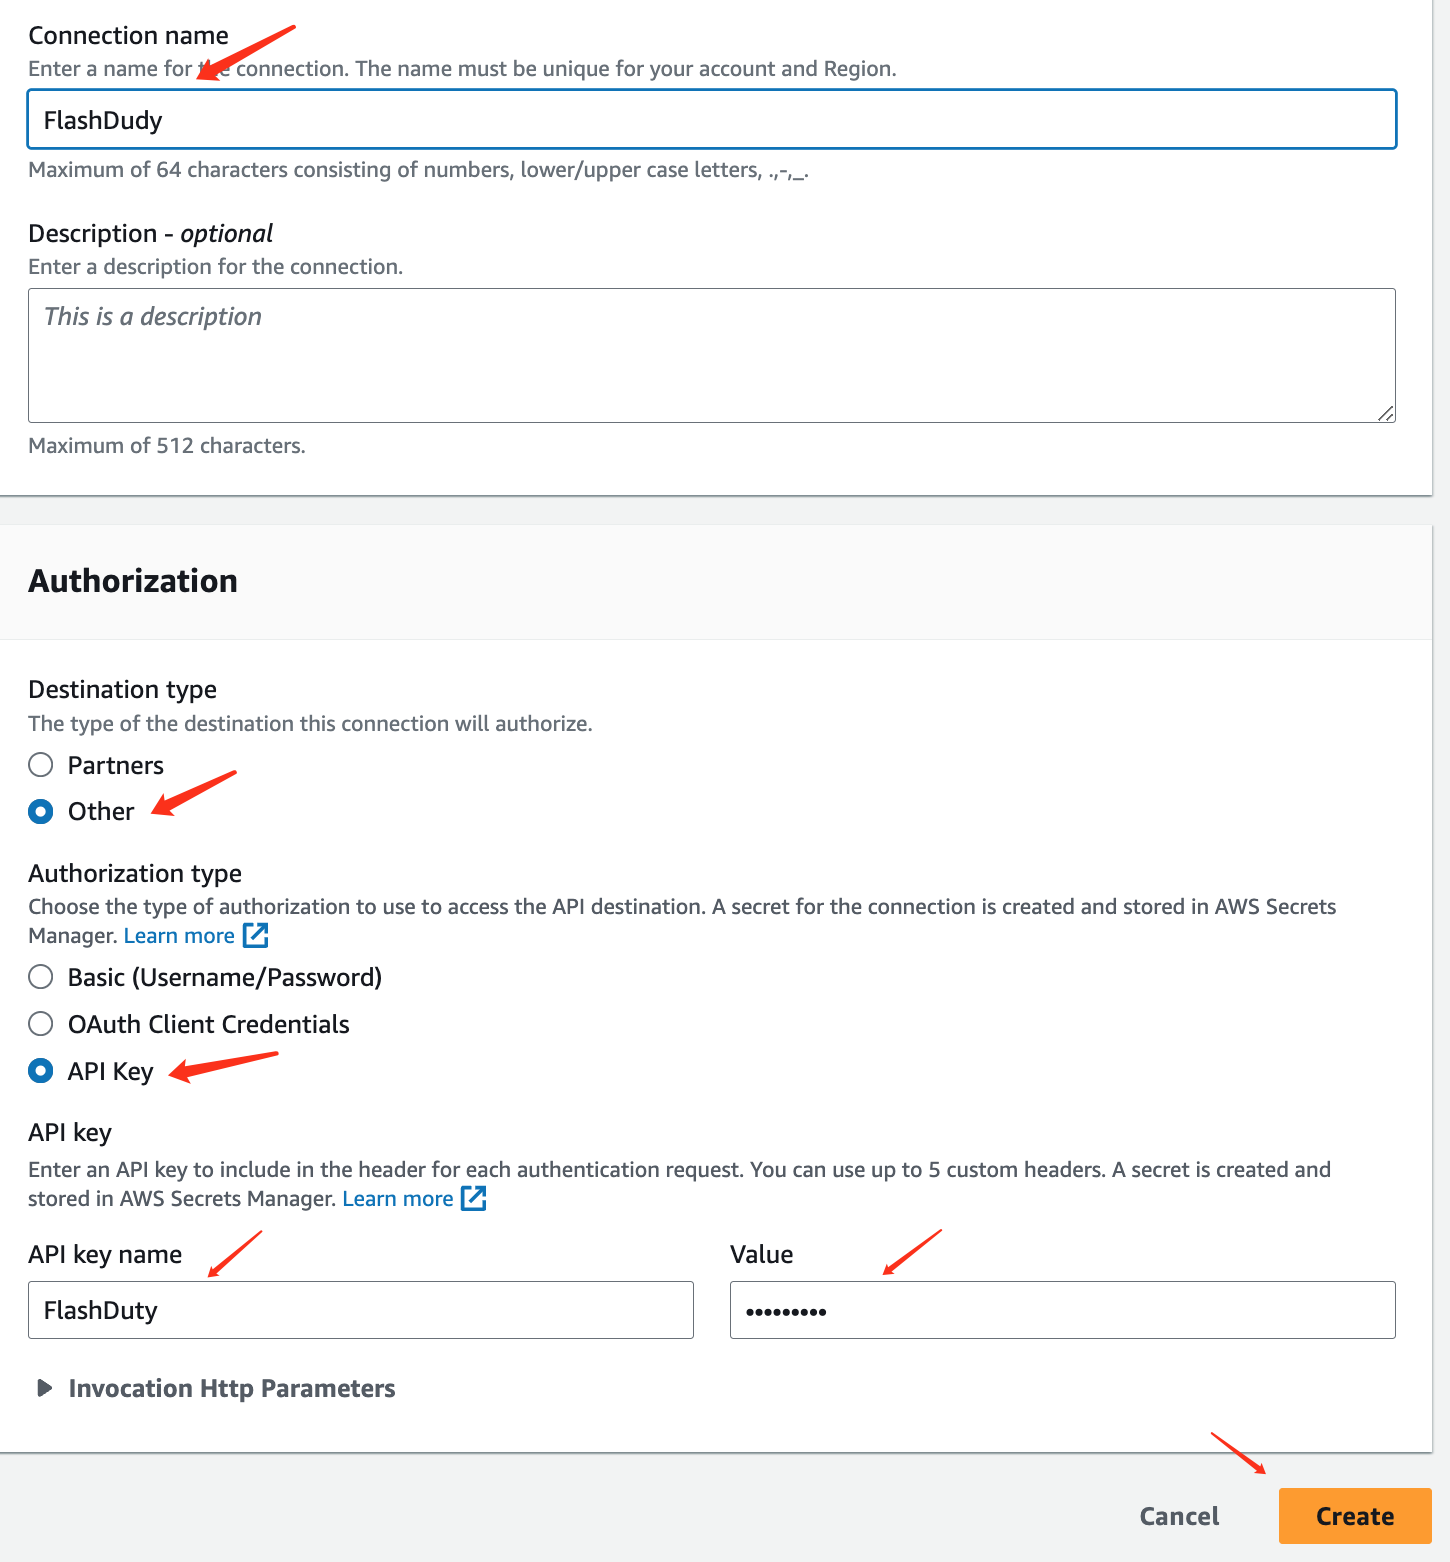
Connection detailssection, enterFlashDutyforConnection name - In the
Authorizationsection, selectOtherforDestination type - Select
API KeyforAuthorization type - Enter
FlashDutyforAPI key name, and enter theintegration_keyfrom the integration push URL forValue - Click
Createto save
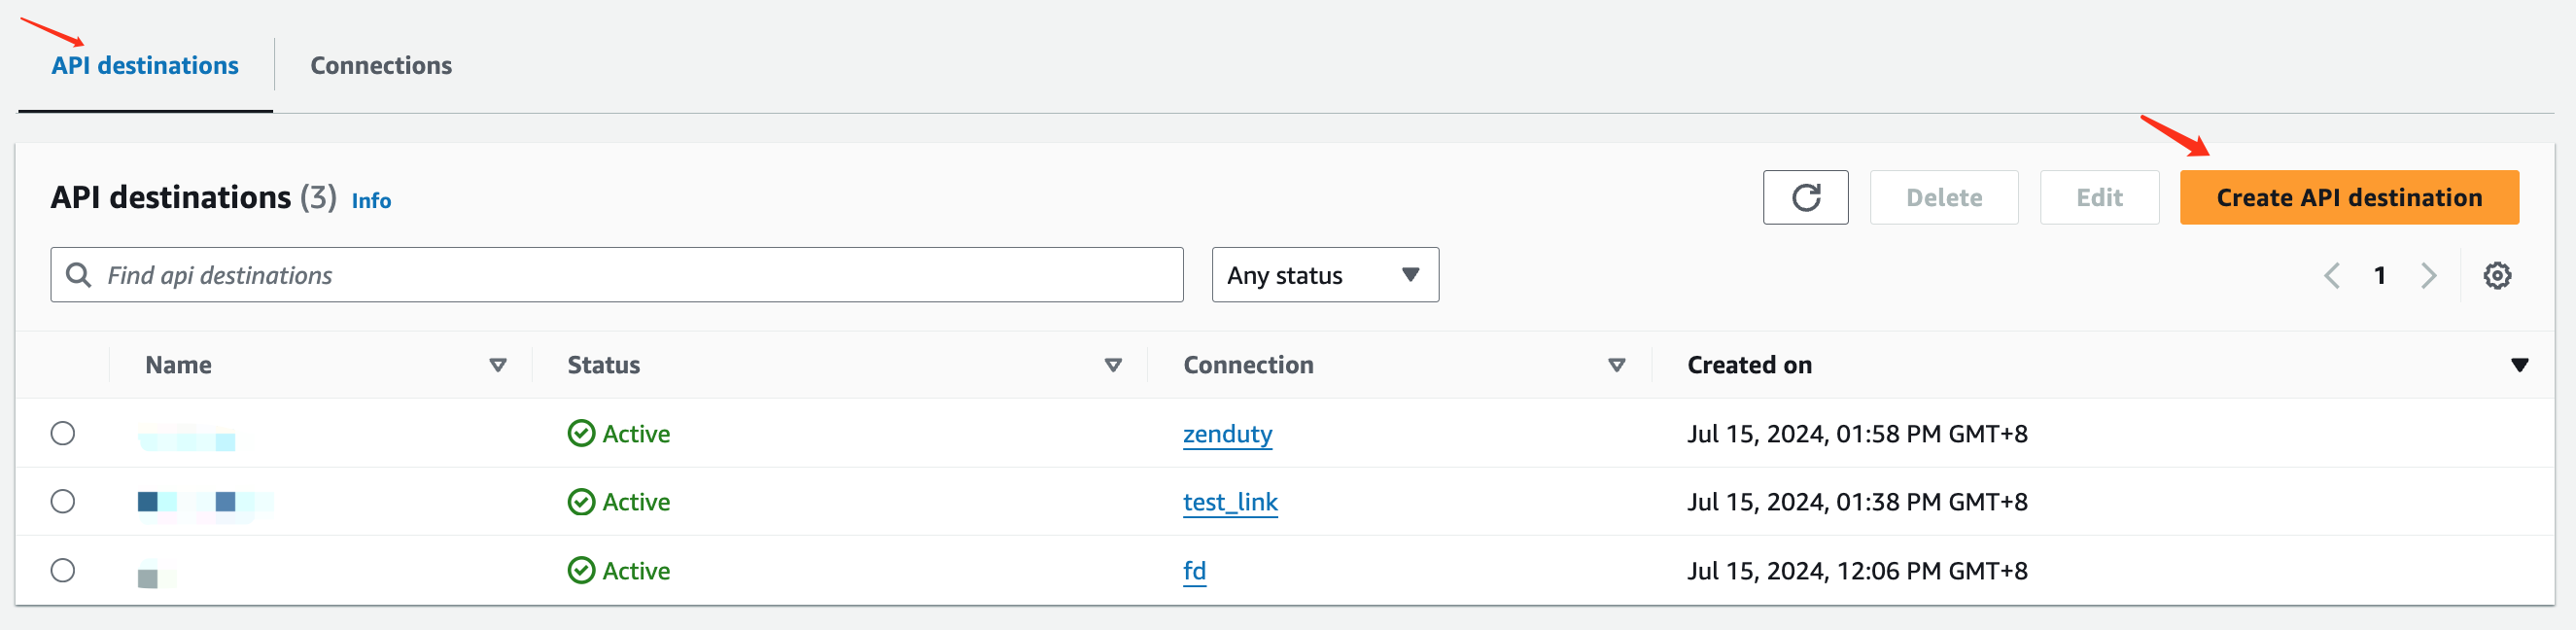
Step 2: Create API destination
- Return to the
API destinationsinterface and clickCreate API destination
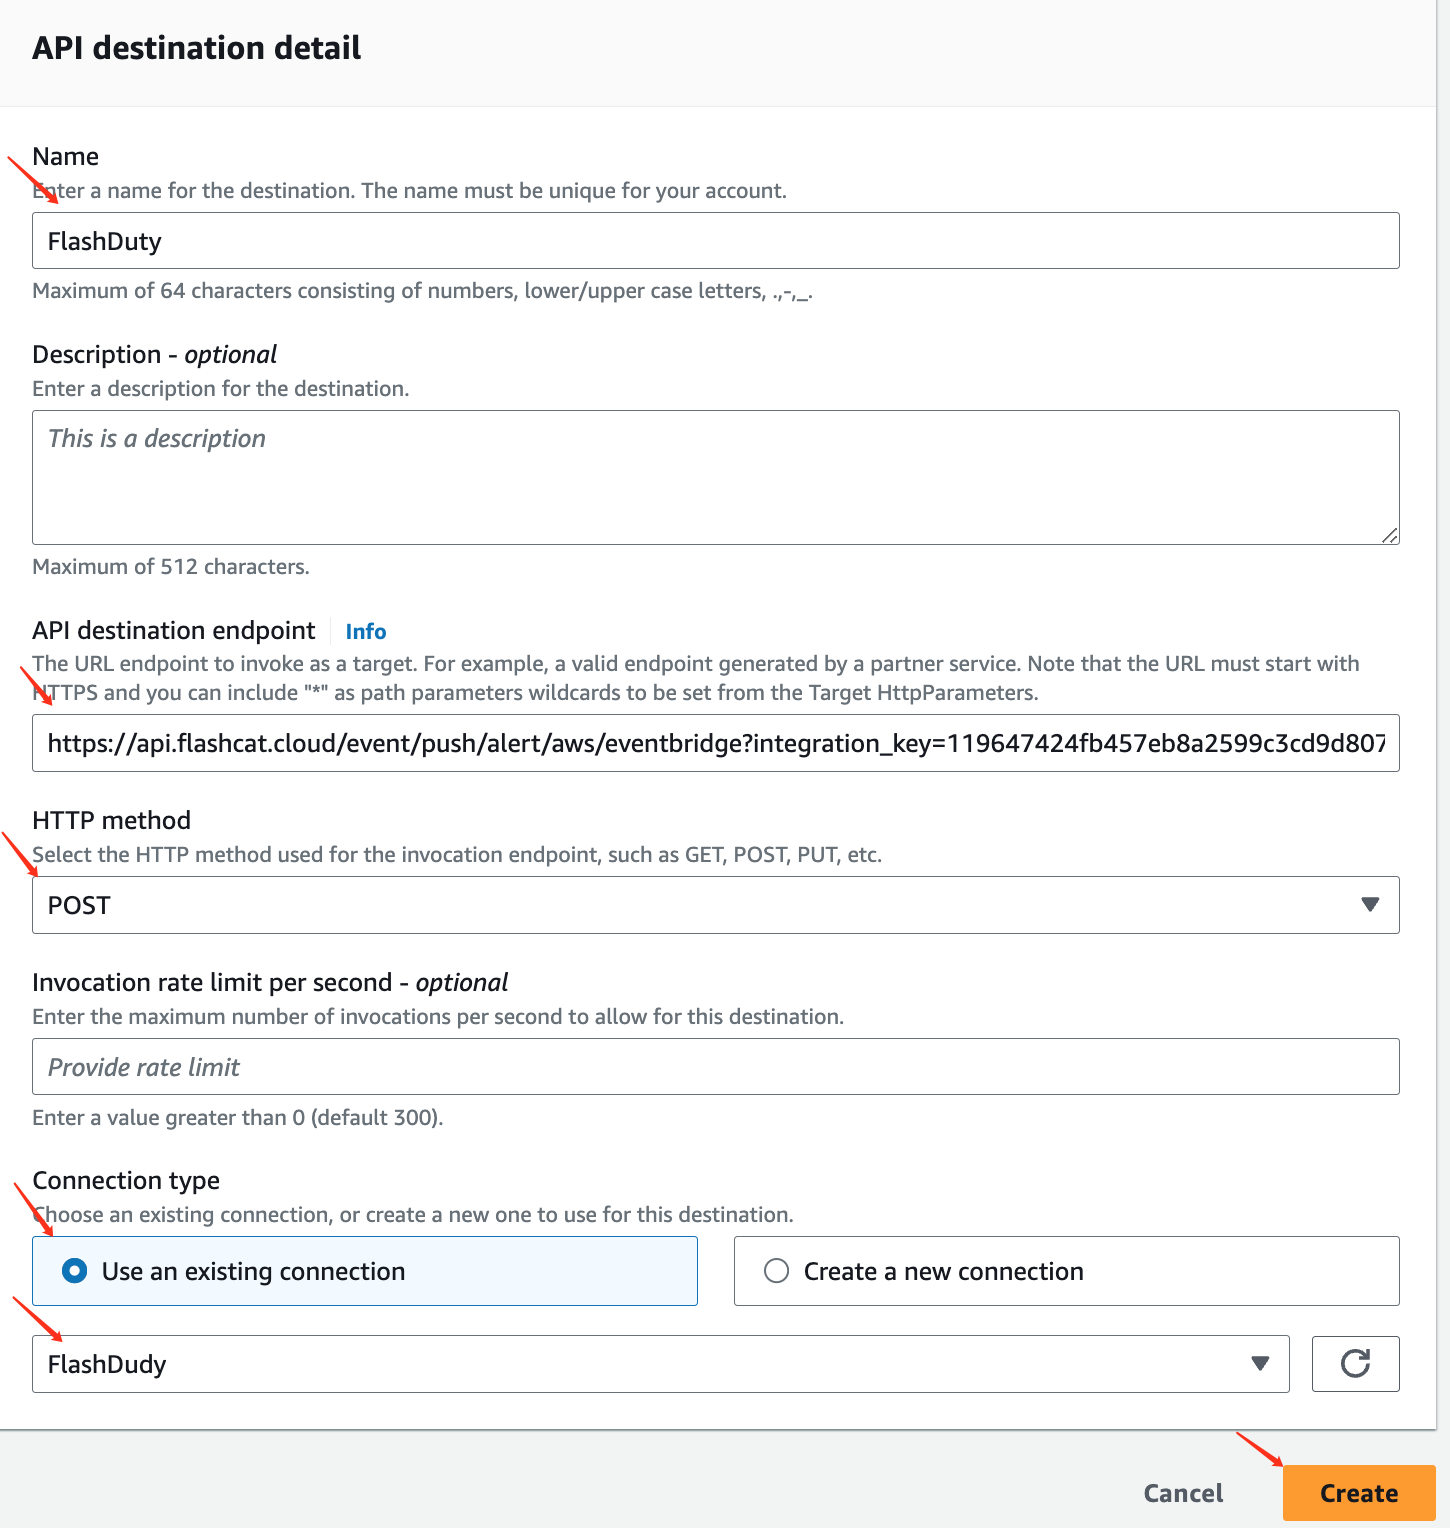
- Fill in the information in the
API destination detailediting interface, enterFlashDutyforName - Enter the integration push URL for
API destination endpoint - Select
POSTforHTTP method - Select
Use an existing connectionforConnection typeand choose theFlashDutyConnection added in Step 1 - Click
Createto save
Step 3: Use the API destination created in Step 2 in EventBridge Rules
- Log in to your AWS Console, search for
Amazon EventBridgeproduct, and enter the corresponding product console - Select
Buses=>Rulesfrom the left navigation bar, create or edit existing rules - Other configurations are omitted here
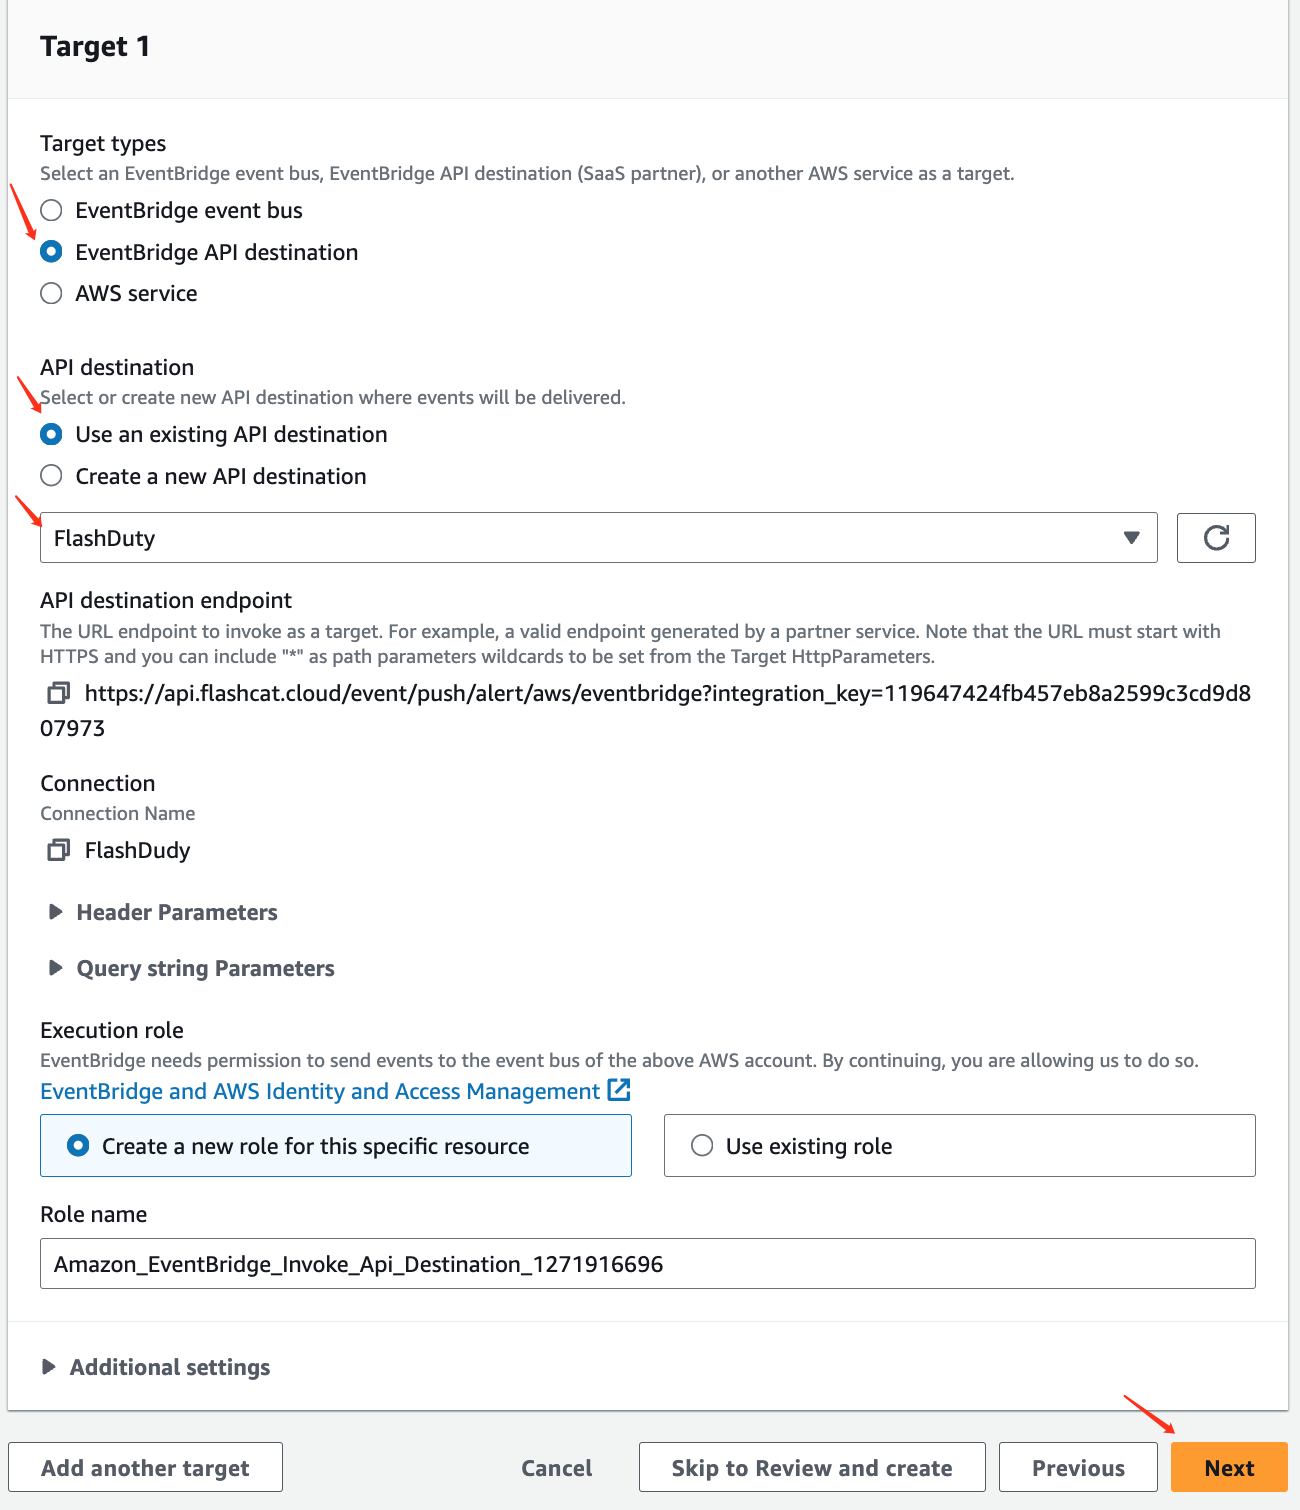
- For
Target types, selectEventBridge API destinationas the target type - Under
API destination, selectUse an existing API destinationand choose theFlashDutyAPI destination created in Step 2 from the dropdown - Click
Next, configure as needed, and save
II. Status Mapping
- Since AWS EventBridge events don't have severity levels, all events pushed to FlashDuty will have a Warning severity
- AWS EventBridge events only have triggers without recovery states, so events received by FlashDuty won't automatically associate with recovery


 微信扫码交流
修改于 2025-03-27 07:51:38