
Sentry Integration
Sync Sentry alert events to Flashduty via webhook for automated alert noise reduction.
In Flashduty
You can obtain an integration push URL through either of these two methods:
Using Private Integration
Choose this simpler option when you don't need to route alert events to different channels.
Expand
- Go to the Flashduty console, select Channel, and enter a specific channel's details page
- Select the Integrations tab, click Add Integration to enter the integration page
- Select Sentry integration and click Save to generate a card
- Click the generated card to view the push URL, copy it for later use, and you're done
Using Shared Integration
Choose this option when you need to route alerts to different channels based on the alert event's payload information.
Expand
- Go to the Flashduty console, select Integration Center=>Alert Events to enter the integration selection page
- Select Sentry integration:
- Integration Name: Define a name for this integration
- Configure the default route and select the corresponding channel (after the integration is created, you can go to
Routeto configure more routing rules) - Click Save and copy the newly generated push URL for later use
- Done
In Sentry
I. Prerequisites
Sentry provides two types of alert mechanisms: Issue Alerts and Metric Alerts. While Issue Alerts support notifications through WebHooks in Integrations, Metric Alerts are limited to using Internal Integration for alert notifications. Notably, Internal Integration works with both Metric Alerts and Issue Alerts. Given the versatility of Internal Integration, we've chosen to standardize on this approach rather than relying on WebHooks separately, thus simplifying alert notification configuration.
II. Sentry Alert Push Configuration
Step 1: Add FlashDuty Custom Integrations
- Log in to the Sentry management console
- In the left navigation bar, locate Settings => Custom Integrations
- Click Create New Integration and select Internal Integration
- On the editing page, enter FlashDuty for Name and paste the integration push URL into WebhookURL
- Enable Alert Rule Action, configure as shown below:
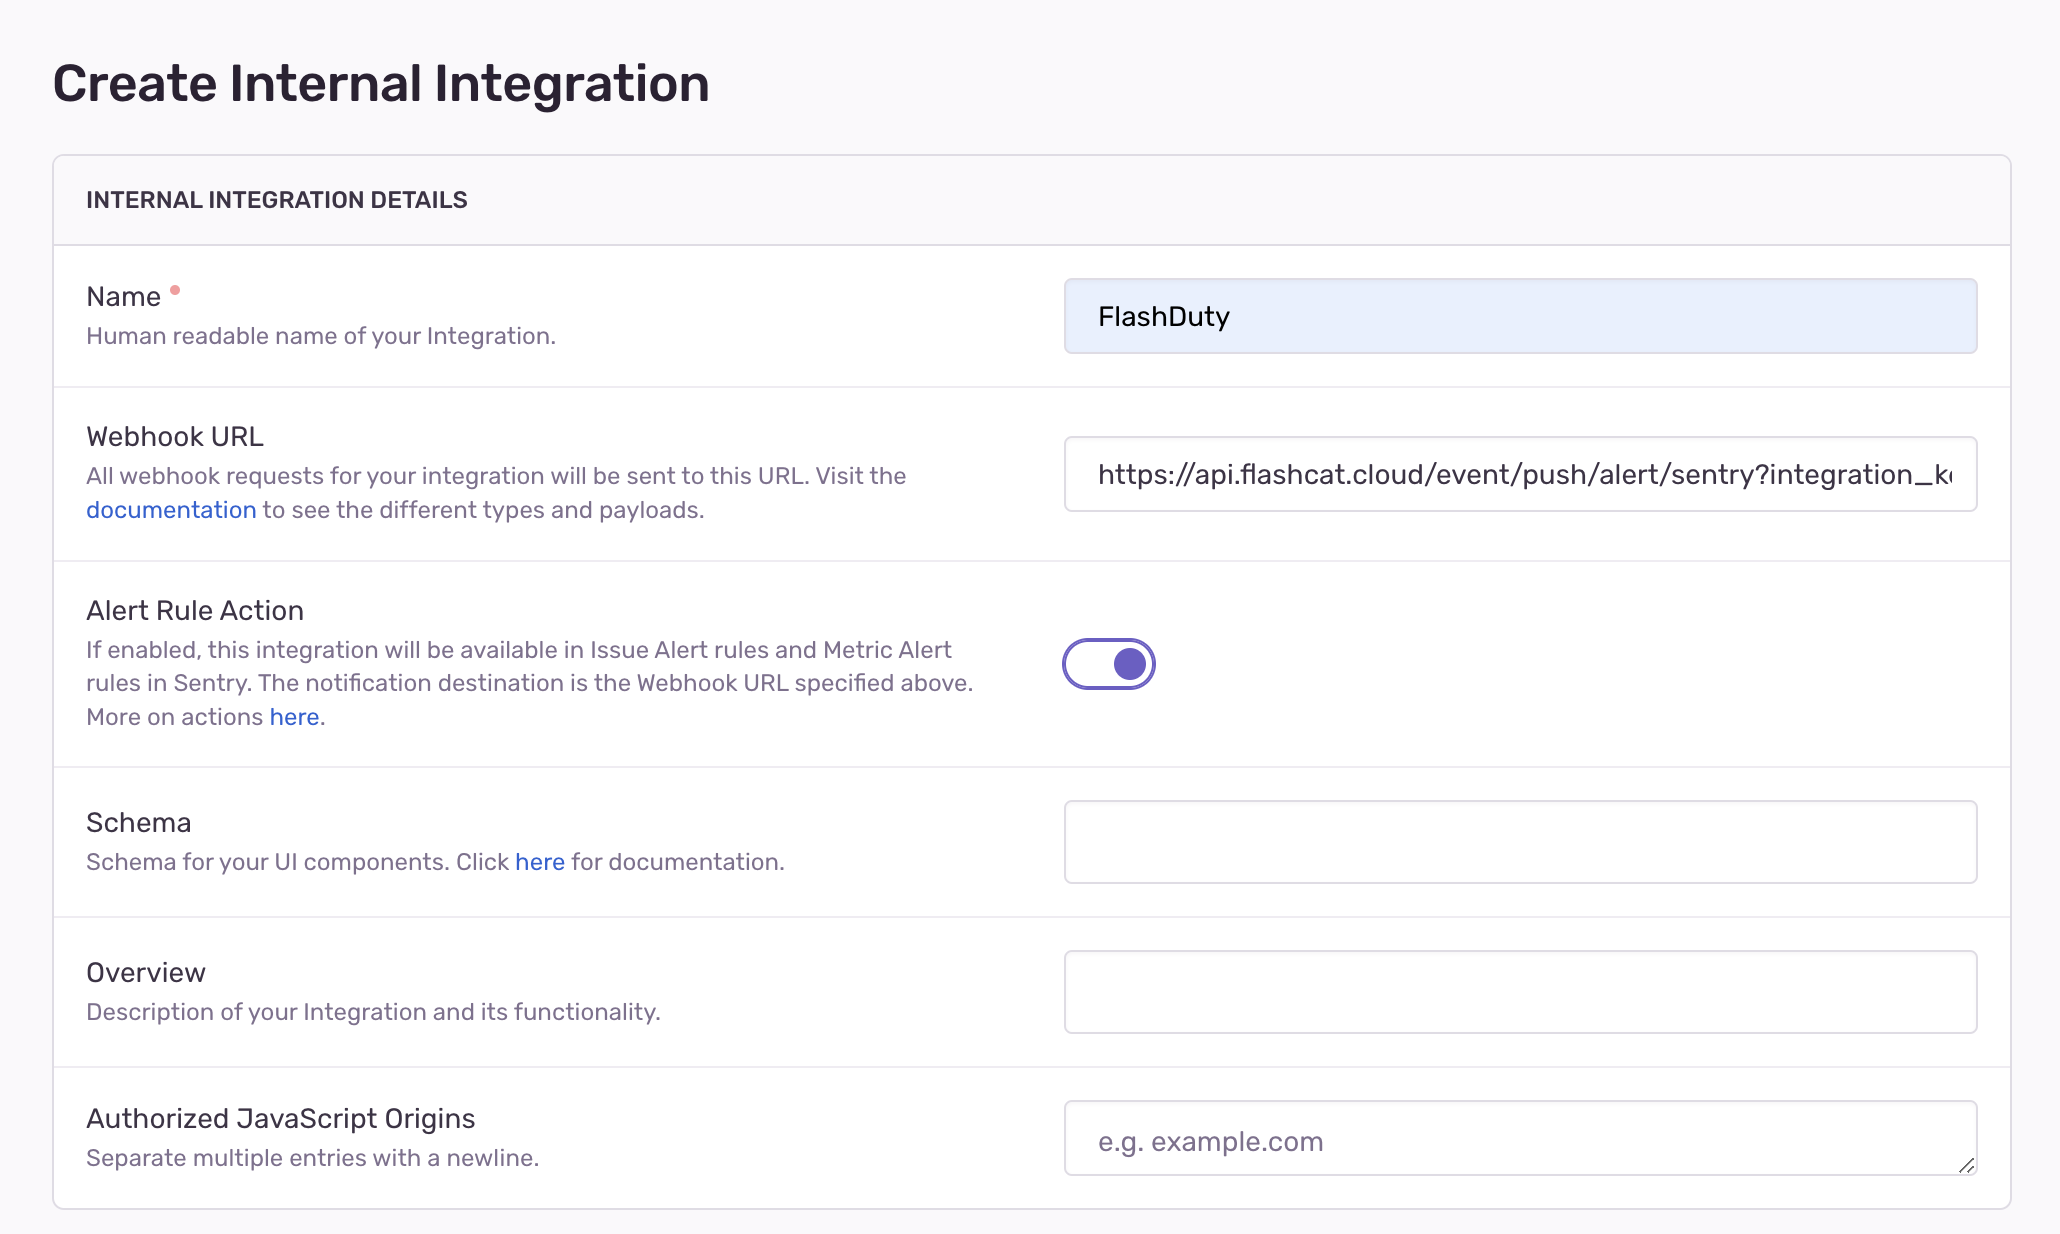
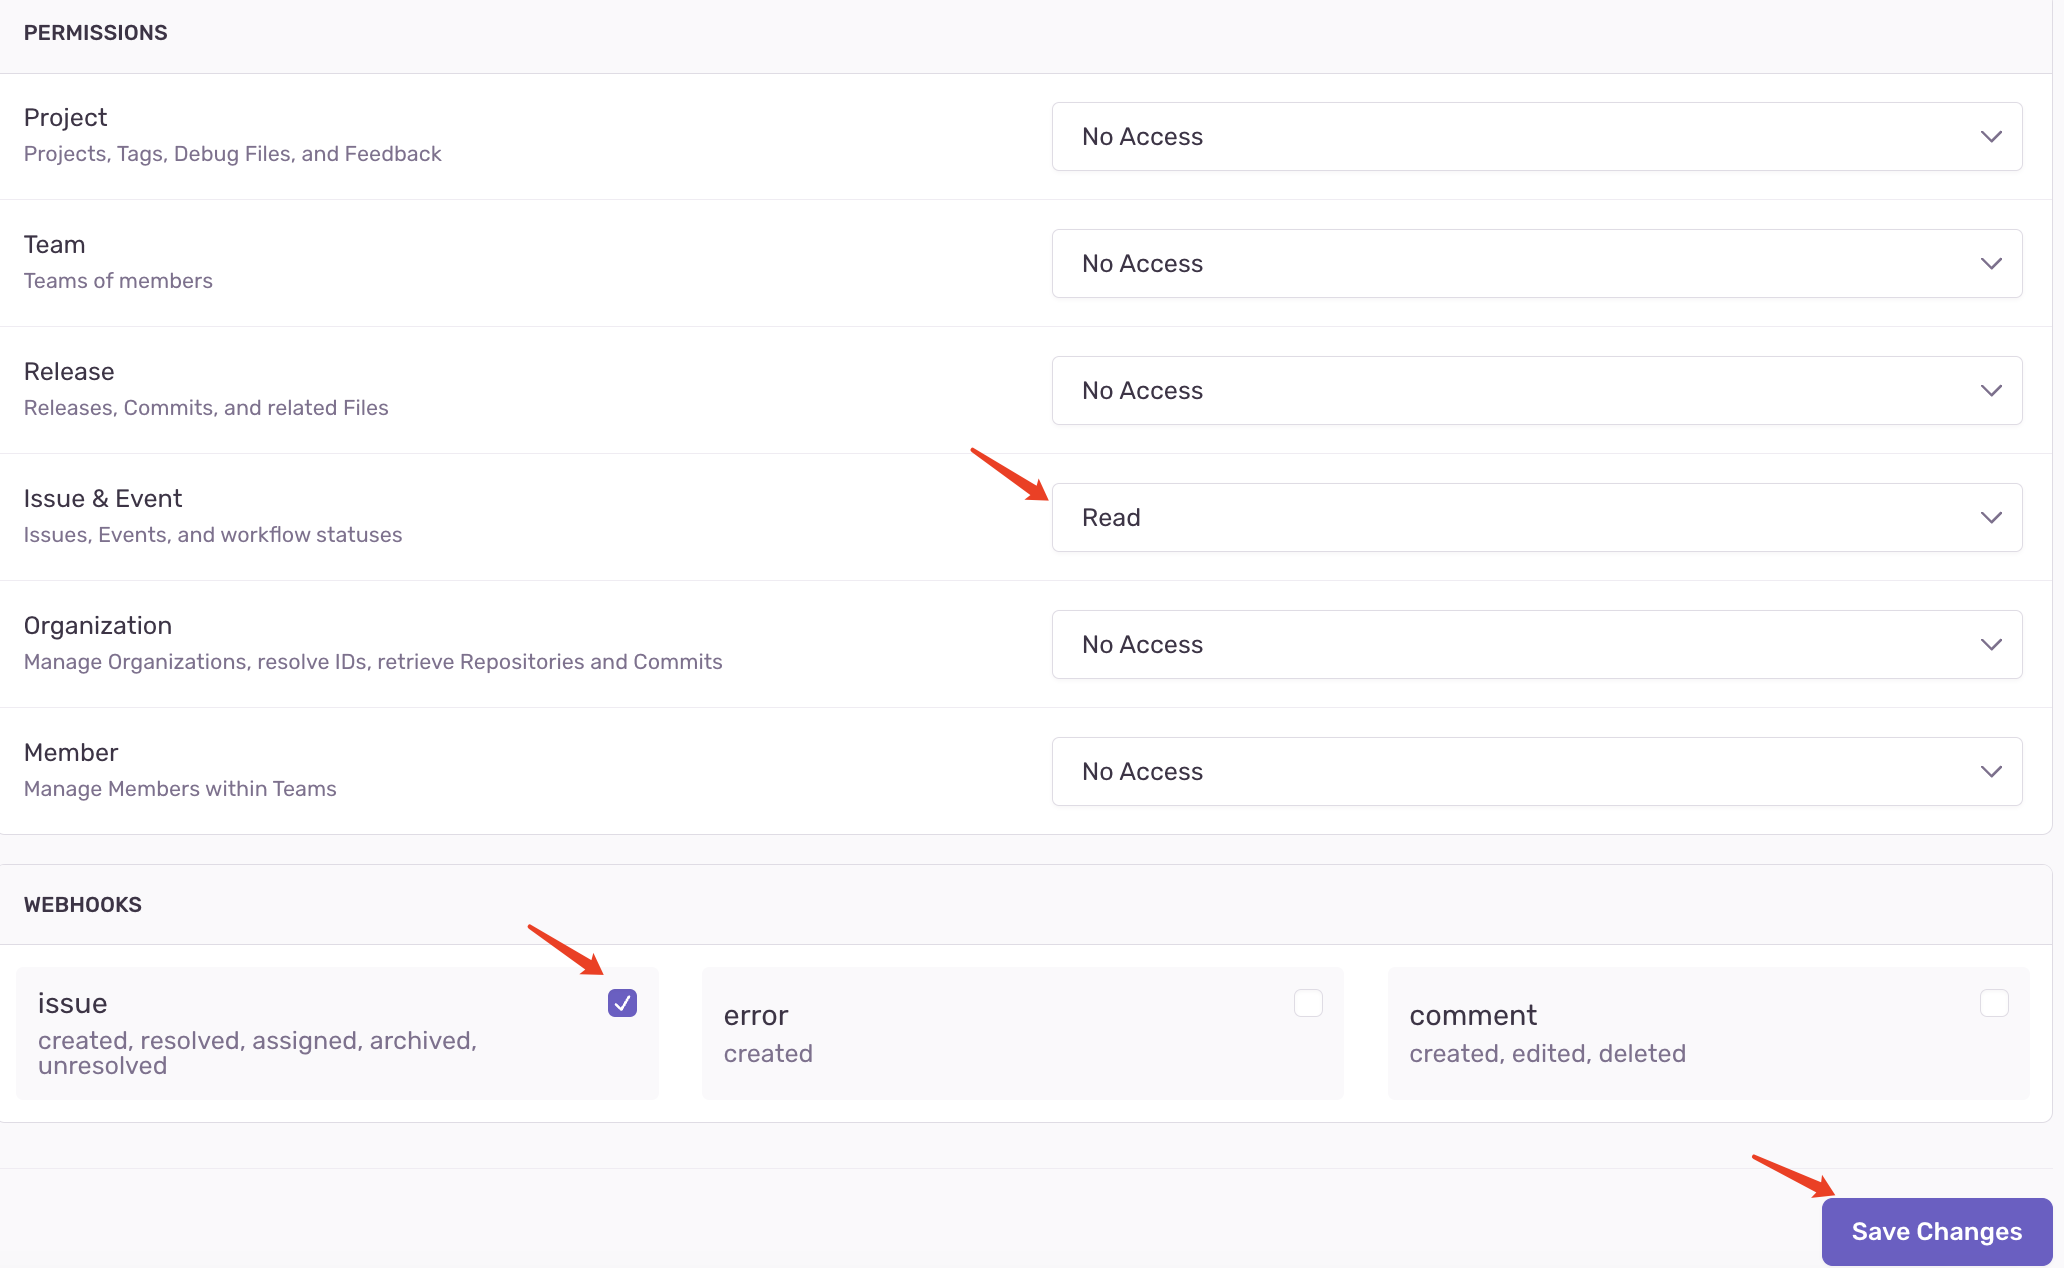
- In PERMISSIONS configuration, set Read permission for Issue & Event
- In WEBHOOKS configuration, check issue, do not check error and comment
- After configuration, click Save Changes to complete the setup
Special notes about WEBHOOKS configuration:
- After checking issue, FlashDuty can receive resolved events for issues, meaning when manually triggering resolved for an issue in the issue list, we will automatically recover the associated incident in FlashDuty
- Other issue events such as create, assigned, archived, and unresolved are not supported
- If error and comment are also checked, FlashDuty will not receive or process these types of events
Step 2: Use FlashDuty Integration in Alerts
- In the left navigation bar, locate Alerts => Create Alert
- Select the type of Alert to create, such as Issue
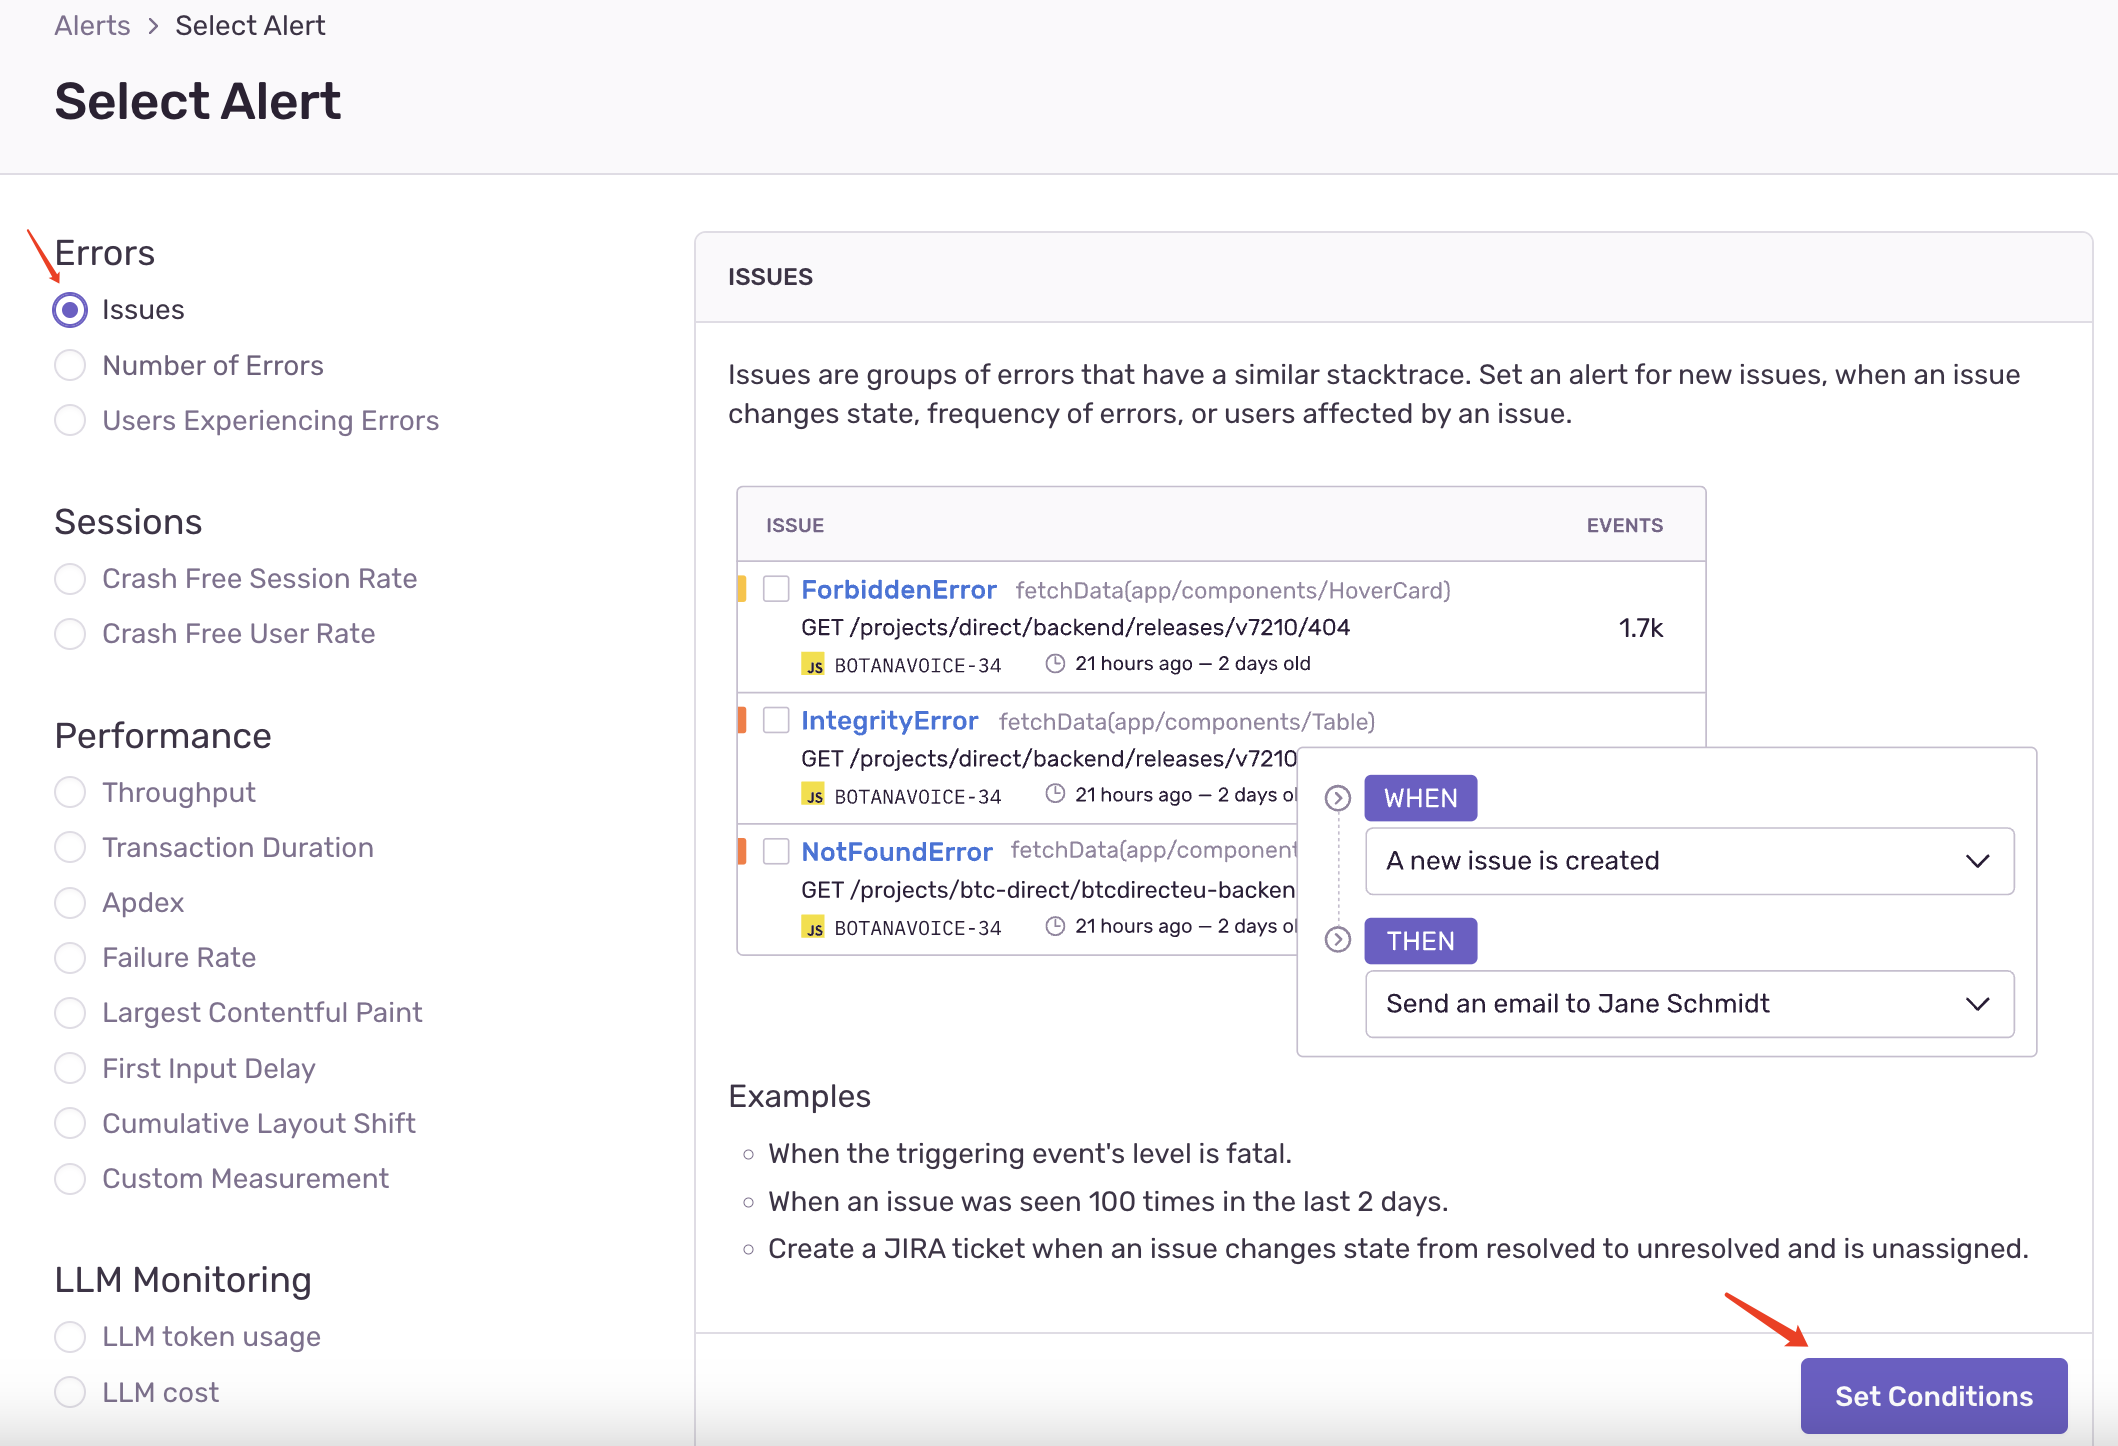
-
Configure trigger conditions as needed
-
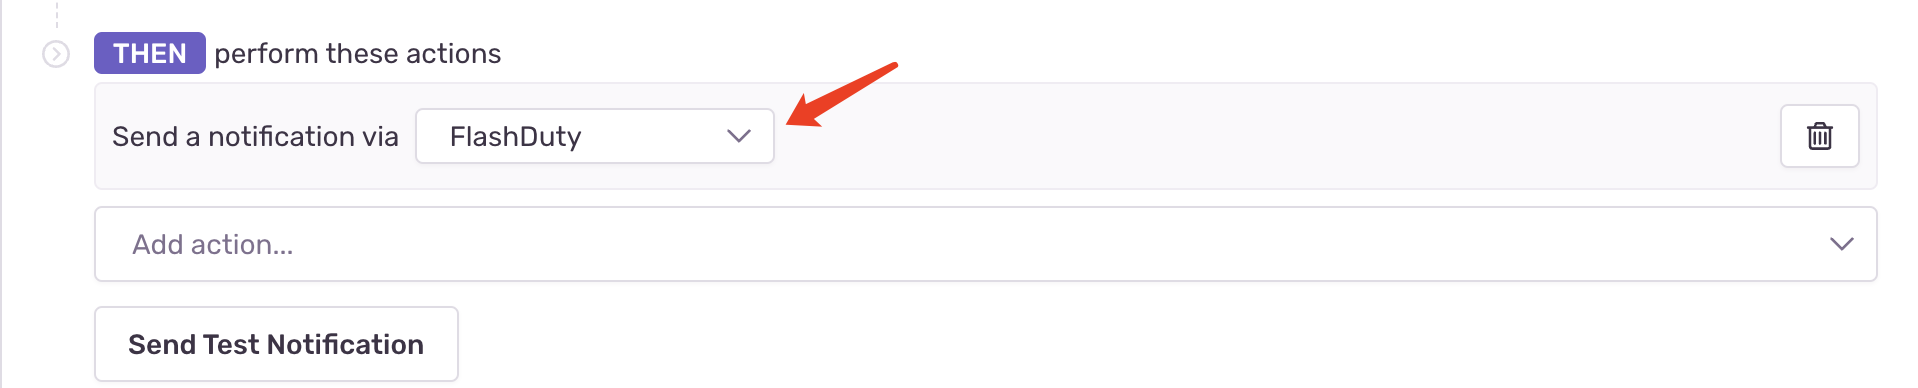
Under THEN perform these actions, Add action and select Send a notification via
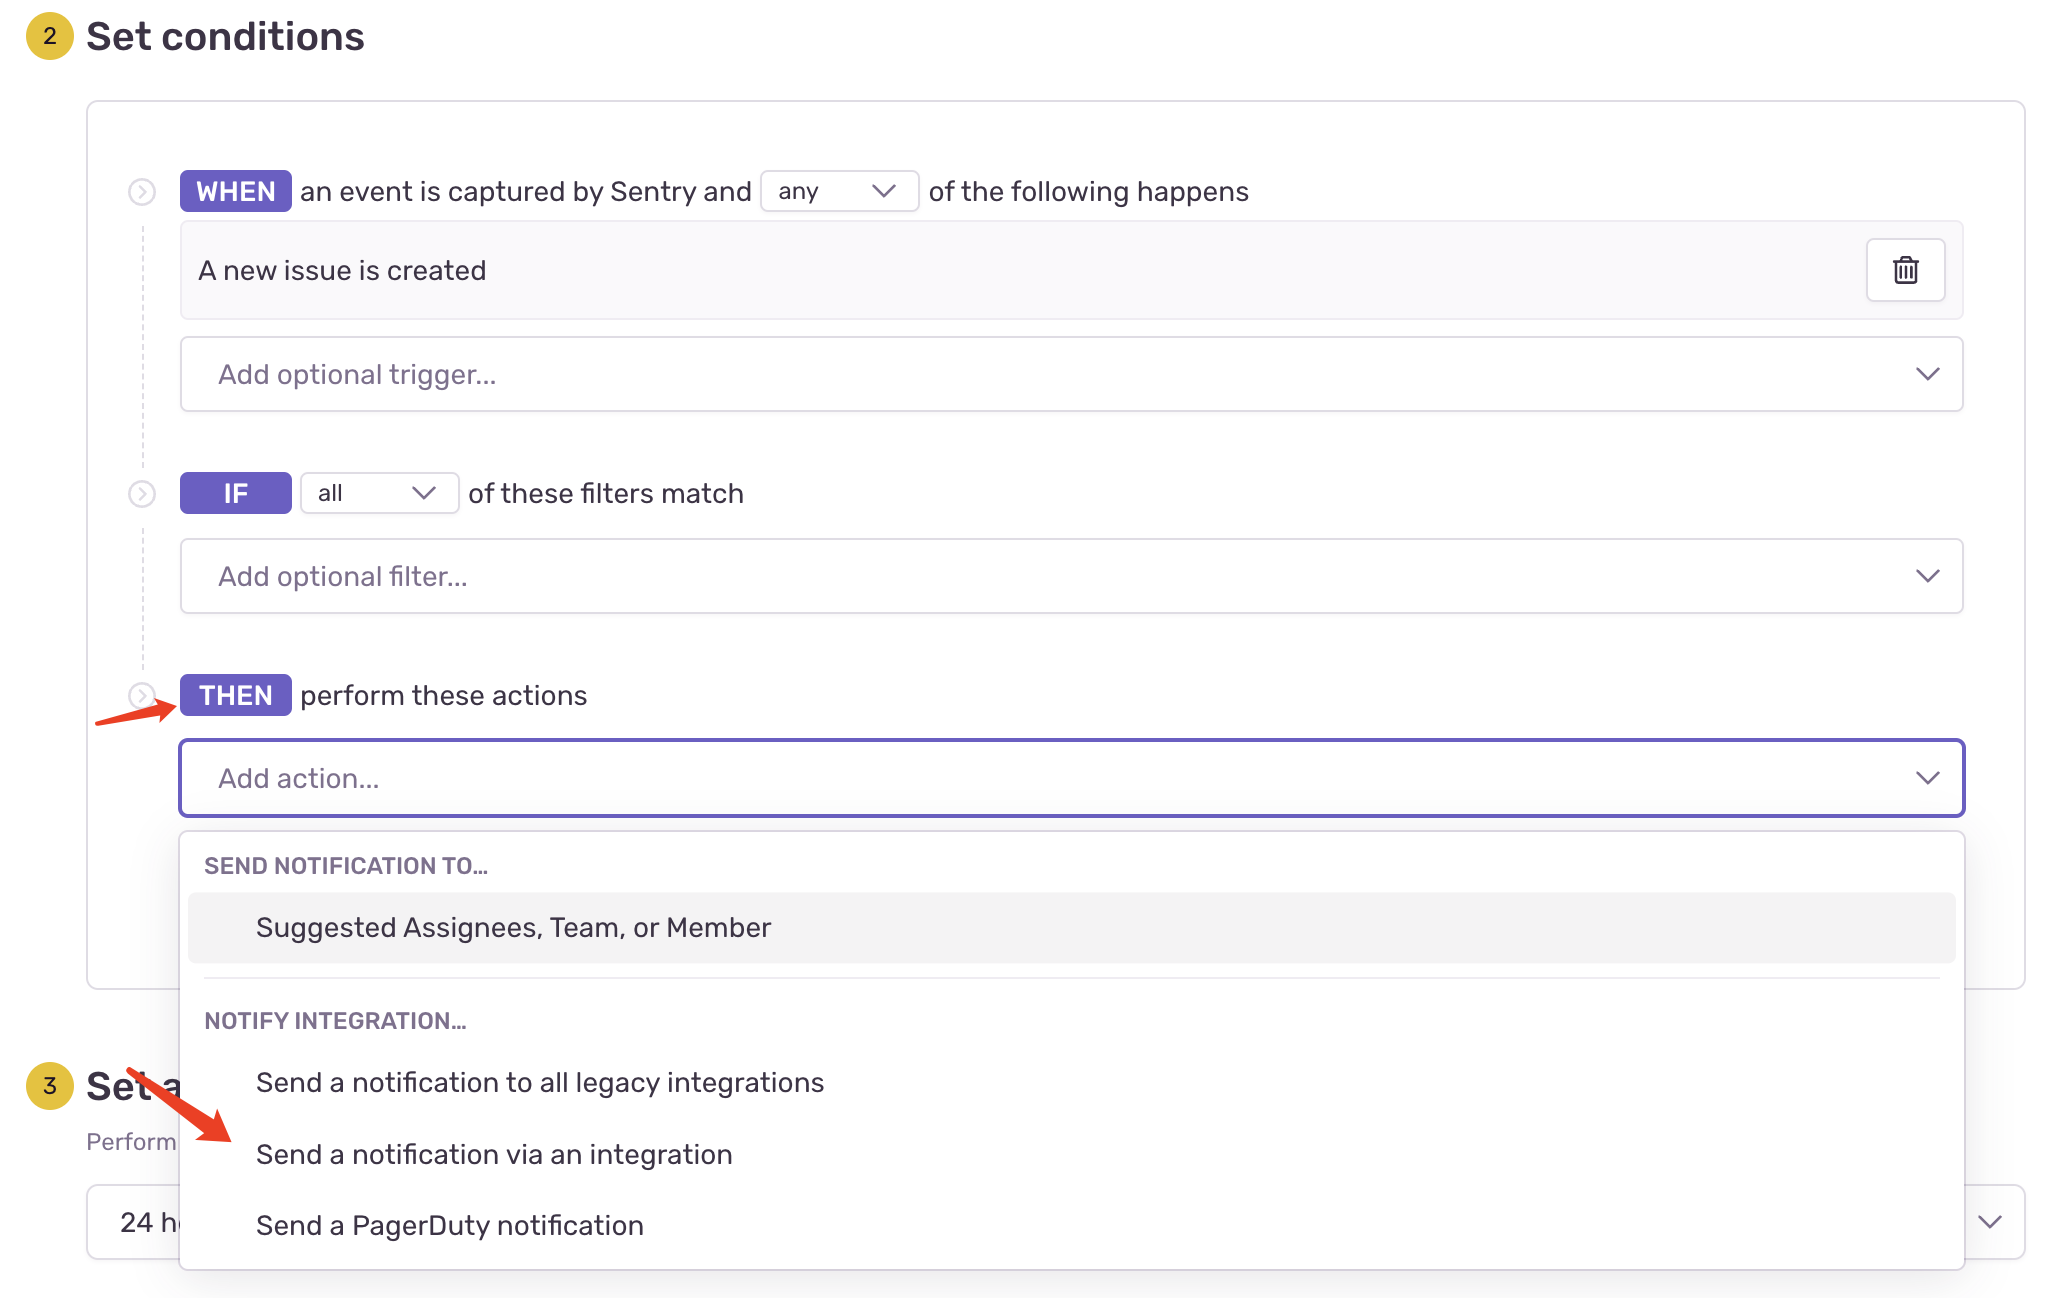
- Select FlashDuty added above as the notification channel
- Configure other options as needed and click Save Rule to complete
III. Status Mapping
| Sentry | Flashduty | Status |
|---|---|---|
| critical | Critical | Critical |
| warning | Warning | Warning |
| triggered | Warning | Warning |
| resolved | Ok | Resolved |


 微信扫码交流