
AppDynamics Alert Integration
In Flashduty
Using Private Integration
Expand
1.
2.
3.
4.
Using Shared Integration
Expand
1.
2.
3.
Route to configure more routing rules)4.
5.
In AppDynamics
I. AppDynamics Alert Push Configuration
Step 1: Configure FlashDuty Alert Channel
1.
2.
Alert Respond, select HTTP Request Templates, and click New to create an alert channel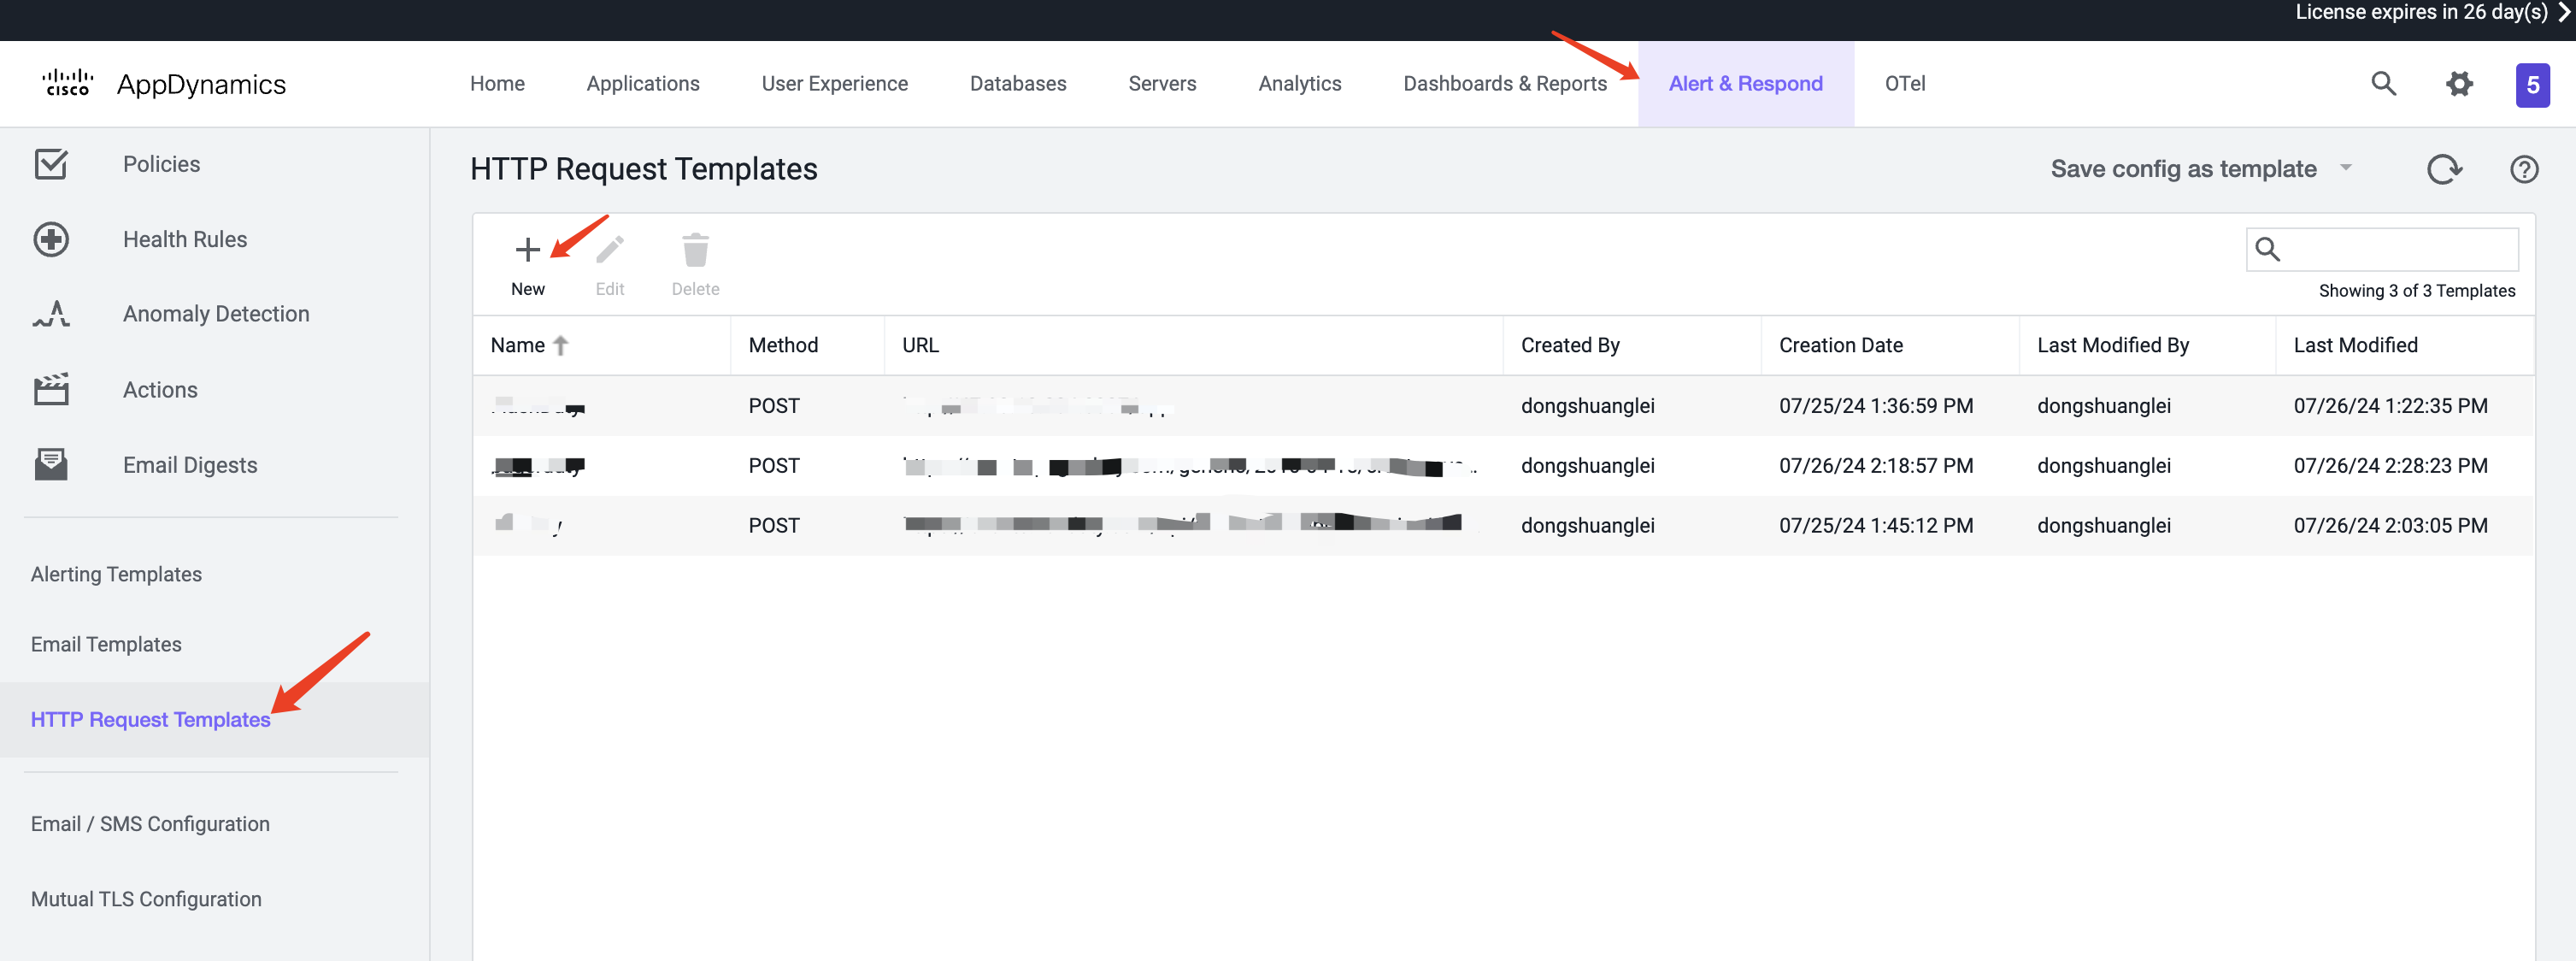
3.
Name4.
Request URL section, select POST as the Method, and enter the integration push URL in Raw URL (enter the integration name on this page, and the URL will be generated after saving)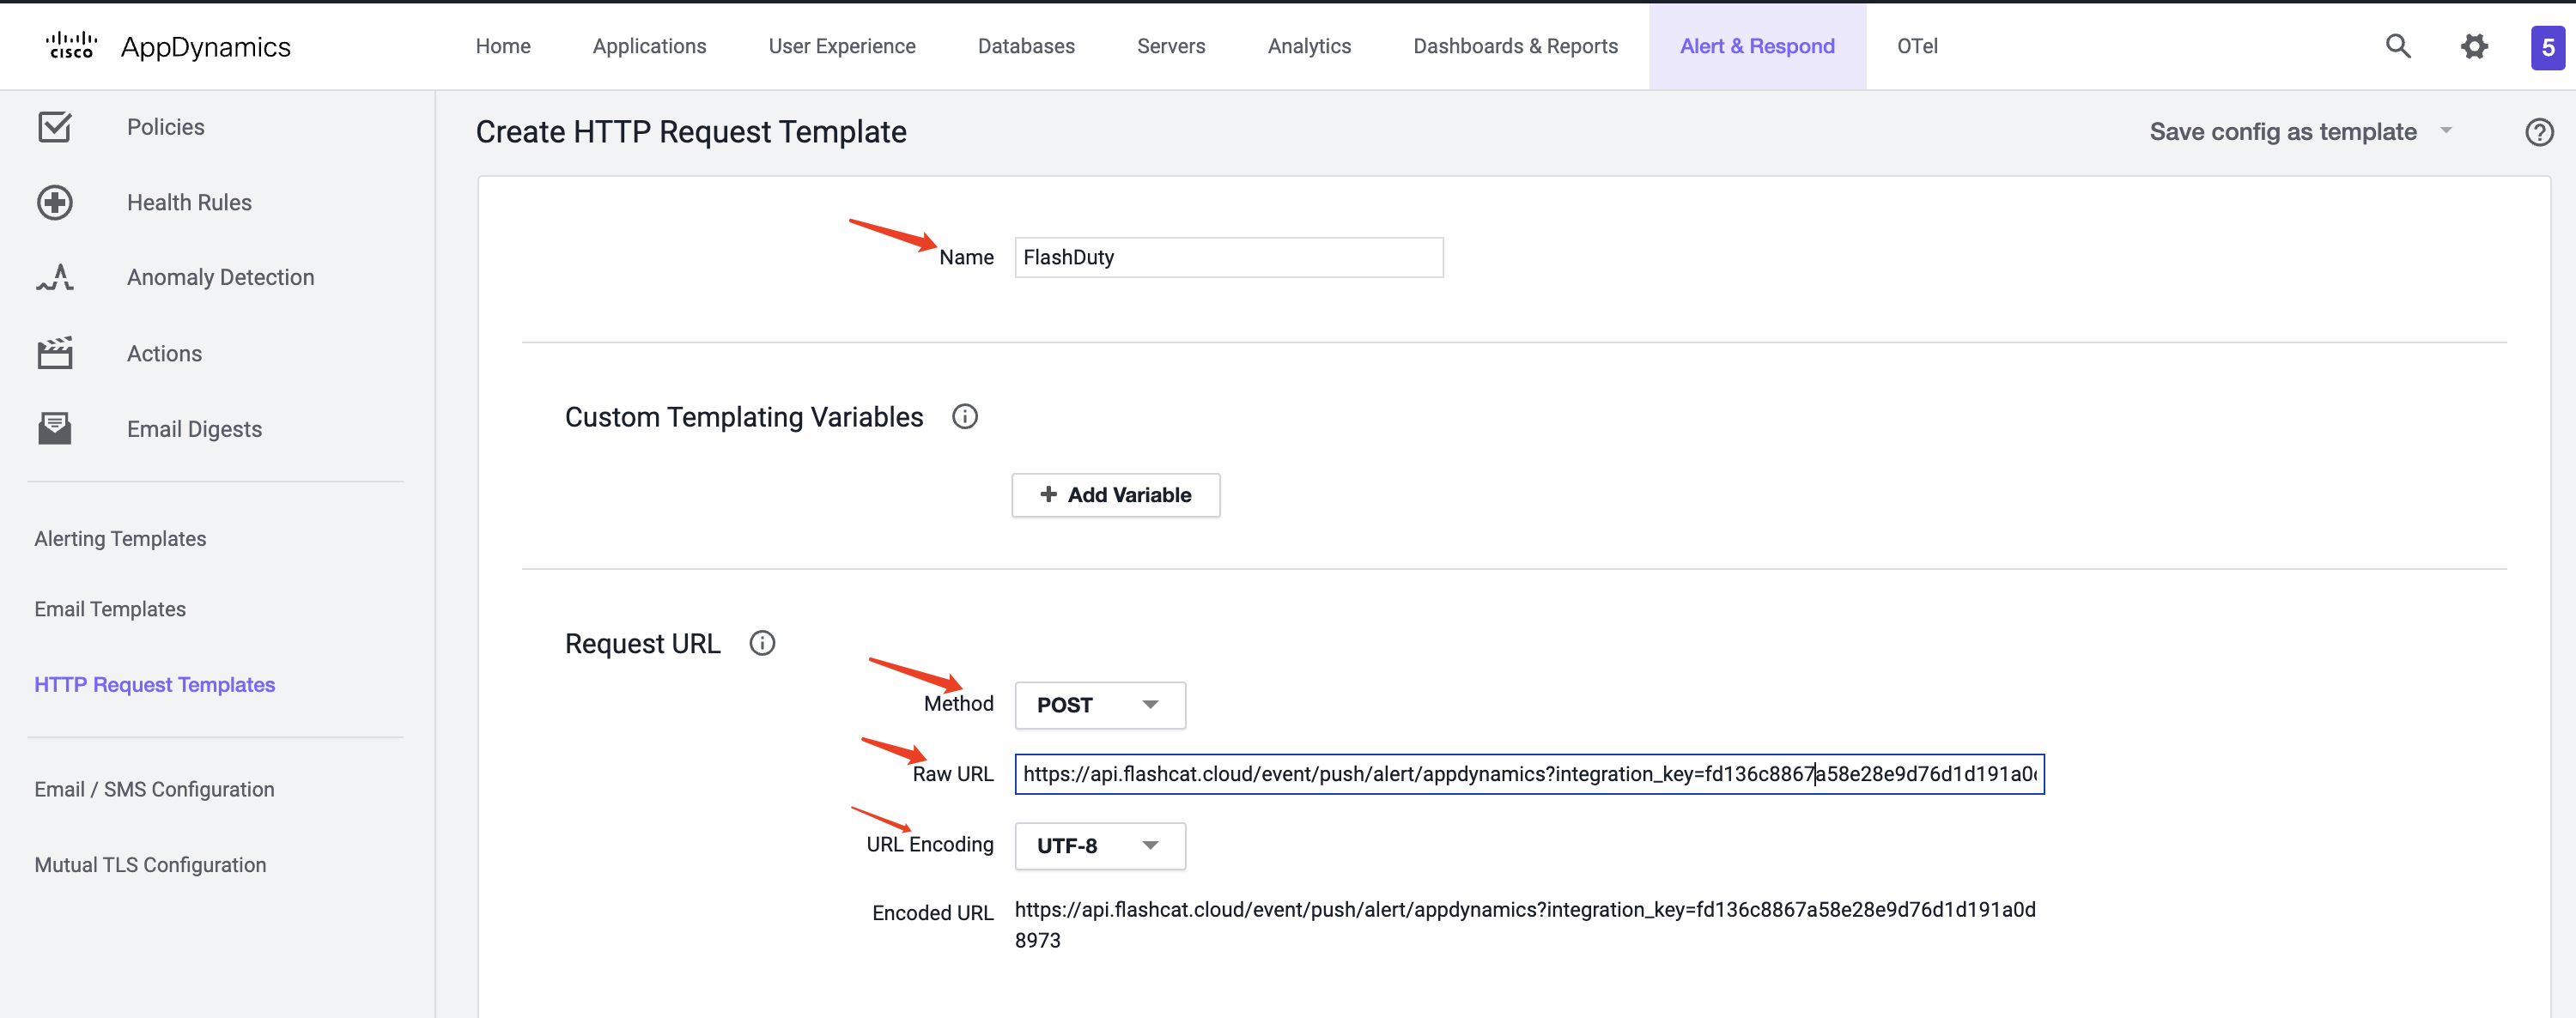
5.
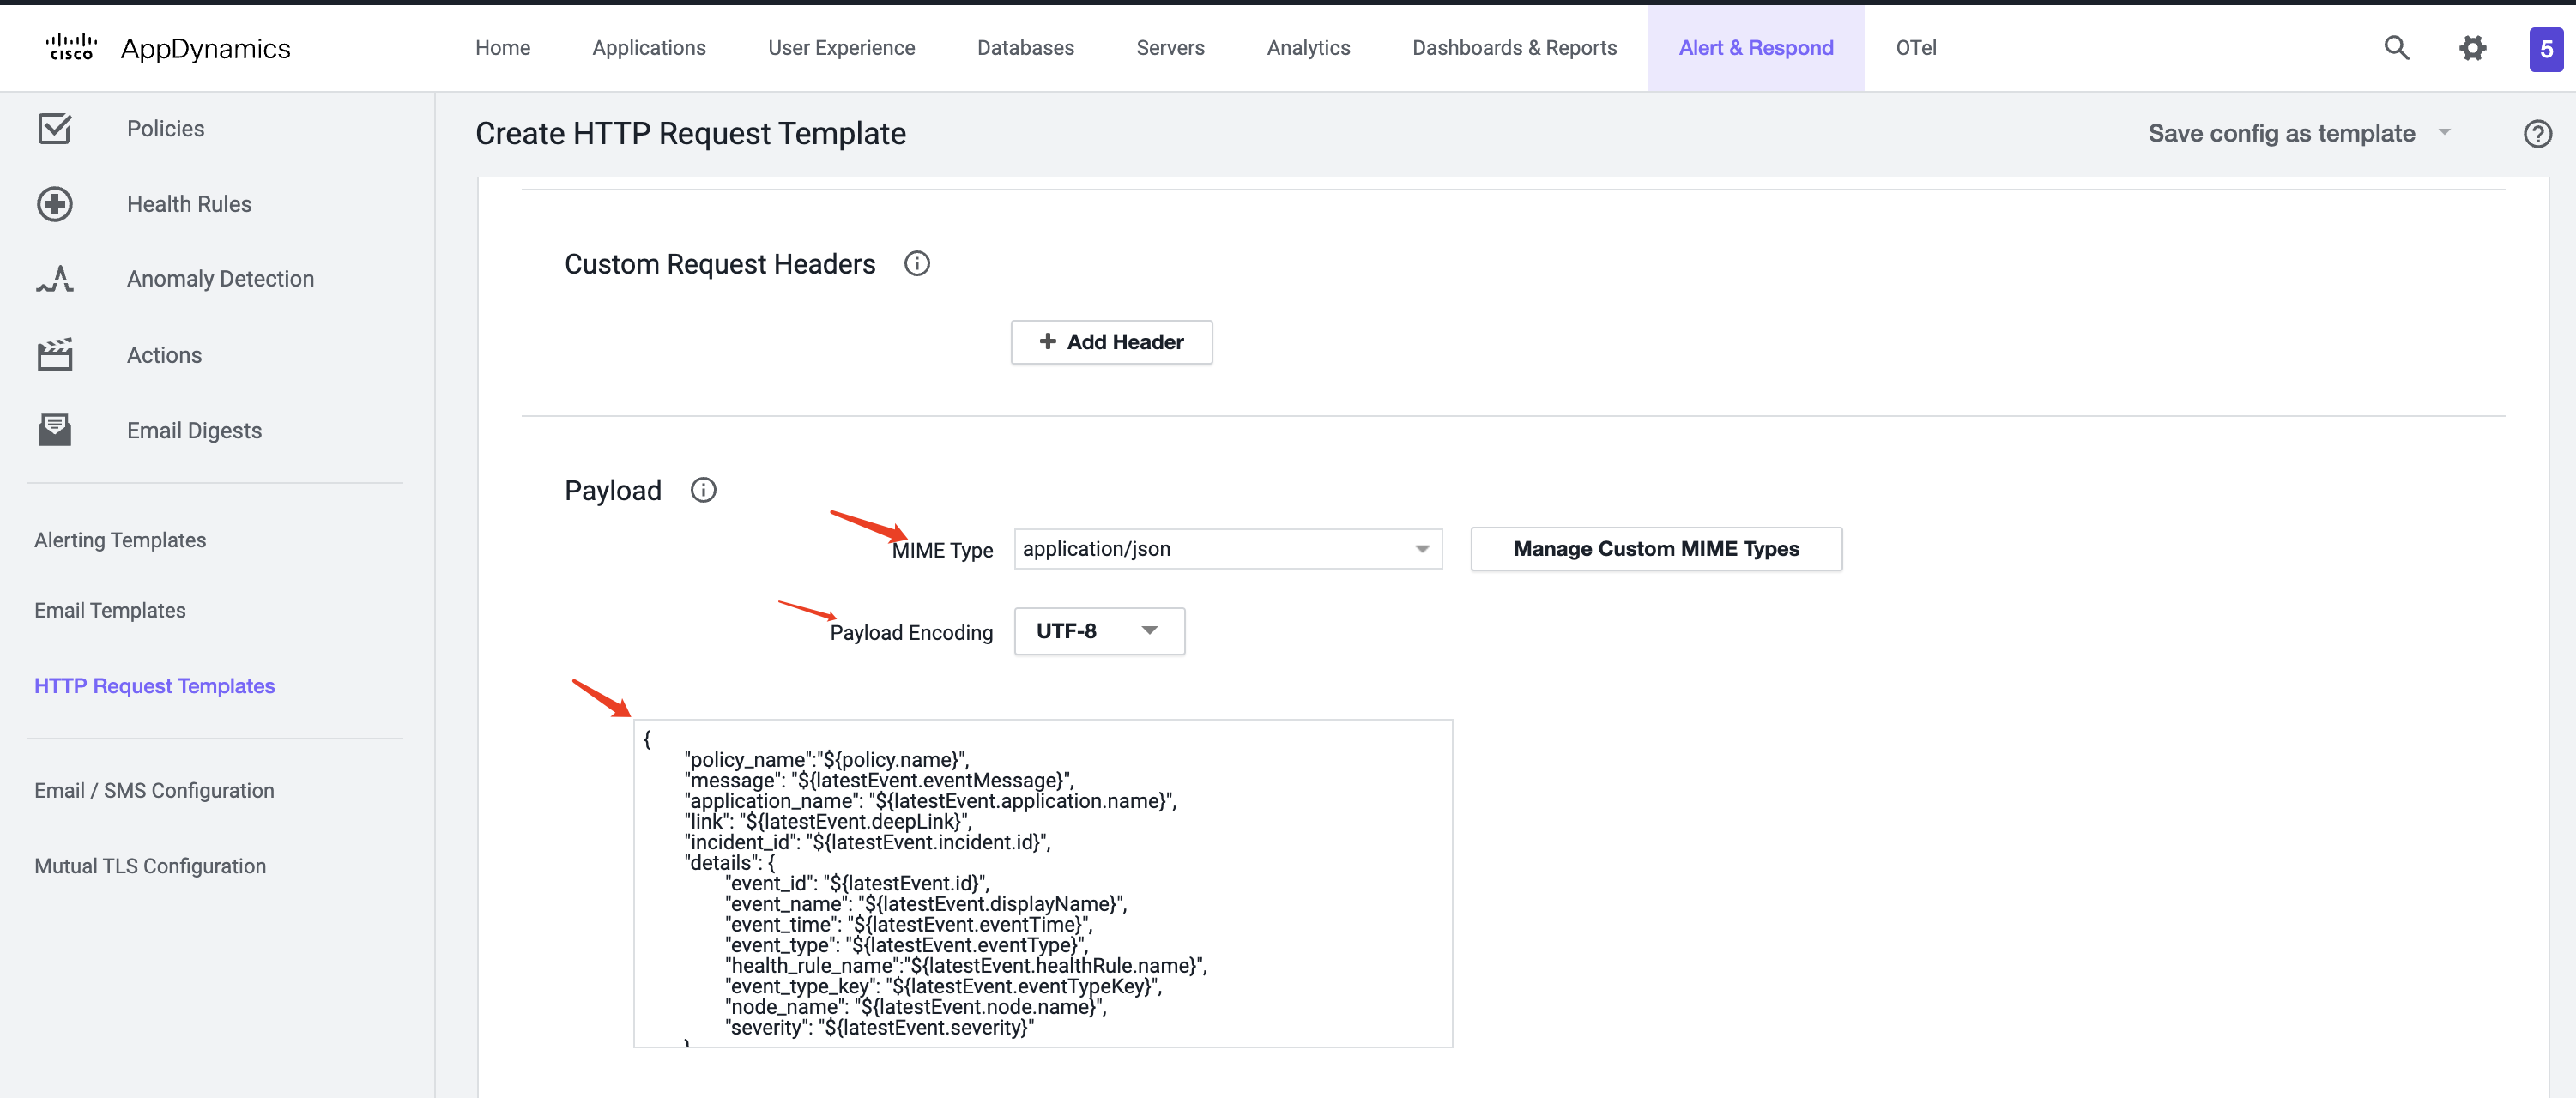
Payload section, select application/json as MIME Type and UTF-8 as Payload Encoding6.
Payload text box:{
"policy_name":"${policy.name}",
"message": "${latestEvent.eventMessage}",
"application_name": "${latestEvent.application.name}",
"link": "${latestEvent.deepLink}",
"incident_id": "${latestEvent.incident.id}",
"details": {
"event_id": "${latestEvent.id}",
"event_name": "${latestEvent.displayName}",
"event_time": "${latestEvent.eventTime}",
"event_type": "${latestEvent.eventType}",
"health_rule_name":"${latestEvent.healthRule.name}",
"node_name": "${latestEvent.node.name}",
"severity": "${latestEvent.severity}"
}
}
Custom Templating Variables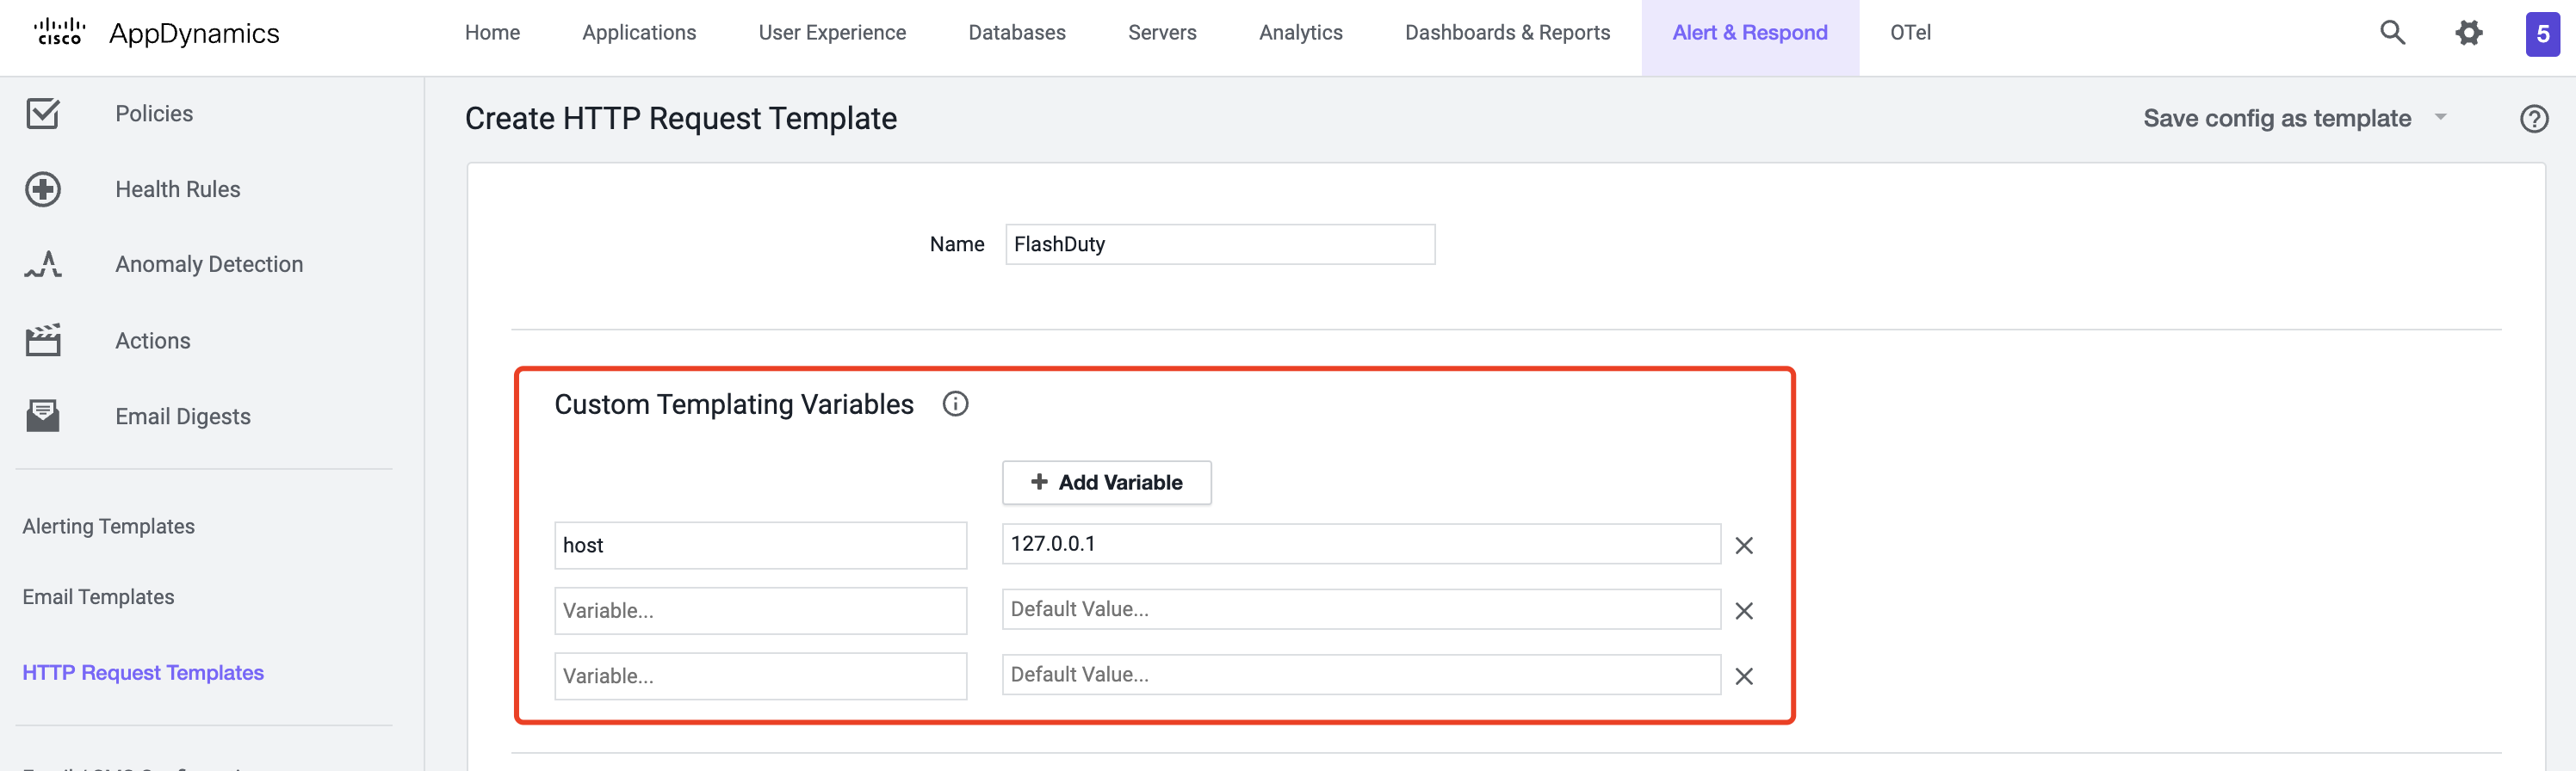
Custom Templating Variables, you can refer to the following JSON template. Here, custom_variables is a fixed format, and the variables within custom_variables are custom Variables. The names defined on the page should match the variable names referenced in the JSON template.{
"policy_name":"${policy.name}",
"message": "${latestEvent.eventMessage}",
"application_name": "${latestEvent.application.name}",
"link": "${latestEvent.deepLink}",
"incident_id": "${latestEvent.incident.id}",
"details": {
"event_id": "${latestEvent.id}",
"event_name": "${latestEvent.displayName}",
"event_time": "${latestEvent.eventTime}",
"event_type": "${latestEvent.eventType}",
"health_rule_name":"${latestEvent.healthRule.name}",
"event_type_key": "${latestEvent.eventTypeKey}",
"node_name": "${latestEvent.node.name}",
"severity": "${latestEvent.severity}"
},
"custom_variables":{
"host":"${host}"
}
}7.
Response Handling Criteria section, set the Failure Criteria status code to 400 and the Success Criteria status code to 201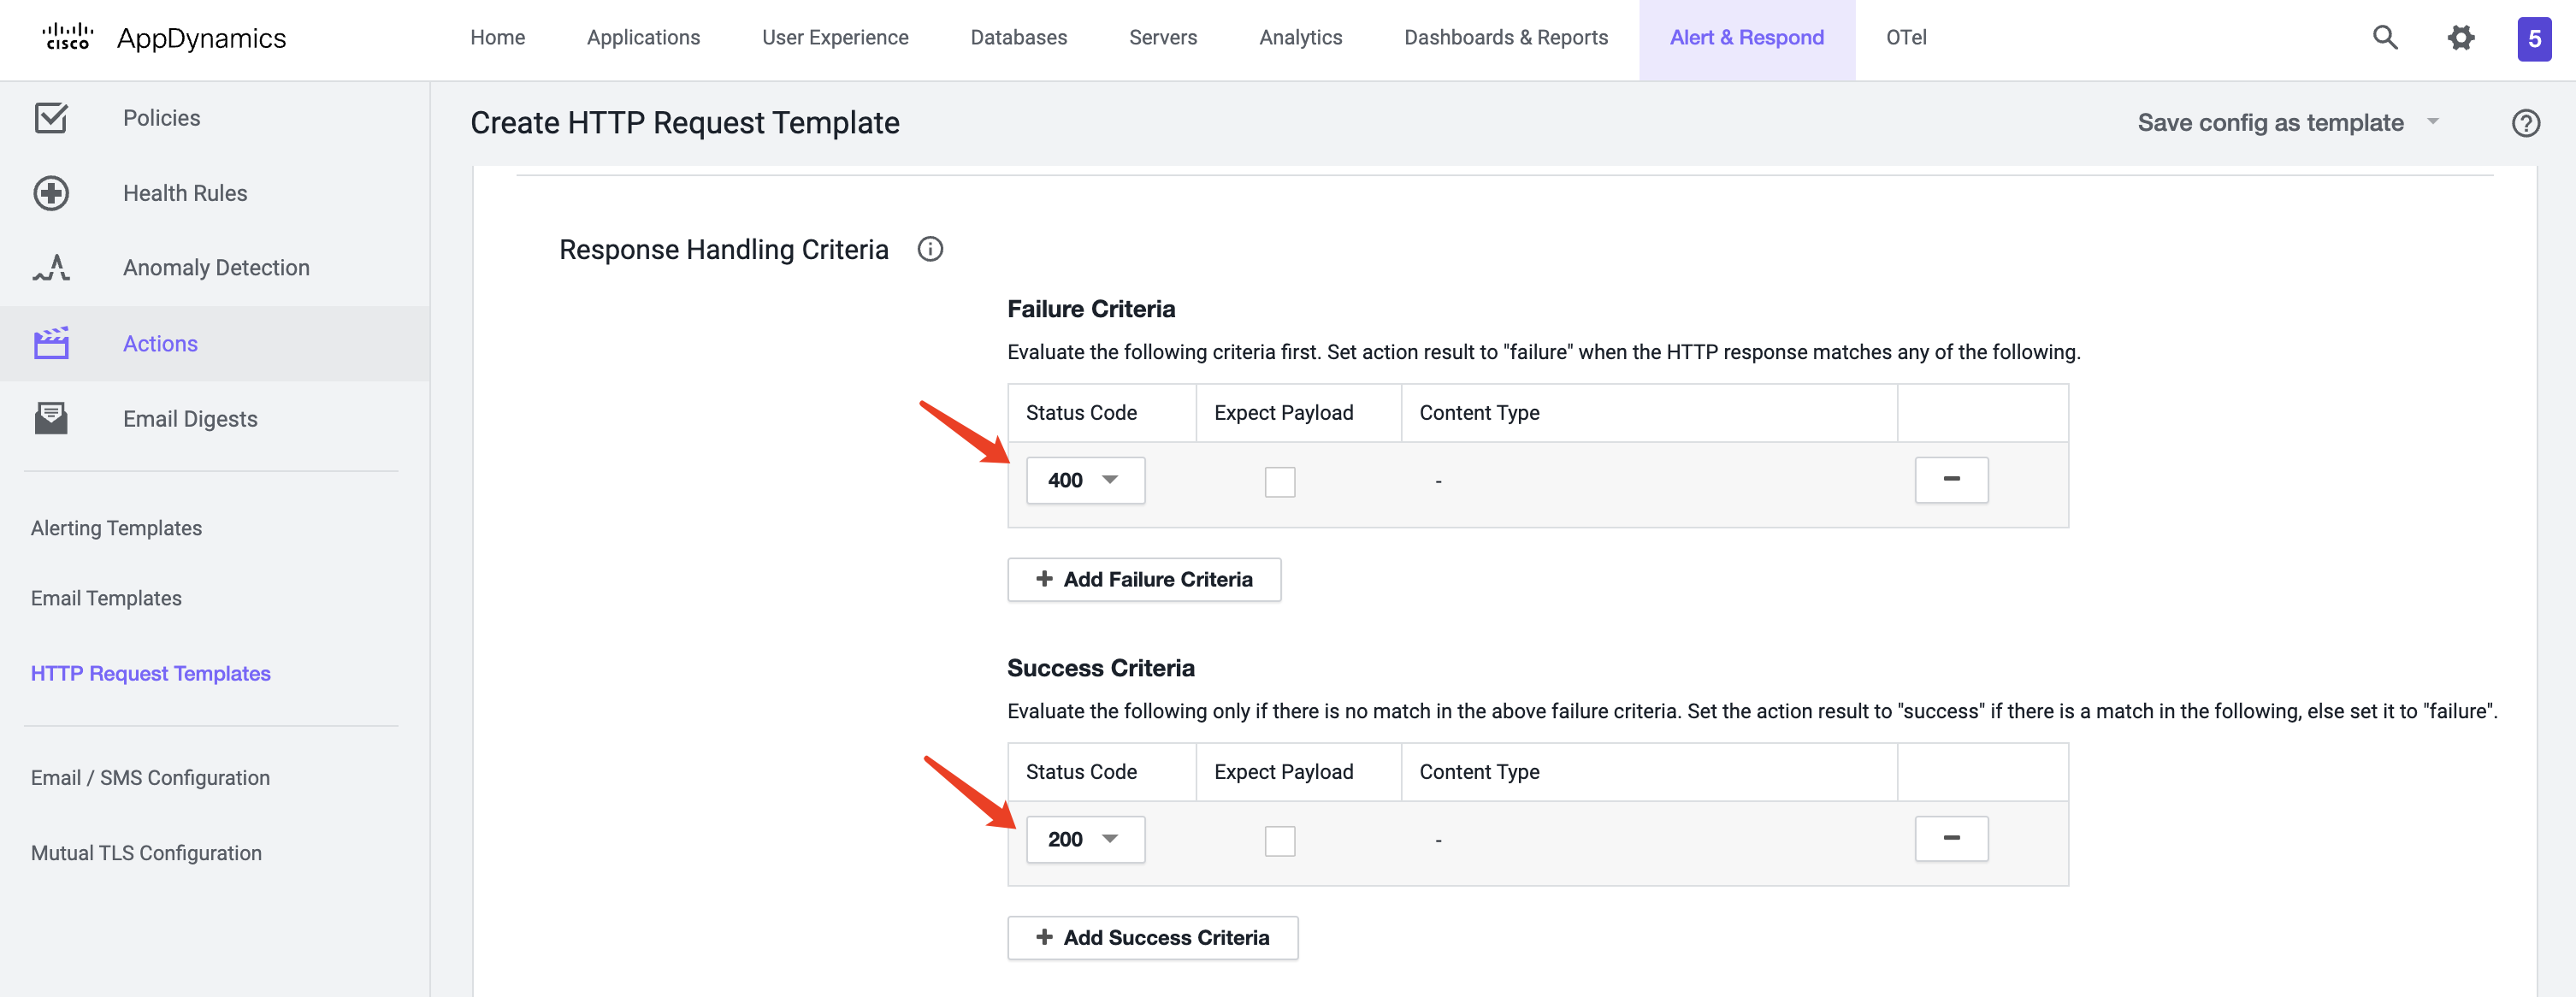
8.
Save to completeStep 2: Create Action
1.
Actions in the left navigation bar, choose the application type you want to create for, and click Create2.
Create Action popup, select Make an HTTP Request and click OK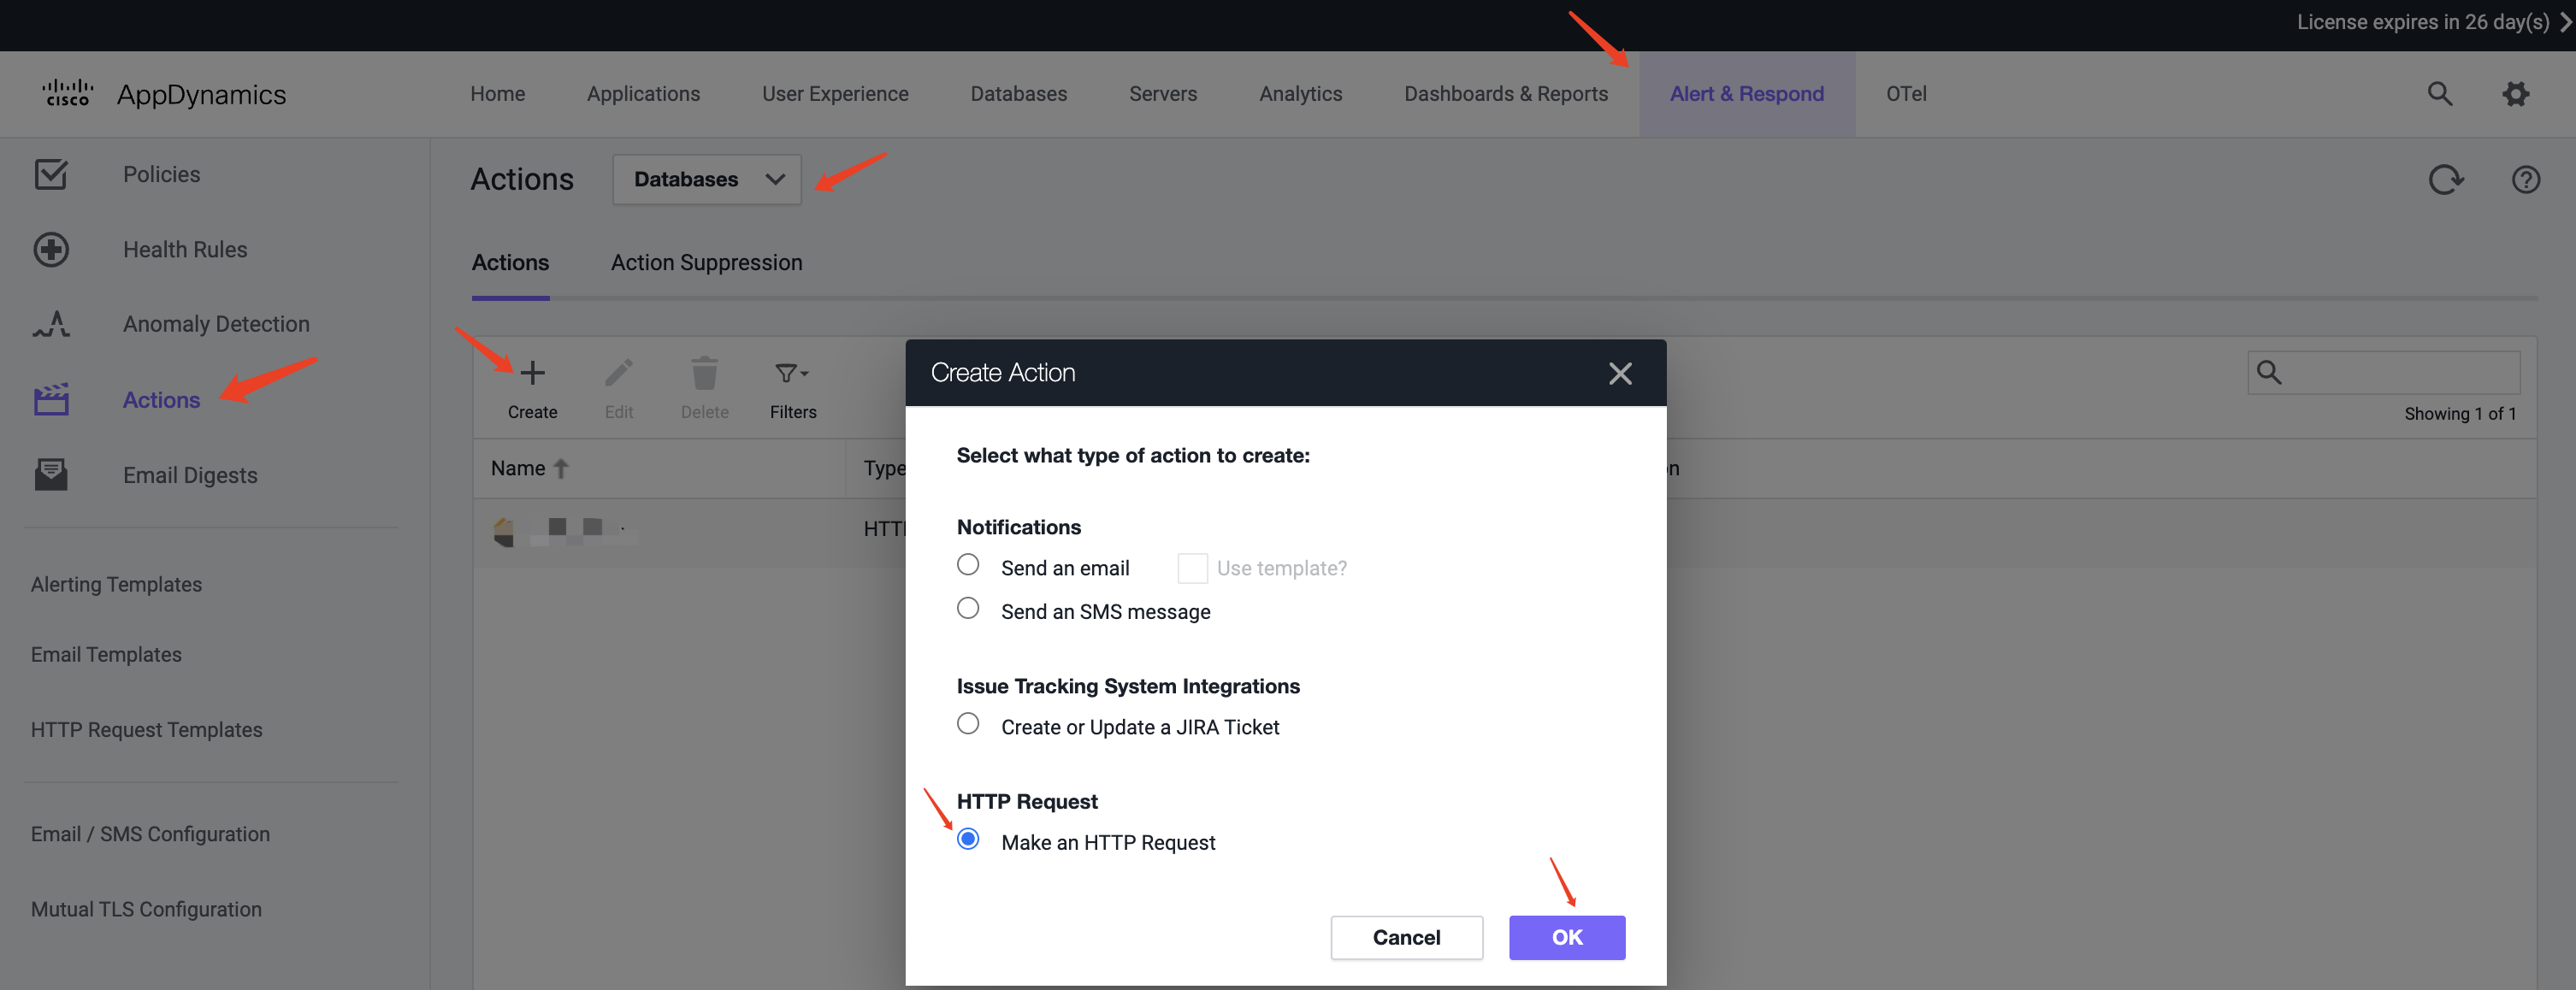
3.
Create HTTP Action popup, enter a Name, select FlashDuty created in Step 1 as the HTTP Request Template, and click SAVE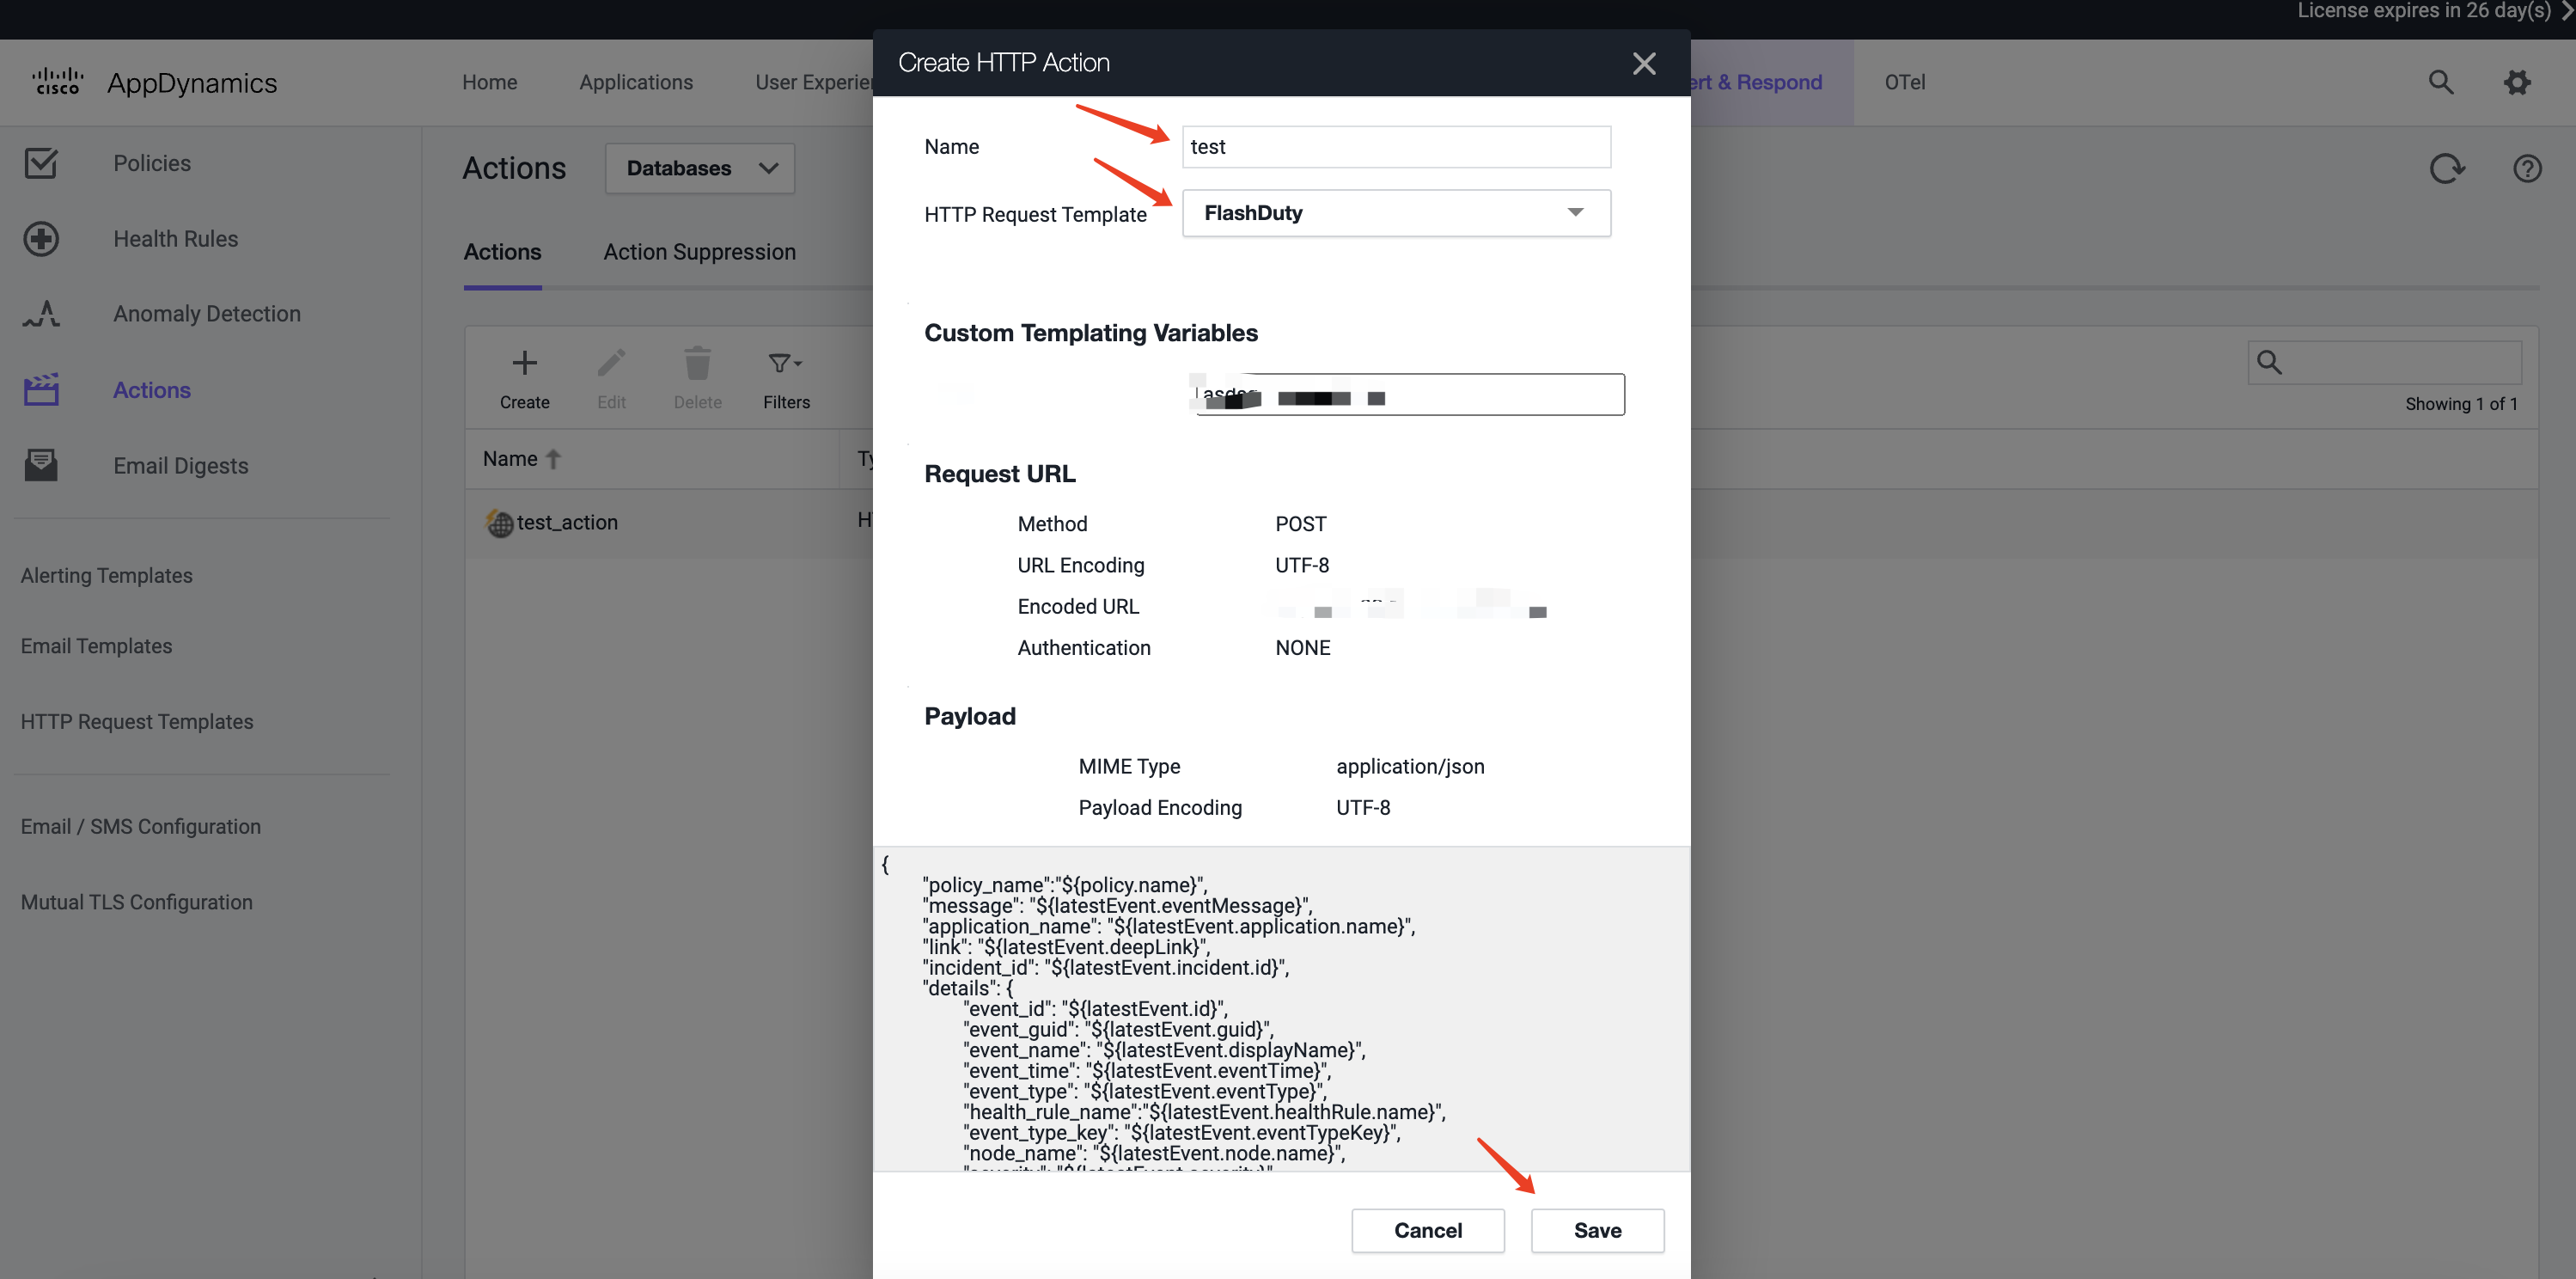
Step 3: Use the Action Created in Step 2 in Alert Policies
1.
Policies in the left navigation bar2.
3.
Actions section of the policy configuration page, click add and select the Action created in Step 2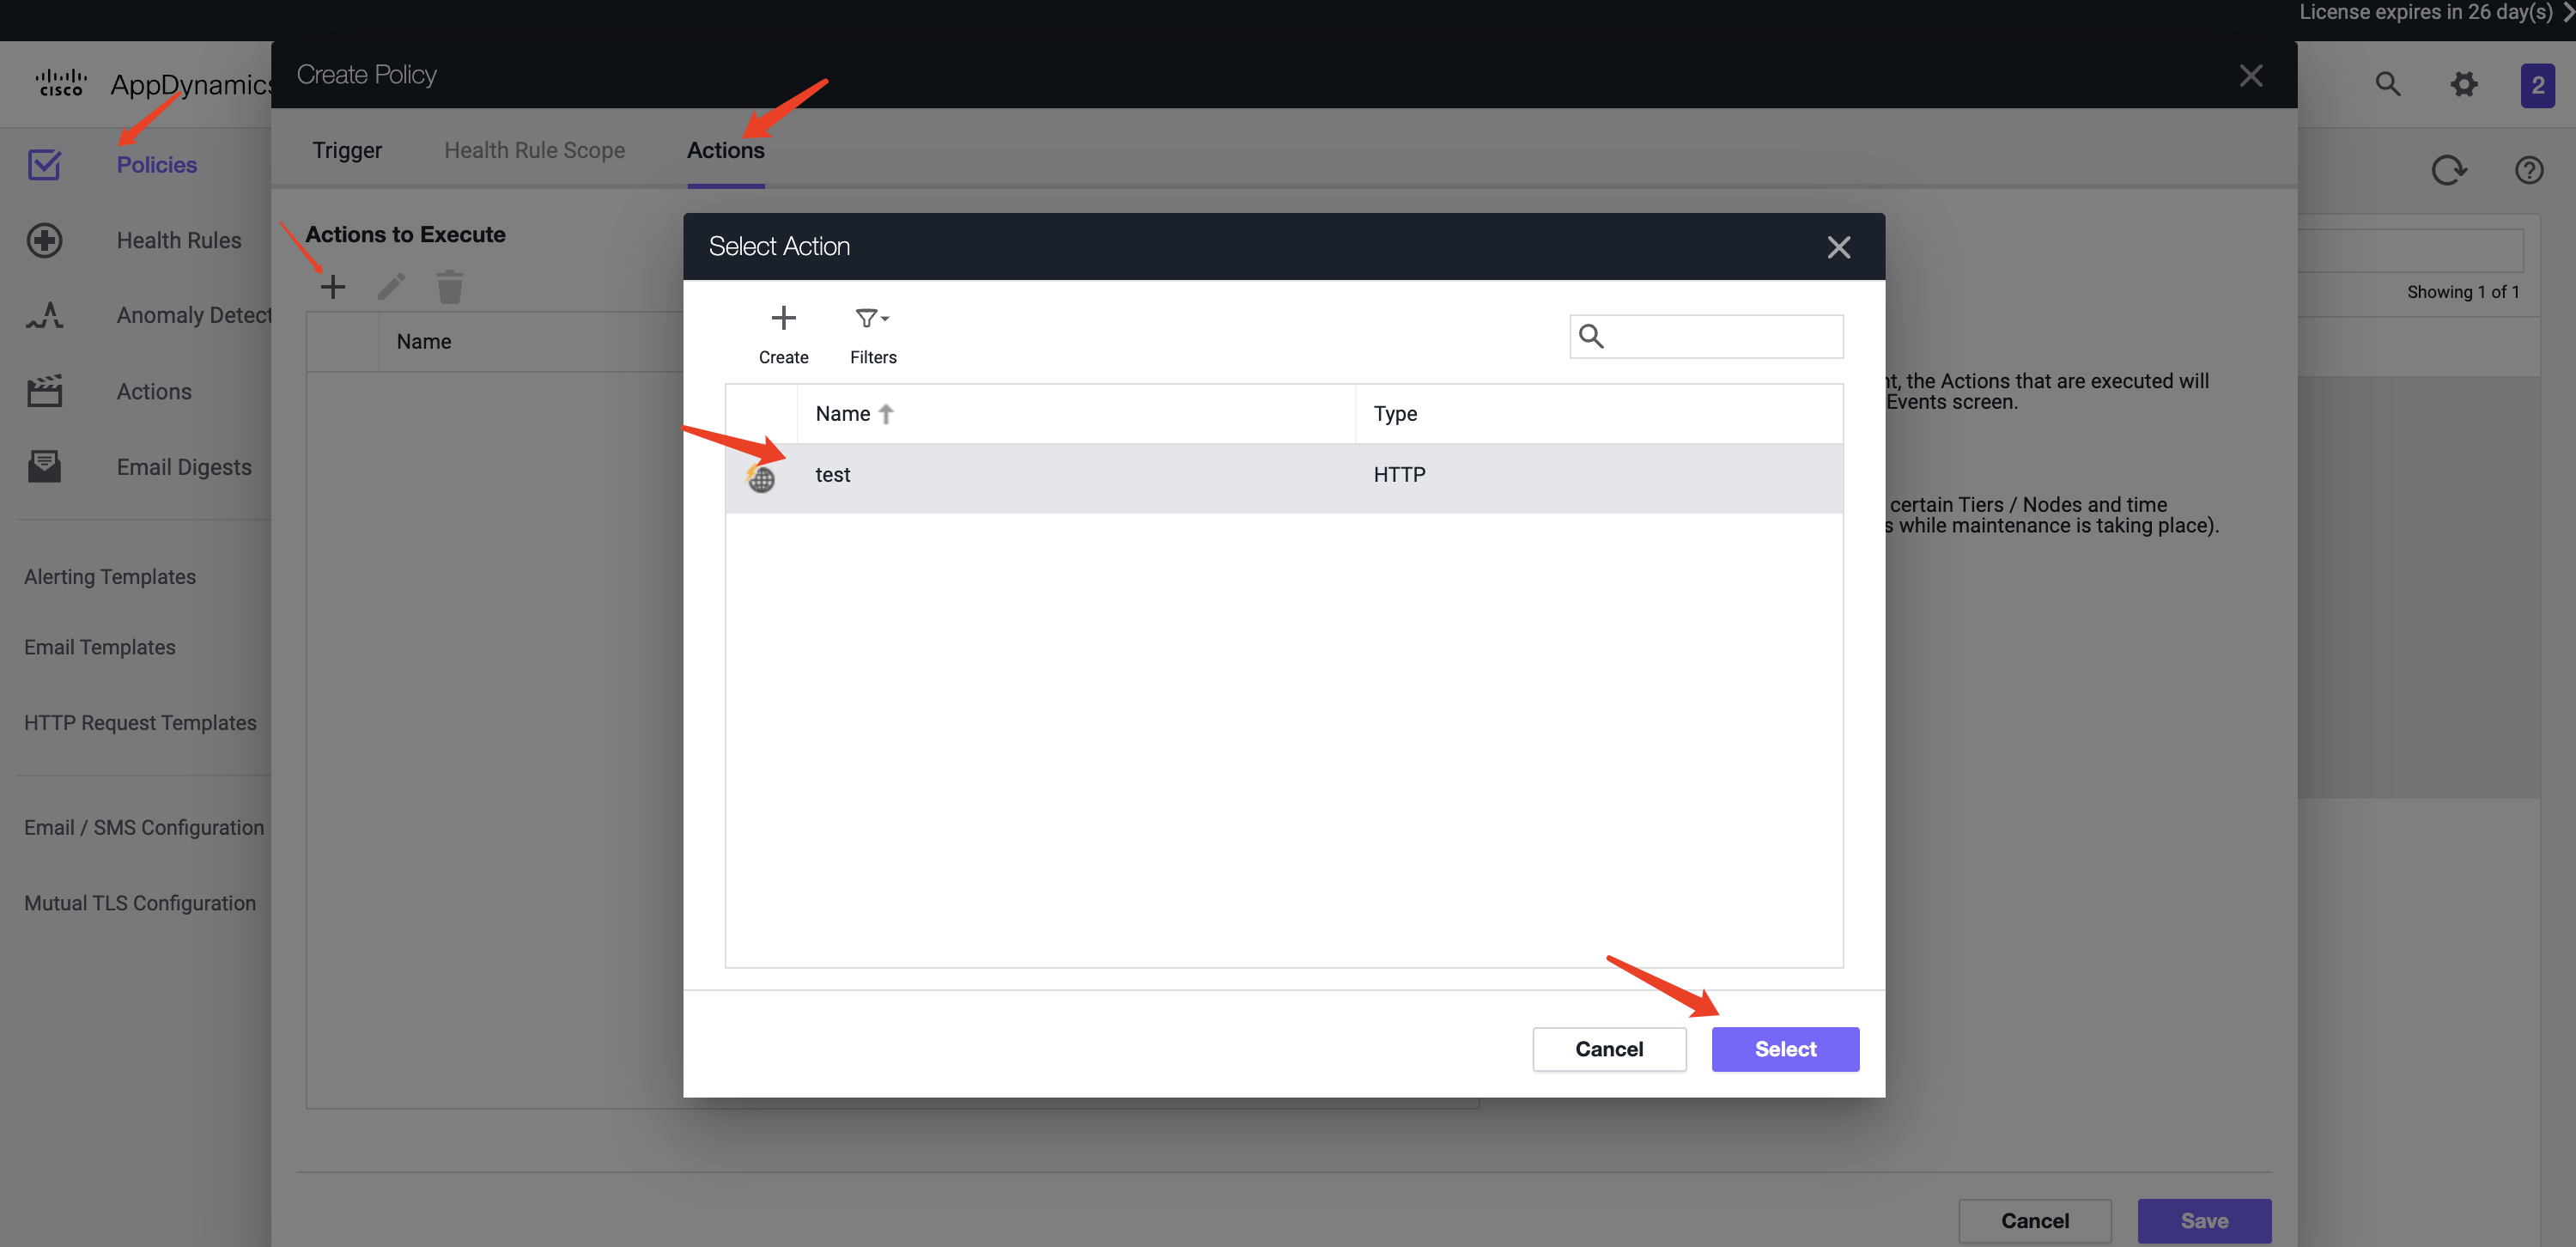
4.
Save to finishII. Status Mapping
| AppDynamics | Flashduty | Status |
|---|---|---|
| ERROR | Critical | Critical |
| WARN | Warning | Warning |
| INFO | Info | Info |


 微信扫码交流
修改于 2025-03-27 07:52:08