Quick Overview#
Authing is an identity authentication and access control management provider. Through the Authing platform, you can implement login to the FlashDuty management console using OIDC, SAML2.0, or CAS protocols.Prerequisites#
1. Login or Register with Authing#
New users need to create a user pool first, following the provided prompts
2. Create an Application#
Select Standard Web Application
Enter the application name
Enter the authentication URL (redirect URL for SSO login)


| Field | Description |
|---|
| App ID | Corresponds to FlashDuty Client ID |
| APP Secret | Corresponds to FlashDuty Client Secret |
| Issuer | Corresponds to FlashDuty Issuer |
| Authentication URL | Redirect URL for SSO login |
Configuring OIDC Protocol#
1. Open FlashDuty Console and Enable SSO Configuration#
 2.1 Copy Authing application information to the corresponding fields
 2.2 Copy the Redirect URL domain to Authing's callback URL
3. Modify Authing Configuration#
3.1 Configure as shown, only change the id_token signing algorithm to RS256 3.2 Configure Login Controls

4. Create Users and Test Login#
4.1 Create Users in AuthingFlashDuty only supports email association, so users must be created with email addresses
 4.2 Test Login Using SSO URL
You can access console.flashcat.cloud and login via SSO

Use the user created in Authing to login to FlashDuty console
Configuring SAML2.0 Protocol#
You can create a new application or modify an existing one. This guide demonstrates modification of an existing application
1. Protocol Configuration#
 1.2 Change FlashDuty's SSO protocol to SAML and copy the ACS URL
 1.3 Copy the ACS URL to Authing application, save and modify the protocol type
 2.1 Download metadata file by clicking the link and save locally
 2.2 Upload to FlashDuty's SSO configuration and save
 2.3 Test Login (refer to OIDC protocol login steps)
These are the complete configuration steps for both methods. The configuration process involves both platforms, so please ensure no critical information is missed. If you encounter any issues during configuration, please contact FlashDuty technical support for assistance
Configuring CAS Protocol#
1. Open FlashDuty Console and Enable SSO Configuration#
2.1 Copy Authing application information to the corresponding fields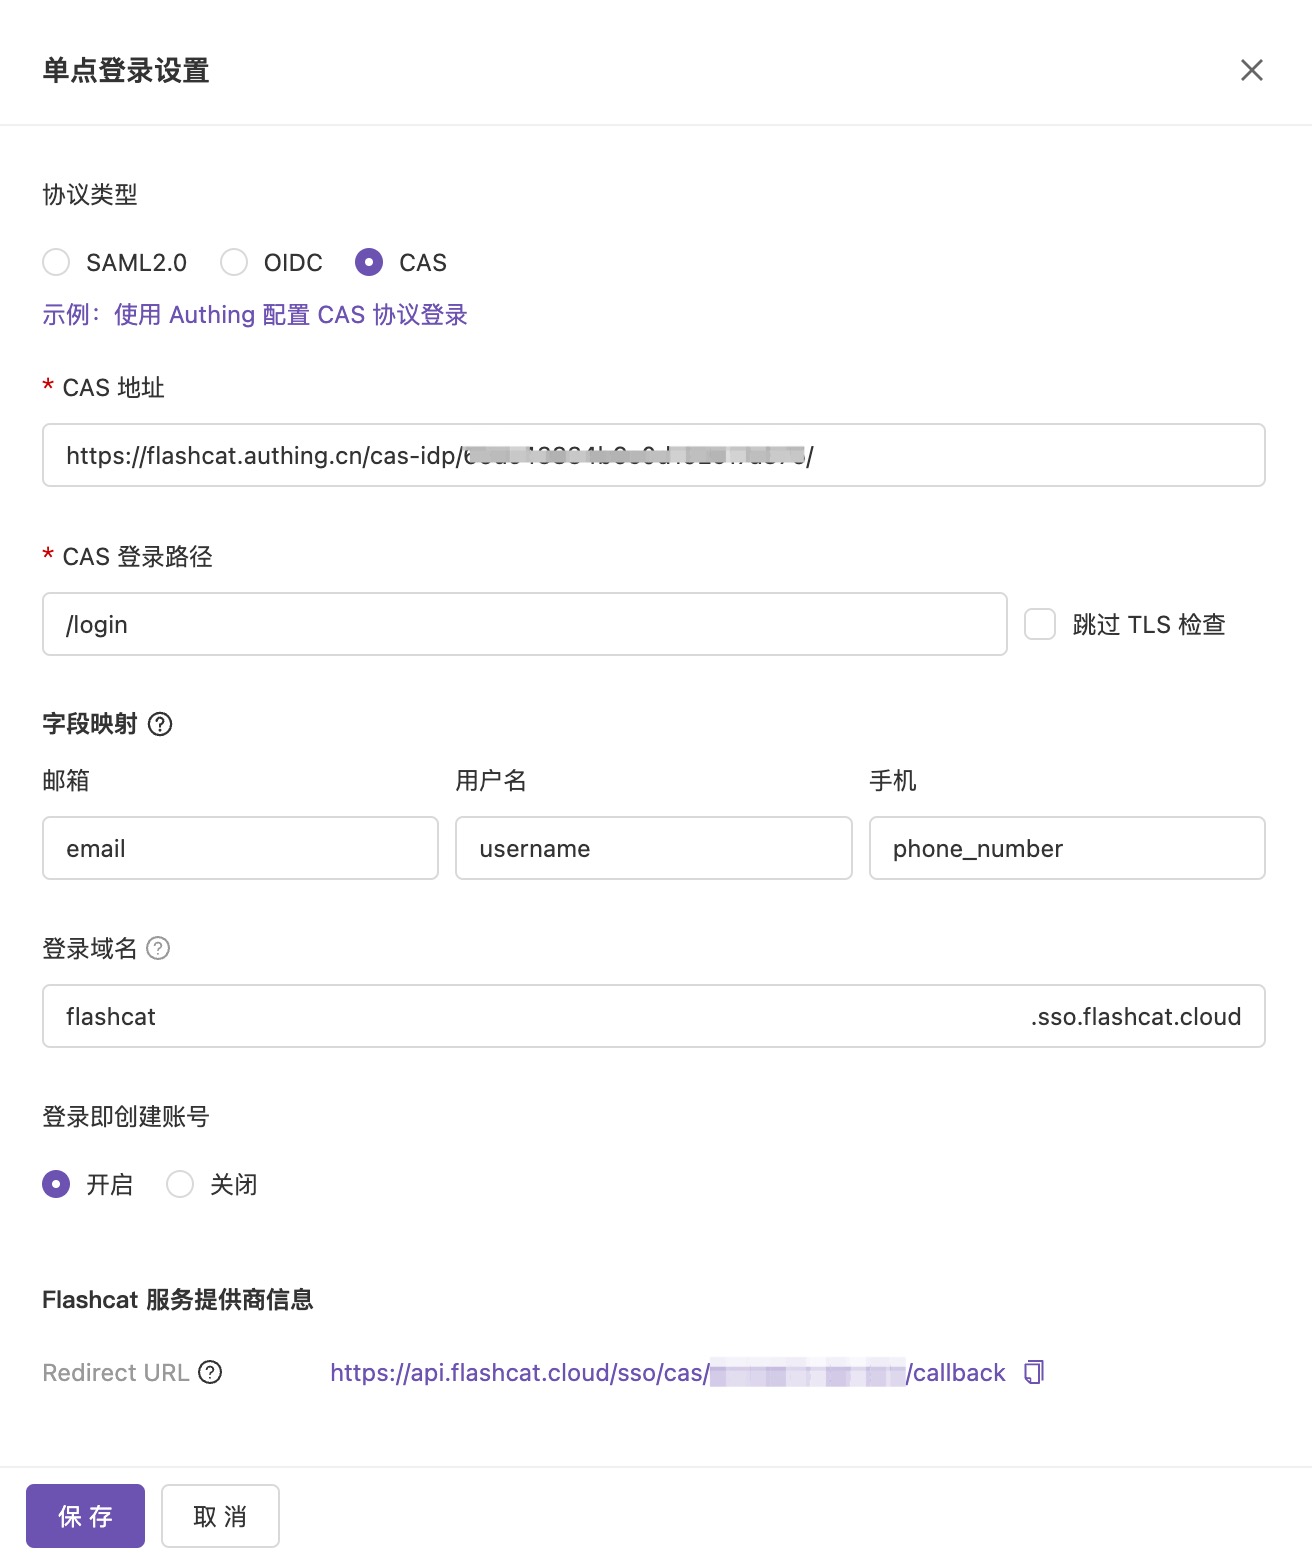 2.2 Copy the Redirect URL to Authing's callback URL
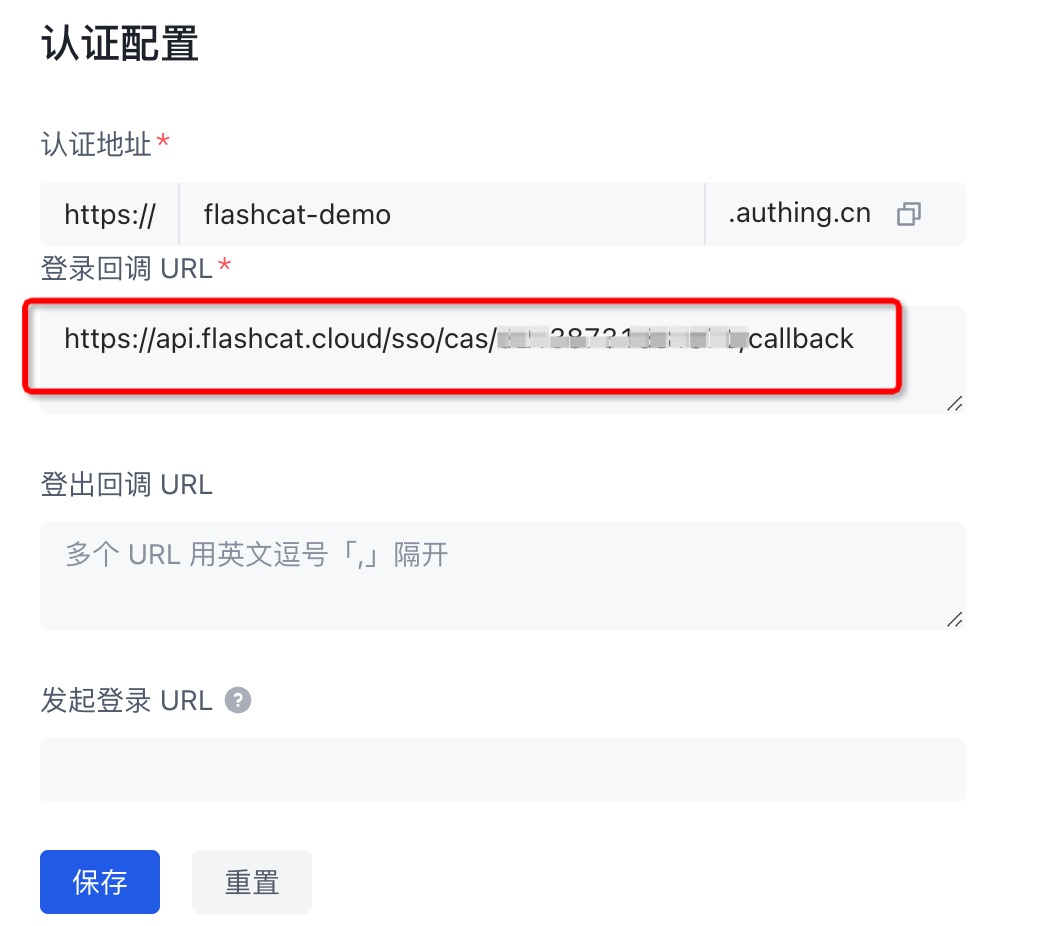
3. Modify Authing Configuration#
 3.2 Configure Login Controls
4. Create Users and Test Login#
4.1 Create Users in AuthingFlashDuty only supports email association, so users must be created with email addresses
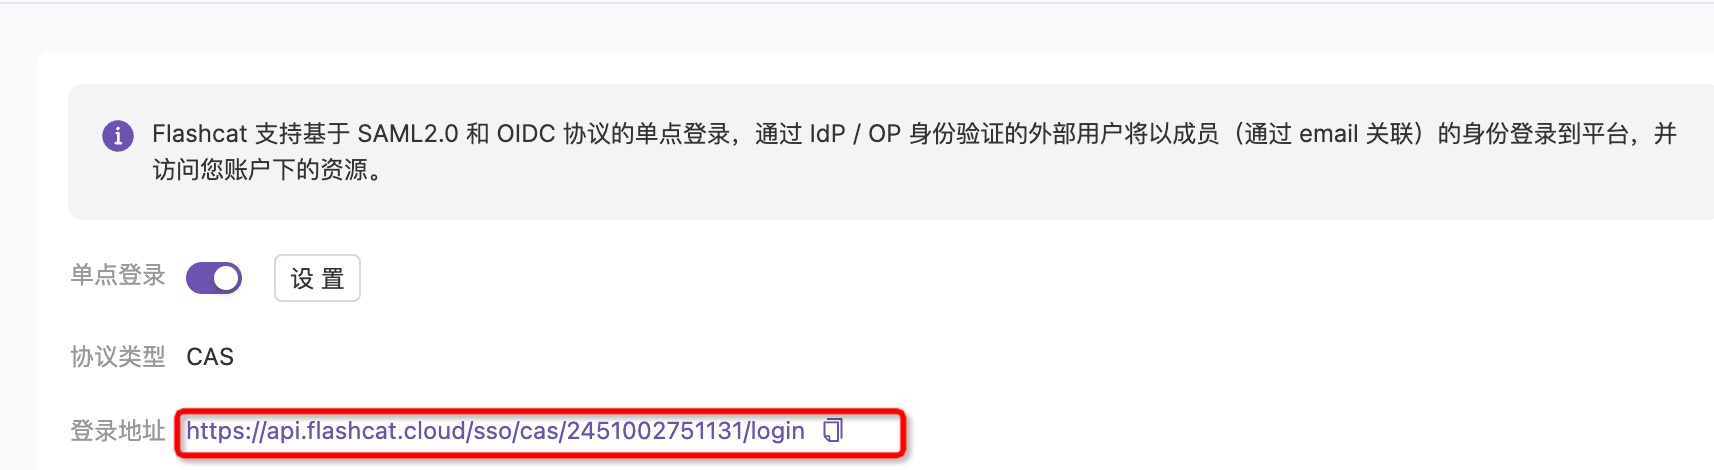 4.3 SSO URL Redirects to Login Page
Use the user created in Authing to login to FlashDuty console


 微信扫码交流